Showing posts with label fall. Show all posts

Thursday, October 28, 2010

Apple Muffins with Maple Icing

Apples. I love them. No, seriously, I love them.

There hasn't been a time in my life where apples have not been present in whatever place I'm housing. It's true.

Ask my Dad. He has the Costco receipts.


When fall comes around, I get giddy. Sure, apples are widely available at all times of the year but it's this time in specific that they really start to get tasty. Not only that, but you've got a wide variety at your disposable. Granny Smith. Jazz. Red Delicious. Fuji. Pink Lady. And I guess we can include the Grapple in there, too (although I am not a fan of the grape/apple hybrid species).

Out of all of them, I prefer my Red Delicious and Fuji. Fuji when I want something a little lighter and sweeter. Red Delicious when I want that CRUNCH every time I bite in. Yeah, i'm a crunchy-sweet-apple fan.

Which means I hate Granny Smith. In everything. Including Apple Pie. I don't know who decided a tart apple would be the best kind of apple to use for pie, but I highly disagree on all levels. That clever Granny Smith may look all sparkling green in the apple bin... but it's just to fool you. No wonder they call them Granny Smith. It's like biting into a bitter old lady with 9 cats. Grainy. Tart. Yuck.

No offense to bitter old ladies with 9 cats or Granny Smith fans... I love you. Just not the apples. Sorry.

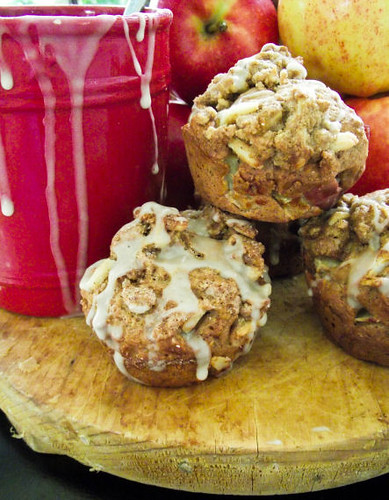
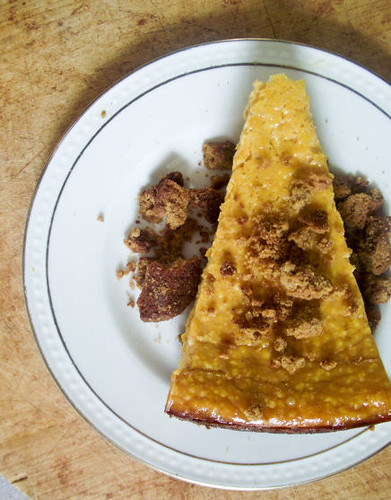
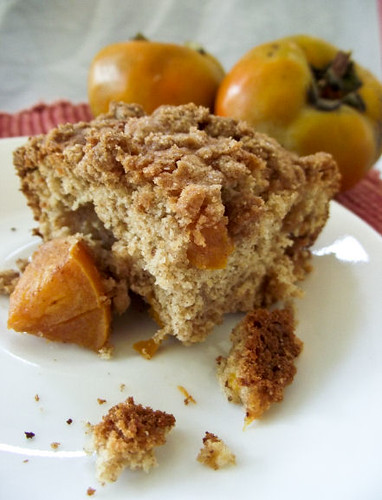
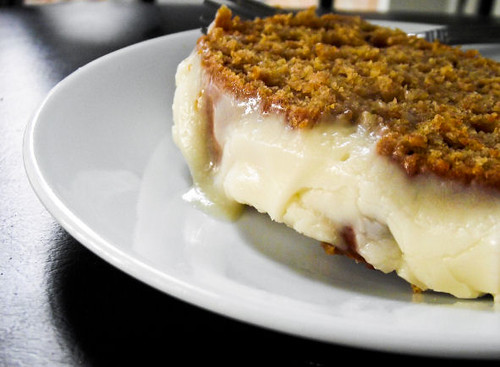
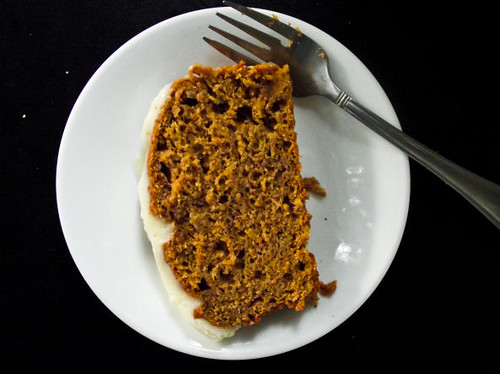
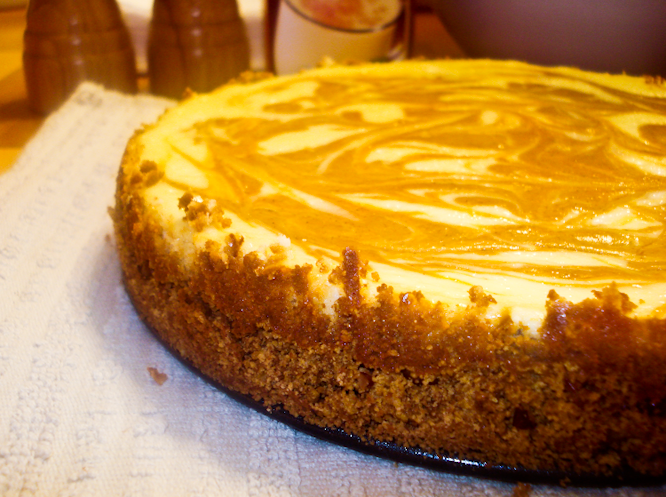
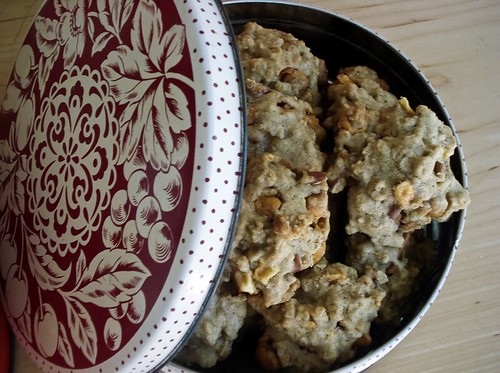
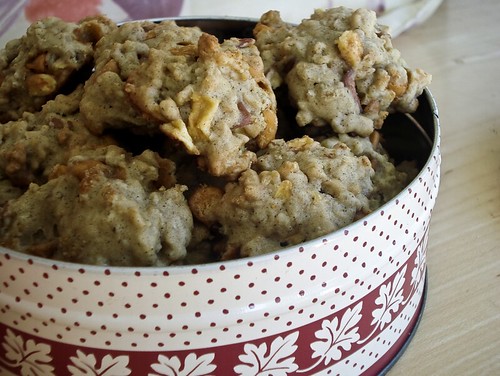
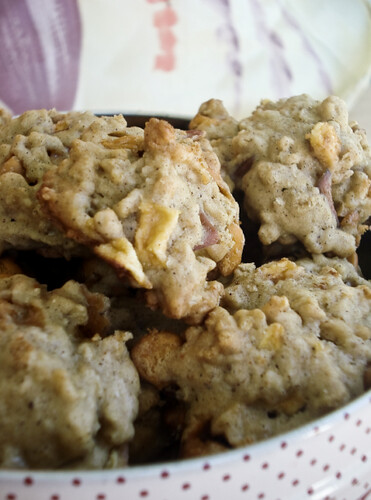
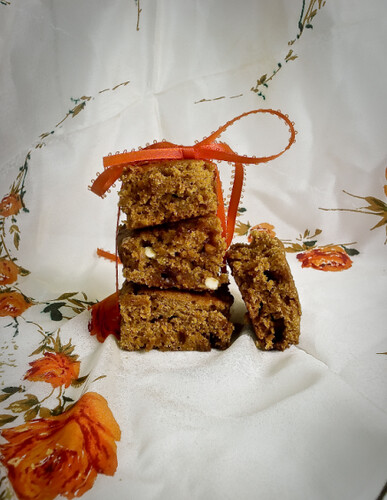
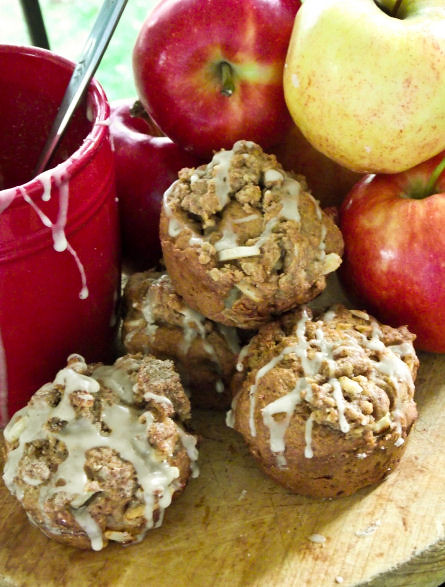
These apple muffins in particular are fantastic. And while you could go ahead and use Granny Smith if that's your preference, I prefered a combo of my two favorites: Fuji and Red Delicious. One of each, to be specific. And as unhealthy as they may look, the only guilty thing about these babies is the brown sugar topping and perfect maple icing that pairs along with it. Seriously. Maple Icing... Where have you been all my life? I could have sat there dunking apple pieces in that stuff until I had a sugar stroke. No lie.

They are made primarily with applesauce in replace of butter and oil, with a little bit of yogurt to help keep them moist. I sifted the flours together twice to get a more light crumb but you can just go ahead and whisk them if you prefer. They are loaded with cinnamon and have just a tad bit of actual sugar in them. I couldn't really find one recipe for these in specific so I just ended up mixing some recipes together and bam: Apple Muffins.

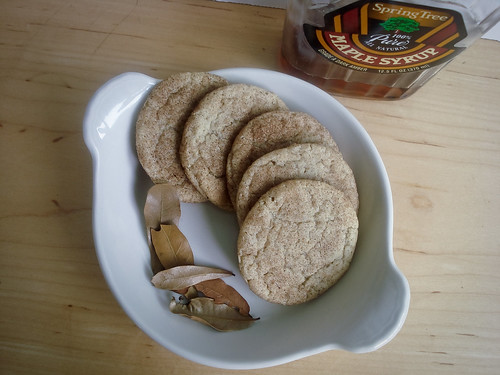
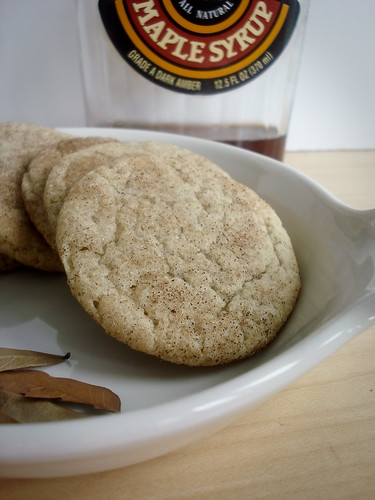
By the way, these are worth going to the store and buying real maple syrup for. Don't use that fake pancake stuff. It's not the same AT ALL.

I hope you all are enjoying apple season as much as I am. Even if you do like Granny Smith.


Apple Muffins with Maple Icing

Ingredients:
1 cup whole wheat flour
1 cup all-purpose flour
1 teaspoon baking powder
1 teaspoon baking soda
1/4 teaspoon salt
1 tablespoon cinnamon
1 cup unsweetened applesauce
1/4 cup granulated sugar
2/3 cup brown sugar
2 egg whites, lightly beaten
1/2 cup plain fat-free yogurt
2 medium sized apples, cored and coarsely chopped
1/4 cup toasted slivered almonds (optional)

Crumble Topping:
1/4 cup brown sugar or granulated sugar
1/4 cup oats, rolled or quick-cooking
1/4 cup whole wheat flour
1/2 teaspoon ground cinnamon
3-4 tablespoons butter, cold
handful of toasted slivered almonds, optional
(if you like A LOT of topping, double this)

Maple Icing:
1/3 cup powdered sugar
2 tablespoons REAL maple syrup (NO PANCAKE SYRUP)
1 teaspon to 1 tablespoon milk, to thin

Directions:
1. Preheat oven to 400F degrees. Prepare muffin tins with nonstick cooking spray or liners.
2. Sift or whisk the flours, baking soda, baking powder, cinnamon and salt together in a medium bowl. Set aside.

3. Whisk together the sugars and applesauce in a large mixing bowl. Add eggs and yogurt. Mix until smooth.

4. Combine the flour with the applesauce mixture and stir until no trace of flour remains. Mixture will be thick. Fold in chopped apples and almond slivers, if using.

5. To make the crumble topping, combine brown sugar, cinnamon, flour, oats, and almonds together. Using a pastry cutter or your fingers, cut in the butter in small pieces until mixture is crumbly.

5. Distribute batter evenly between muffin cups, sprinkling the crumble topping on each one as desired. Bake at 400F for 18-20 minutes (NOTE: Mine were done in 14 minutes so make sure to check them with a toothpick a little earlier on). Cool on wire rack when done.

6. While muffins are baking, make the maple icing. Simply whisk together the powdered sugar, maple syrup. Add milk in teaspoonfuls until icing drizzles easily off the tip of a spoon or fork.

7. Once muffins are done and cooled, drizzle maple icing on each one. Don't be flimsy with it either. I'm watching you.

Makes 16-18 Muffins.

Monday, October 18, 2010

Spiced Pumpkin Cheesecake

I have come to the conclusion that I have a problem.

Don't worry! It's not the kind of problem that includes the use of anti-itching cream in odd places or anything like that.

It's more of a personal thing. You know. Like a, "what the heck was God thinking when he made me?" problem.

No offense to you, God. We're still homies.

I guess the problem, more or less, is my attitude in the kitchen. It's like... as soon as I walk into the kitchen, I turn into the Hispanic/American hybrid female version of Ramsey. And instead of having a spatula in my grasp, I have a hand-mixer on high, ready to kick someones butt if they even look at what I'm doing. Isn't that horrible?'

You'd think having such a passionate love for baking and cooking would give me a sense of patience. In reality, I am probably the least patient person in the world. And if someone gets in my way when I'm cooking, or says something like, "are you sure you wanna use that much cinnamon?" while I'm in the middle of making snickerdoodles, then I cannot account for the words that may pass my lips.

Example: This pumpkin cheesecake. It was not easy to make. There were many trials. And I was not alone in making it.

I've made pumpkin cheesecake before. I've made a lot of varieties. When I saw the recipe for Rose Levy's pumpkin cheesecake, I couldn't resist. But at the same time, I saw another recipe that called for ginger, nutmeg, allspice and cinnamon in the batter; spices which were lacking in Rose's recipe. I decided to just combine the two and see where it got me. Not only that, but I decided to ask my boyfriend to join me, as he is a huge pumpkin cheesecake fan and I thought it would be fun...

Until he tried to take the cream cheese out of its package with a whisk because he didn't want to get his fingers messy.

It all just went downhill from there.

Now that I think about it, working on something like cheesecake with someone who has never baked something from scratch before may not have been a good idea. And although I was thankful for the time spent together, I won't deny the fact that at one point I wanted to just throw the whole batter out into the sink and call it a day. Gratefully that didn't happen, because regardless of the whole batter being funky issue, the cheesecake still came out perfectly firm, uncracked, and delicious. Although I wasn't a huge fan of it (I'm not a pumpkin cheescake person), the spices did meld together perfectly and I think it made all the difference in the cheesecake. That, and an awesome crust that I pretty much almost ate by the fistful by itself.

But really. This whole impatience with other people in the kitchen thing... am I the only one? I would honestly rather wait 20 minutes for lunch then work with someone else in a small kitchen so we can make our own lunches at the same time. It just doesn't work for me.

Either way, this cheesecake did come out awesome. I didn't have a food processor so the recipe itself didn't work out for me exactly the way I wanted it to. If you do have a food processor, great! Maybe it'll work out for you. But I didn't. So, if you only have a hand mixer, I'm going to include both ways to make this cheesecake with and without a food processor. And if you do happen to make this with someone else less baking savvy, and you have the same kitchen temper I do... let them make the crust.

Trust me.

It might save their life.

(P.S: I do love my boyfriend for helping me out with it, and he is still alive. Just wanted to make that clear before someone calls the police.)


Spiced Pumpkin Cheesecake w/Gingersnap Pecan Crust
(Tweaked from Rose Levy Beranbaum's Pure Pumpkin Cheesecake Recipe)


Crust:
4 1/2 oz gingersnaps (about 17 2-in. cookies)
1/2 cup finely chopped pecans, toasted
1 tsp ground cinnamon
1 tablespoon sugar
4 tablespoons butter, melted
(NOTE: I doubled the crust for mine and it worked out fine)

Cheesecake:

16oz cream cheese, softened
15oz pure pumpkin puree (not pumpkin pie mix, preferably Libby's)
1 cup granulated sugar
1 teaspoon ground cinnamon
½ teaspoon ground ginger
¼ teaspoon freshly grated nutmeg
¼ teaspoon ground cloves
¼ teaspoon ground allspice
½ teaspoon salt
2 eggs
2 egg yolks
1 teaspoon vanilla extract
2 cups heavy cream, chilled (NOTE: I had to substitute 2 cups full fat evaporated milk for this since there was no heavy cream left at the store, feel free to do the same if you're watching your budget)

For Garnish:
Whipped Cream
Crumbled Gingersnaps
Caramelized Pecans


Directions:

1. Preheat the oven to 350 degrees. Grease the bottom and sides of a 9x 2 1/2 -inch or higher springform pan.

To make the crust:
2. In a food processor, process the cookies with the pecans, sugar, salt and cinnamon (if using) until the cookies become fine crumbs, about 20 seconds. Add the melted butter and pulse about 10 times, just until incorporated.

3. Using your fingers or the back of a spoon, press the mixture into the base of the prepared pan and partway up the sides. Lay plastic wrap over the crumbs to keep them from sticking to your fingers. Be sure to press the bottom thoroughly so that the crumbs are evenly distributed. Wrap the outside of the pan with a double layer of extra-wide heavy-duty aluminum foil to prevent water leaking in from the water bath .

To make the filling:
4. In a small, heavy saucepan, combine the pumpkin puree and sugar. Over medium heat, bring the mixture to a sputtering simmer, stirring constantly, about 5 minutes. Turn the heat to low and cook stirring constantly, until the mixture has darkened somewhat, about 5 minutes. Set aside.

FOOD PROCESSOR WAY:

5. Scrape the pumpkin mixture into a large food processor and process for 1 minute with the feed tube open (so steam can escape), scraping down the sides. With the motor running add the chilled cream. Add the softened cream cheese and process for 30 seconds or until smoothly incorporated, scraping down the sides two or three times. Add the eggs and yolks and process for about 5 seconds, just until incorporated.

HAND MIXER WAY:

5. Scrape pumpkin mixture into a large mixing bowl with cream cheese. Blend together until completely incorporated and smooth. Add the eggs and yolks until just incorporated. Add chilled heavy cream until smooth, remembering to scrape down the sides.

To bake the cheesecake:
6. Pour the batter into the prepared pan. Set the pan in a larger pan (a 12×2-inch cake pan or a roasting pan and surround it with 1 inch of very hot water. Bake the cheesecake for 45 minutes. Turn off the oven without opening the door and let the cheesecake cool for 1 hour.

7. Transfer the cake to a rack (the center will still be jiggly) and cool to room temperature, about 1 hour. Cover the pan with plastic wrap and refrigerate for at least 6 hours or overnight.

8. Unmold cheesecake onto serving platter. Garnish as desired.

Monday, October 11, 2010

Persimmon Coffee Cake


Fuyu Persimmons.

Does anyone else know what they are? Huh? Anyone out there?

Hello? Japan? Can you please explain yourself, here? Because I seriously need to know why these haven't been apart of my life until now. What else are you hiding from me?

Fuyu Persimmns. They blow my mind.

Upon my first meeting of the Fuyu Persimmon (not to be confused with its sister fruit, Hachiya Persimmon), I thought it was a tomato. Imagine my surprise when I brought a buttload of them home under the impression that I'd be eating BLT's all week, only to be told that those were definitely not tomatoes, but a fruit instead (yes, I know tomatoes are technically a fruit but I would rather not get into a political discussion about fruit today). I didn't believe it until I ran a knife through it and heard the familiar *crunch* noise that followed. It was as if I was cutting a juicy, firm, ripe apple. Except the taste was entirely different. Subtly sweet with a hint of what seems like cinnamon or honey, Fuyu Persimmons quickly became one of my favorite fruit the minute I snacked on it.

Which is why I had to take a perfectly healthy fruit and throw it in some butter and brown sugar and make a coffee cake.

What? It's only the logical thing to do.


In most persimmon recipes, they tell you to puree the fruit first due to its hard texture. But I merely chopped these up, threw them with some baking powder and then folded them into the batter like you would do for apples or pears. The result was a still slightly firm but mostly soft fruit buried within the coffee cake, giving bursts of flavor in every bite. Not only that, but the perfect crumble on top brings it all together for an awesome sunday morning treat or weekday brunch.

Or just a snack every time you pass by the kitchen. I'm not kidding. You won't be able to pass by this without grabbing little bits here and there.

I plan on experimenting with this fruit a little more since I still have quite a few left over. If you want you could easily substitute the persimmons for apples, pears, or any other fall fruit.

Just don't confuse them for tomatoes. It might mess up everything. Especially if you planned to use them for spaghetti sauce. Although, Fuyu Persimmon Spaghetti Sauce might turn out pretty awesome... Y'never know.


Fuyu Persimmon Coffee Cake

Coffee Cake Ingredients:
1 cup whole wheat flour
1 cup all-purpose flour
1 teaspoon ground cinnamon
1teaspoon ground cloves
1/4 teaspoon nutmeg
2 teaspoon baking powder, divided
1 stick butter, softened
1 1/2 cup granulated sugar
2 eggs
2 teaspoons vanilla extract
3 cups chopped fuyu persimmons (3 medium persimmons, chopped)
1/2 cup of golden raisins (optional)

Crumble Topping Ingredients:
1/2 all-purpose flour
1/4 cup brown sugar, packed
1 1/2 teaspoon ground cinnamon
1/4 cup butter, cold
powdered sugar (optional)

Directions:
1. Preheat oven to 350F. Butter and flour a 9x13in. pan. Stir 1 teaspoon baking powder with chopped fuyu persimmons in a medium bowl to coat. Set aside.

2.
Sift together all dry ingedients (flour through 1 teaspoon baking powder) in a medium bowl and set aside.

3. Mix together butter and sugar until creamy. Blend in eggs and vanilla until the batter is light and fluffy. Fold in the fuyu mixture into the batter.

4. Blend the flour mix into the fuyu mix until no trace of flour remains.

5. In a seperate bowl, make the crumble topping. Whisk together flour, brown sugar, and cinnamon. Cut in the butter with a pastry cutter or your fingers until the batter is crumbly.

6. Pour the fuyu batter into the 9x13 pan, sprinkle the crumble topping evenly ontop.

5. Bake at 350F for 30-50 minutes or until a knife/toothpick comes out without crumbs when inserted into the middle. Let cool on a wire rack. Dust with powdered sugar if desired.

Sunday, September 26, 2010

Pumpkin Spice Loaf with Cream Cheese Glaze


The fact that October is in 4 days hasn't hit me yet. The fact that Halloween is at hand and I feel like we're still just getting over Easter is bugging me. I've never been one to lose count of the months, or the days. Now it feels like the complete opposite.

And that whole Christmas is in 3 months thing...

Yeah. 3 months. I know everyone reading this just felt their stomach drop.

Even though fall is here it doesn't feel like it yet. Sure, we've put up all our fancy fall specials in the cafe of our store. Canned pumpkin is making its return full blast and Winter Squash is goin' for 69 cents a pound at the store. It should feel like it's Autumn, but where's the cold? Kind of hard to enjoy my butternut squash soup on a chilly night when it's hot enough to still be drinking pink lemonade and eating overpriced strawberries.


Regardless of the humidity, I'm still trying to get into the set of things. I know that as soon as I get that whiff of winter on a chilly, foggy morning here, I'll get the Christmas bug. I like to call it my CCD. Christmas Cookie Disorder. It begins whenever the first smell of winter arrives, and leaves any time after the store stops selling those awesome Danish Butter Cookies that come in the dark blue tins... Dang, those things are good.

This loaf is one of those things helping me remind myself that yes, it is almost October. Yes, there is pumpkin to be eaten. Yes, I do not have any freakin' idea what to get anyone for Christmas and Yes, this Pumpkin Spice Loaf goes great with Coffee or if you're feeling really ambitious, a Pumpkin Spice Latte'. Hey, man, if you're gonna go all the way.... ;)

The bread itself is moist, a little less sweeter than you're normal pumpkin bread just because I went ahead and cut the sugar in half so I wouldn't get a blood rush in the morning when I ate it for breakfast. It's virtually fat-free, replacing all the oil with unsweetened applesauce and only using one whole egg. The bread still stays delicious, though I could've definitely amped up the "spice" part of it, but I feared the end result would be a little too hardcore for my cinnamon-hating other half to handle. I'd say when and if you do make the bread, definitely throw in 2 teaspoons of cinnamon, 1 teaspoon of ground ginger, and maybe even add 1/4 teaspoon of allspice. Or you can just go with a healthy dose of pumpkin pie spice and call it a day. Whatever makes your skirt fly up.

Though the bread part of it is pretty much good for snacking and breakfast, the unsweet undertones of the bread are balanced out completely by the cream cheese frosting.

And yes. It is to die for. You will have leftovers. Use them wisely. As in.... insert spoon into vat of frosting and proceed to put it in your mouth. Don't worry! Even the frosting isn't that bad for you... Or at least that's what we can pretend.

I'm going to keep trying to get my mindset in the Autumn mood. Maybe buy a few fuzzy jackets. Make a few Christmas Cookies ahead of time. Eat some gingersnaps. Eat some gingersnaps in a crust with Pumpkin Pie. Eat some gingersnap in a crust with Pumpkin Cheesecake Pie. Heck, maybe I'll actually carve a pumpkin this year and make it look like Elvis.

And then I'll make another loaf of pumpkin spice bread. And eat all the frosting for breakfast. Yep. That sounds like a plan.


Pumpkin Spice Loaf with Cream Cheese Glaze

Pumpkin Spice Loaf Ingredients:
1 cup of pure canned pumpkin
3/4 cup unsweetened applesauce
1 egg white
1 egg
1 teaspoon vanilla extract
1/2 cup granulated sugar
1/4 cup brown sugar
1 1/4 cup whole wheat flour
1/2 cup all-purpose flour
2 teaspoons baking powder
1/4 teaspoon baking soda
1/4 teaspoon salt
1 teaspoon ground cinnamon (I would up this to 2 teaspoons next time)
1/2 teaspoon ground ginger (I would up this to 1 teaspoon next time)
1/4 teaspoon ground nutmeg
1/8 teaspoon ground cloves
1/4 teaspoon ground allspice (optional, but it wouldn't hurt)


Cream Cheese Glaze
4 tablespoons butter, room temperature (I used I Can't Believe It's Not Butter Light and it tasted fine)
4 oz 1/3 less than fat cream cheese, room temperature
2 cups powdered sugar
1/2 teaspoon vanilla extract
(yes, you will have leftover glaze. If you do not want leftover glaze, cut the ingredients in half)


Directions:
1.
Preheat oven to 325F.
2. Combine all wet ingredients, pumpkin through vanilla extract, into a medium bowl. In a larger mixing bowl, whisk together all dry ingredients, flours through allspice.
3. Mix the wet ingredients into the dry until no trace of flour is left
4. Pour the mixture into a well greased 9x5in. loaf pan, making sure the batter is even and flat on the surface.
5. Bake at 325F for 50-60 minutes or until a tooth pick inserted in the center comes out clean.
6. Meanwhile, while bread is baking, make the glaze. Mix together the cream cheese, butter, and vanilla until smooth. Add powdered sugar by 1/2 cupfuls, waiting until each one is incorporated until adding more. Once you've got the desired consistency, set aside.
7. When bread is finished baked, leave to cool in the pan for 5 minutes before taking it out and cooling completely on a wire wrack. Once bread is cooled, top off with half of the cream cheese mixture. Cover the bowl with plastic wrap and keep the rest in the fridge for later baking adventures. Or you can go all out and just pour all of that glaze on top of the bread. Whatever strikes your fancy. ;)

Serves 12 generously.
Or just one really ravenous lady at breakfast.

Friday, November 27, 2009

Marbled Pumpkin Cheesecake


I am starting to slowly realize that when it comes to holidays, sometimes it's best to just stick with what people like, instead of going all out to change every single thing. You know what I mean?

Sure, it's cool to show off with some fancy shmancy roasted garlic mashed 'tatoes... It's awesome to come up with some magnificent cake with perfectly iced fall leaves on top for decoration. It's fun to sit there and come up with ways to make your cornbread stuffing that much better than last years stovetop...

It's understandable for a foodie to wanna go all out to impress guests and family.

But sometimes. Sometimes you just needa little somethin' that's traditional.
And i'm thankful for that.

I'm thankful for the instant mashed potatoes, the freeze and bake biscuits, and the simple stick-in-the-oven-and-fuggeddaboutit turkey (that was my awesome donnie brasco impression). I'm thankful for it all. Because regardless of whether it's homemade or store-bought -- it still brings a family together. And that's what actually matters.

Truth.

I'm also thankful for this Marbled Pumpkin Cheesecake.
And i'm pretty sure everyone else at the dinner table last night was, too.
(P.S: Did I mention that it's lower in fat & calories than the original recipe? Second slice, please.)

"Snappy" Marbled Pumpkin Cheesecake
(Adapted from Taste of Home, August/September 2008)

CRUST
1 cup cinnamon graham cracker crumbs
1/2 cup ground cornflakes (grind them in a food processor until they get crumby)
1/2 cup finely chopped pecans
1/4 cup butter, melted

FILLING
2 8oz packages of neaufchatel cheese (or 1/2 reduced fat cream cheese), SOFTENED
1/2 cup granulated sugar
1/4 cup brown sugar, packed
1 teaspoon vanilla extract
3 eggs, lightly beaten
1 cup canned pumpkin
1 teaspoon ground cinnamon
3/4 teaspoon ground nutmeg

DIRECTIONS:
1. Place a greased 9 inch springform pan on a double thickness of heavy duty foil (about 18in. square). Securely wrap foil around pan. Set aside.

2. In a small bowl, combine cinnamon cracker crumbs, ground cornflakes and pecans. Stir in butter. Press to the bottom and 1inch up the sides of your 9 inch springform pan. Bake this at 325F for 9 minutes or until set (should be a darkish slightly golden brown). Take out and cool on a wire wrack.

3. Meanwhile, in a large bowl, beat SOFTENED cream cheese and 1/2 cup sugar until smooth. Beat in vanilla. Add the eggs; beat on low speed until just combined (DO NOT OVERBEAT).

4. Place 1 cup of the cheesecake filling in a seperate bowl. To that seperate bowl, add the pumpkin, cinnamon, nutmeg and 1/4 cup of brown sugar. Stir together to combine. Remove 1/2 cup of the pumpkin filling and set aside.

5. Pour remaining pumpkin filling into the crust. Top with plain cheesecake filling. Now go to the 1/2 cup of pumpkin filling you set aside, and with a large tablespoon, just scoop and drop spoonfuls ontop of the cheesecake. Take a smooth knife (butter knives work best) and just run it through the top of the cheesecake to get a marbled effect. Have fun with it!

6. Place the springform pan into a larger baking pan (like a roasting pan or a large 13x9 baking pan; the kind you'd bake brownies in) . Add some hot water inside the baking pan (NOT ontop of the cheesecake) until the water comes up 1inch. Bake for 50-60 minutes or until the top is just set and looks slightly dull (to check if it's set, tap the sides of the pan. If the center jiggles slightly, it's ready to come out).

7. Cool on a wire wrack for 7 minutes. Run a clean, smooth knife around the edges of the cheesecake pan to loosen the crust from the pan. Cool 1 hour longer.

8. Refrigerate cheesecake overnight. Then remove the sides of the pan and reward your patience with one big slice o' cheesecake. ;]

Monday, November 16, 2009

Back there and again.


I'm sorry for the lack of updates. Really, I am. But this time, I have a good excuse. I promise.

Usually, when I don't update my blog, it's due to:

1) Being too busy doing other things (or my subtle way of saying I was too lazy).
2) I didn't take pictures of what I've been making
3) I didn't like the pictures of what I made
4) What I made got eaten before I could go to my room to get my camera.

In all truth though, the first one is the most common. I know. Not cool, Alex.

This time though, I have a good excuse. A really good one. Y'see, while you all were w
aiting for me to update with some more seasonal goodies, I was busy in New Orleans eating my pants size worth of these:


If you don't know what these are, then... Oh, God. I'm so, so sorry. Seriously. I fantasize about these. I fantasize about waking up to a warm plate full of these with a big cup of steamin' hot coffee every day. I fantasize about all that powdered sugar going everywhere everytime I even move or breathe wrong (quick personal note: never laugh when eating a Beignet. Ever. As it will result in a death-consuming cloud of powdered sugar smoke.)

I was kind of hesitant to try one. After all, Beignets are basically deep-fried dough. But they were so light and the edges -- Oh god, they were my favorite part. So crisp and chewy. Honestly, if I lived in New Orleans... Cafe' Du Monde would never go out of business. Truth.

But anywho.


While I could use the whole "I was in New Orleans eating Beignets! You have to believe me!" excuse as to why I haven't updated, I'll give you a real one, which is: ... I had no baking equipment. At all. Yeah, tell me about it. Unfortunately I'm not quite sure how security check out would deal with me bringing a deadly mixer on board of the plane -- and I don't think my luggage could carry a 20lbs bag of flour and sugar. So I had to leave my baking behind for a week or two. And I have to say this: I did miss it. But that's okay. We're back on track now and kicking off the ride with a cookie I think you'll find good enough to forgive me for.


These little oatmeal cookie delights are filled with a cool autumn combo of diced apples and butterscotch chips. When they come out of the oven, they can get pretty crispy -- but if you leave them out for awhile, they become incredibly moist and cakey. So if you like your oatmeal cookies crispy, you should definitely make and eat these the day they are made. If you like 'em cakey, then just make 'em, and let them sit out on the counter uncovered overnight. Or, better yet, store 'em in the refrigerator in a air-tight container. These taste really good served cold. But i'll let you be the judge of that.

The apples and butterscotch really shine here, with some help from a dash of cinnamon and some pumpkin pie spice. Not only that, but I replaced 1/4 cup of the butter in the original recipe with some applesauce, keeping these nice and moist and bringing out a more natural sweetness that helps the apple flavor a lot.

I think you'll like 'em. Hell, I know I did, and I'm not a big oatmeal cookie fan. These could probably do with some chopped walnuts thrown in, if you like your cookies a little on the nutty side. Pecans or almonds probably wouldn't contrast as well with the apples/butterscotch chips, though.

Happy eatin' foodies! And look for updates. I promise I won't run off on you for some donuts again.

Well. Maybe.

Butterscotch and Apple Oatmeal Cookies

INGREDIENTS:
1/2 cup butter
1/4 cup applesauce
1/2 cup brown sugar
1 large egg
1 teaspoon vanilla
1 1/2 cup all-purpose flour (I used 1 cup AP and 1/2 cup whole wheat)
1 teaspoon baking powder
1/2 teaspoon baking soda
1/2 teaspoon salt
1 teaspoon ground cinnamon
1/4 teaspoon ground nutmeg
1 cup finely chopped apples (about 1 big apple, 2 medium ones and 3-4 small ones)
1 1/2 cups quick-cooking or regular oats, uncooked
1/2 cup butterscotch chips

DIRECTIONS:
1. Preheat your oven to 325F. Cream the butter; add the brown sugar and applesauce and beat until light, fluffy and there are no brown sugar chunks.
2. Beat in egg and vanilla.
3. Add flour, baking powder, baking soda, salt, cinnamon, and nutmeg. Beat until well combined.
4. Gently stir in apples, oats, and butterscotch chips.
5. Drop dough by heaping teaspoon or tablespoon fulls on a baking sheet lined with parchment paper (or just grease it with nonstick cooking spray). Bake at 325 for 10-12 minutes, or until edges are golden brown. Remove from pan and cool on a wire rack.

Makes about 2 dozen cookies depending on size. Store in air-tight container in fridge or leave at room temperature uncovered.

Tuesday, October 27, 2009

Pumpkin. Cheesecake. Pie. Hold my hand.


Let me ask you a question, dear reader.

What do you do when you have half an opened can of pumpkin puree in your fridge and a smidgen of left over cream cheese from mini-cheesecakes past accompanying it?

This.

This is what you do.

You go crazy and in a frenzy of inspiration and seasonal delusions you make this.

Pumpkin. Cheesecake. Pie.


This isn't just your Mama's pumpkin pie, let me tell you. This baby is chock full of a ton of ingredients that will have your tummy going "Uhm, yes" and your dietician going, "Uhm, share." Yeah, it's that good.

Oh, and by the way -- did I mention it has a sugared almond/ginger crust? No? Well. It does. And don't even think you can get out of this easy by using some store-bought graham cracker crust. Oh no. This pie crust and filling were meant to be, and it's so incredibly easy to
make... Best part about it? Totally easy to make Gluten-Free. Bonus points? I think so.


Really though, this pie is pretty awesome. I got the original recipe from allrecipes double layer pumpkin pie. Admittedly, I've never had pumpkin pie. Ever. But i'm sure i'd like it either way. This was really good though. Perfect balance of sweetness in contrast to the natural flavor of the pumpkin. And the almondy/ginger crust just brought out the best in the cinnamon and nutmeg in the pumpkin itself. You'd think for the amount of sugar this pie has packed in, it would be too sweet. But it's not at all.

So if you happen to have some left-over pumpkin puree sitting in your fridge -- totally make this. If you don't have any cream cheese... go get some. If you don't have any almonds... Well. Okay. If you absolutelyhavetouseapremadecrust... It may be a little time consuming but it's worth it people, really.

Did I mention it's a pumpkin cheesecake pie?

I can't get over this.

Now, I have one more question for you, my lovely reader:


Want a slice?

Double Layer Pumpkin Cheesecake Pie w/Almond Ginger Crust
(Original recipe adapted from allrecipes.com)

Pie Crust Ingredients:
roughly 1 cup of finely chopped almonds
1 tablespoon fresh ginger, minced
5 tablespoons salted butter, divided
1 tablespoon sugar
3 tablespoons brown sugar
1/4 cup whole wheat flour (optional, can sub almond meal for gluten-free crust)

Pie Filling Ingredients:
2 8oz packages of cream cheese, softened
1/2 cup white sugar
1/2 teaspoon vanilla extract
2 eggs
1/2 cup pumpkin puree
1/2 teaspoon ground cinnamon
1 pinch ground cloves
1/4 teaspoon ground nutmeg

Directions:
1. First, we'll make the pie crust. It's incredibly easy. Take a medium skillet and melt 2 tablespoons of butter in it over low-medium heat. When butter is melted, add almonds, ginger, and sugar. Toss together to coat and let simmer over medium heat, tossing around occasionally to make sure the almonds and ginger are toasted evenly.

2. As soon as they start getting nicely toasted (watch for burning) and fragrant, let them simmer for a minute or two longer before taking them off the skillet and letting them cool on a kitchen towel or a few paper towels piled on top of each other.

3. While almonds are cooling down, melt remaining 3 tablespoons of butter in a microwave safe container. Preheat your oven to 350F degrees.

4. Wait until both the almond/ginger mixture and melted butter is cooled completely before proceeding. This is because we are making a crust, not almond butter, and if the almonds are still warm, they will not give a crusty texture.

5. With a food processor or hand blender, grind the almond/ginger mixture until it gets a mealy texture. Then, dump into a separate bowl. Add the melted butter, 3 tablespoons of brown sugar, and 1/4 cup of whole wheat flour (or almond meal). Mix together until you have a crumbly crust-like texture. Don't worry if you have left overs -- I did. And if your crust is a little warm, that's okay. Just as long as it still has a mealy feel to it.

6. Press your crust into a 9 in. pie pan and bake at 350 for 10 minutes. Let cool on counter while you make your pie filling.

7. To make your pie filling, lower your oven to 325F. In a large bowl, combine cream cheese, sugar, and vanilla together. Beat until smooth. Blend in eggs one at a time, being careful not to over mix. Reserve 1 cup of this batter and pour evenly into your COOLED pie crust. Set aside.

8. Add your pumpkin, cinnamon, cloves and nutmeg to remaining batter and stir gently until well blended. Carefully spread over the batter in the crust.

9. Bake in preheated oven for 35-40 minutes, or until center is almost set (it should be a little bit jiggly in the middle). Allow to cool, and then refrigerate for 3 hours or overnight. Garnish with a cookie leaf or whip cream if desired.

Sunday, October 18, 2009

Pumpkin Blondies


Pumpkin Blondies
I smelled it.

The minute I woke up this morning to a dreary half-lit bedroom.
The minute I attempted to open my tired eyes.

I smelled it.

Winter.

I don't know about you, but there's one thing that sets off every nerve in my body to scream: WINTER, WINTER, WINTER, CHRISTMAS, PRESENTS, THANKSGIVING, TURKEY, EGG NOG, WINTER, COOKIES, WINTER, WINTER.

And that's the smell of it.
Winter has a particular smell. It is crisp, clean, cool, and every time it rolls around all I feel like doing is getting a huge, fluffy blanket, rolling inside of it and eating fruitloops while watching saturday morning cartoons in my PJ's before running outside and swinging on our swingset for five hours.

And if we still had a swingset around, and fruitloops, I'd probably be doing that instead of writing this post. Sans the saturday morning cartoons. That would probably be replaced with 3 hours of Good Eats (which, by the way, anyone else notice that Alton looks kind of like a zombie now-a-days? I hope he's feeling alright).

Now, for the past few hours i've been awake (tightly snugged inside a warm jacket), I am having rushes of nostalgia and craving gingerbread men.

Does anyone else get these?
Am I the only one?

I know it won't last long. This is the south, afterall. The sun will warm us over nice and soon, I'm sure. But for today and tomorrow, things will be much cooler around here, and I have a feeling that my urge to bake every single warm, fuzzy, homey dessert I can think of will surface violently and I will find myself passed out at 3A.M. in my kitchen covered in flour and pumpkin pie spice.

They should really have a name for a condition like this.

Like P.I.S, Pumpkin Insanity Syndrome.

Or P.G.M.O.O.T.K.B.I.B.F.T.C.S (Please Get Me Out Of This Kitchen Before I Bake Five Thousand Cookies Syndrome).

I don't know. I'm out of it and I need an afternoon nap and some hot chai tea. This is what winter does to me. It makes me babble. And ramble. And talk insanity.

But if there is one thing you can get out of this whole post, it's this: Pumpkin Blondies.

They are pumpkiny.
They are octobery.
They are butterscotchy.
They are cakey.
And they are best eaten out of the refrigerator after a day of being made.
If you can wait that long. If you're me, and have no patience, you probably can't. But try anyways.

Definitely make these sometimes. I should've baked mine longer so they came out a little... eh, fudgy, for blondies, but they are stilll very good. Don't hesitate to leave them in the oven for a little longer if you're not sure if they are done or not. AND PLEASE, PLEASE, PLEASE add the butterscotch morsels. You have to. You do. Don't argue. Just do it. It's worth the store trip. I swear.

Now please excuse me while I go look through five hundred christmas cookies recipes.


Pumpkin Blondies
(Adapted from Annie Eats who adapted it from Martha Stewart)
Ingredients:
2 cups all-purpose flour
1 tablespoon pumpkin pie spice
1 teaspoon baking soda
3/4 teaspoon salt
8 tablespoons unsalted butter, room temperature
1/2 cup applesauce
1 cups granulated sugar
1/4 cup brown sugar, lightly packed
1 large egg
2 teaspoon vanilla extract
1 cup pumpkin puree
1 cup white chocolate chips
1 cup butterscotch chips
1/2 cup chopped, toasted nuts (optional)
1/2 cup quick-cooking oats (optional)

Directions:
Preheat the oven to 350° F. Line a 9×13-inch baking dish with foil.

In a medium bowl, combine the flour, pumpkin pie spice, baking soda and salt. Stir together and set aside.In the bowl of an electric mixer fitted with the paddle attachment, beat together the butter, sugar and applesauce on medium-high speed until light and fluffy, about 2 minutes. Beat in the egg and vanilla until well combined. Mix in the pumpkin puree.

With the mixer on low speed add the dry ingredients and mix just until incorporated.

Fold in the white chocolate and butterscotch chips (and nuts/oats, if using) with a rubber spatula.

Spread the batter evenly into the prepared pan.

Bake until the edges begin to pull away from the sides of the pan and a toothpick inserted in the center comes out with just a few crumbs, about 35-40 minutes. Transfer the pan to a wire rack and let cool completely before cutting.

To serve, lift the cake from the pan using the foil and transfer to a cutting board. Peel off the foil and using a sharp knife, cut into 24 squares.

Sunday, October 4, 2009

Maple Snickerdoodles

-00963

When I was smaller, my mom and I went on a trip to visit my Grandparents who lived in New Jersey at the time. I can't remember if we flew or drove there... but I do remember being in the car with my grandma, driving to her house.

While we were driving, I was in the backseat, swinging my legs back and forth because they were too short to reach the car floor. I was literally faceplanting the window, staring in awe at the autumn trees. Everything was covered in ruby and golden leaves. It was so gorgeous, and I had never seen anything like it before. Back in Florida, we didn't have "fall". Our trees did not change colors and we scarcely saw the transition from summer/fall/winter. Besides the chillier temperatures, we never really got a full blast of autumn like most places did up north.

I remember being totally wide-eyed and captivated by what I saw. As soon as we got back to my grandma's house, I went back outside and played in those very same leaves. Giggling like a schoolgirl. I loved it. I really did. The best part was going back inside to a warm fireplace.

That was fall to me. That was autumn.

Unfortunately, I've only been able to see that beauty once in my entire life... but it did leave a permanent mark on me. I also remember playing around with my grandma's neighbor's little girl. We would sneak down into her basement and play grocery-shopping. And then I'd secretly want to eat the plastic foods.

Don't judge me. They totally looked real.

-00959

Anyway. Living down south, the only real feel of autumn we can get is through food and spices. This is the time of the year where we start getting extra snuggly with our blankets in the early morning, and we have to literally get to our local grocery store at 6 in the morning just to get the canned pumpkin puree before anyone else does. It's also the time of the year where the smell of cinnamon, ginger, and nutmeg, can be found wherever you go. Not that I have a problem that ;).

Although nothing can compare to those autumn leaves falling down all around me, these Maple Snickerdoodles come as close as can be. Just the smell of them baking in the oven was enough to tickle my senses. And the taste? Oh baby. Move over Chocolate Chip Pumpkin Cookies. You are gonna have to wait.

They are so ridiculously easy to make -- and so, so good. Soft and extremely chewy. I love it. I seriously do. While you can bake these right after mixing the dough, I prefer to refrigerate my dough because of the humidity. And because I don't like my cookies to spread too much.

Remember though, when making these, you want to use REAL MAPLE SYRUP. Not that fake stuff you put all over pancakes. Although that stuff is good too. But not for these cookies. Trust me on this one. It's worth the splurge. You can find real maple syrup right by the fake stuff in the pancake aisle. If you want, you could definitely use it to replace the fake stuff. So much better. Soooo good.

Do you have any cookies that remind you of fall or maybe just some good autumn memories? Or maybe foods that you particularly tie along with the coming of colder weather? Share your stories! I'd love to hear them. :)

That is, if you can stop trying to maul your screen. :P

-00947

Maple Snickerdoodles

Ingredients:
2 cups all purpose flour
1 ½ teaspoons baking powder
¼ teaspoon baking soda
1 ½ teaspoons ground cinnamon
¼ teaspoon salt
½ cup butter, softened
1 cup granulated sugar
3 tablespoons real maple syrup
1 egg

1/4 cup granulated sugar
2 tbsp cinnamon

Directions:
1. Preheat oven to 350F.
2. In a medium bowl, sift together flour, baking powder, baking soda, cinnamon, and salt.
3. In a large bowl, cream the margarine and 1 cup sugar until light and fluffy. Beat in the maple syrup and egg until combined. Add dry ingredients. Beat until just mixed.
4. Combine 1/4 cup granulated sugar and 2tbsp of cinnamon in a bowl.
5. Roll dough into 1-inch balls. Roll each ball in cinnamon-sugar mix. Arrange balls on cookie sheets, 2 inches apart.
6. Bake until tops are crackly, about 8 to 10 minutes. (Mine took about 7)
7. Remove from oven, and leave cookies on sheets to cool slightly. Transfer cookies to wire rack to cool completely.
 

Dunk Twice Copyright © 2009 Cookiez is Designed by Ipietoon for Free Blogger Template