Showing posts with label breakfast. Show all posts

Monday, April 4, 2011

Cinnamon Rolls


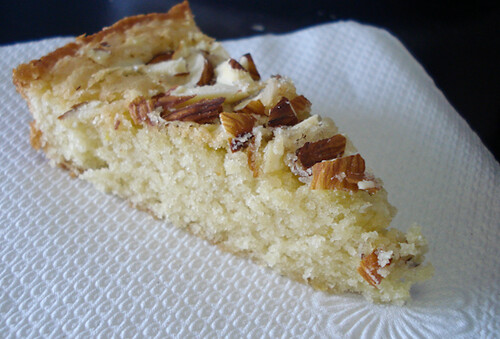
Before I talk about these beautiful, delicious rolls of love... let me tell you 5 reasons why these should not invoke any guilty conscious in you when you make them (and eat all of them).

1. Cinnamon. Cinnamon is good for you. It's high in antioxidants, helps digestion, and also lowers stress!

2. Has enough carbohydrates to make you want to wrestle a bear. And really, hasn't everyone always wanted to wrestle a bear before?

3. You actually can tell people what ingredients go in them! Bet you can't do that with your regular old supermarket cinnamon rolls.

4. They give you a work-out! Rollin' the dough out for these babies is like running a marathon. You'll have so much arm muscle after this you'll be able to lift up a car! (disclaimer: please do not actually attempt said statement after eating cinnamon rolls as it may cause hip displacement or other injuries to vital areas)

5. It makes 7 pans. 7. Pans. What are you going to do with 7 pans of cinnamon rolls?! You practically have to give them away! This recipe actually ENCOURAGES will-power, selflessness, and kindness to your neighbors! (even if you're still pissed at them for stealing your mail for a year)

Now that we've gotten that over with, we can continue with how amazing these cinnamon rolls are. They will make men propose to you. Make your manager give you a raise. They'll make you the most popular chick (or guy) around. Soon enough, people will be begging you to make more. In fact, they'll demand it. They are that good.

Just don't tell anyone it has four and a half sticks of butter in it. Especially not Jillian Michaels. She might come to my house and make me do burpies.

I hate burpies.

Really, though, if you want to make a special treat... This is it. This recipe makes A LOT of cinnamon rolls... so if you make the full recipe, be prepared to give some away. I gave two batches to my neighbor, three to my work (they were gone two days), and froze the last two. They are better than any cinnamon rolls you'll buy from a bakey. And people will be super impressed when you tell them you made them yourself. I highly recommend starting the night before and finishing it in the morning. You can easily freeze these like I did after their done baking or before you put them in the oven. Either way, people will be singing your praises.

Just make sure you save one for yourself.
Remember: Cinnamon rolls make your digestion better.

And who doesn't like being regular?

Right?
...Right?

...

*cricket*


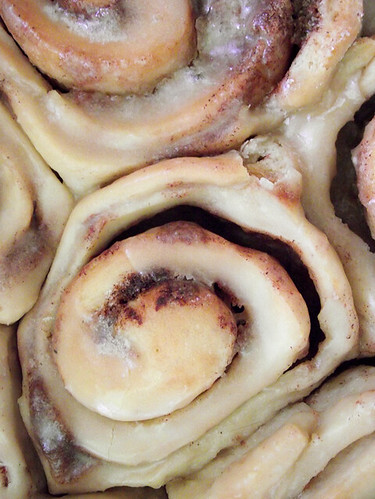
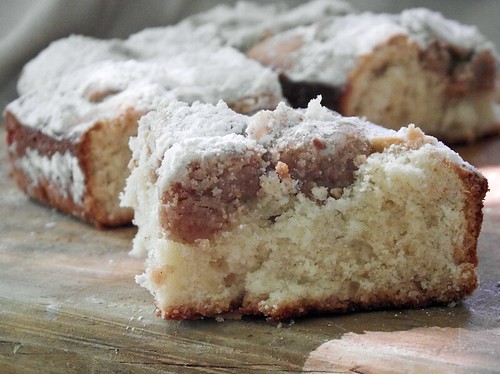
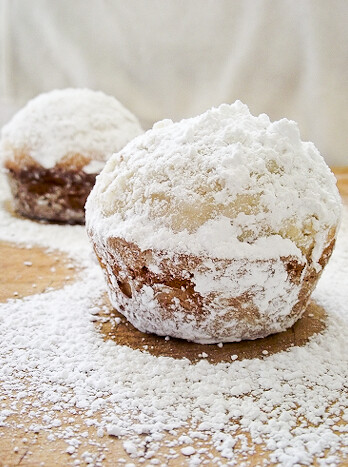
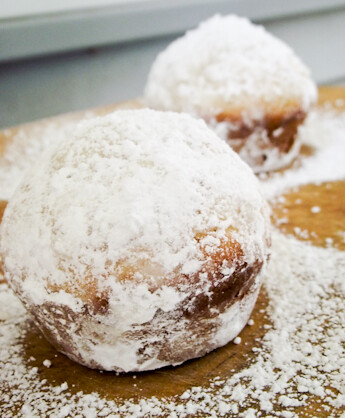
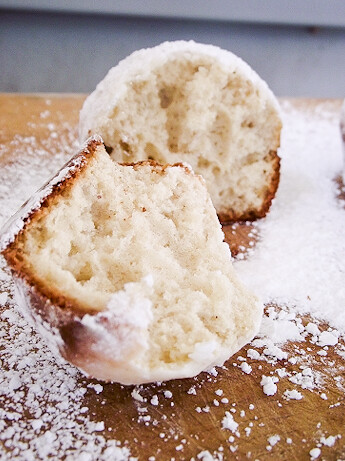
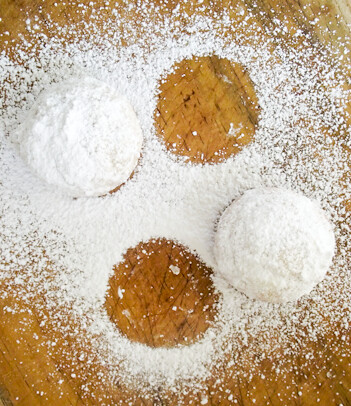
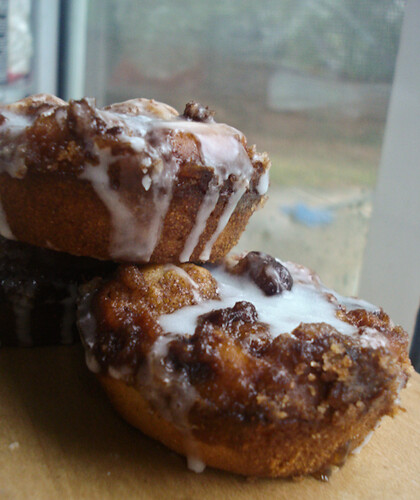
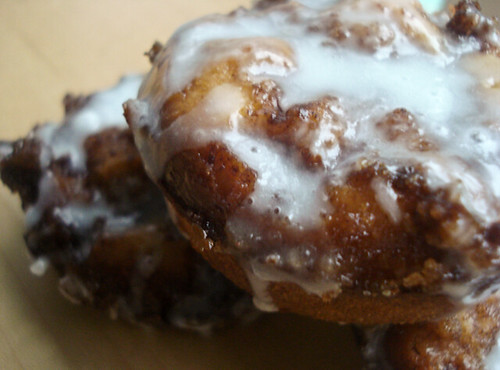
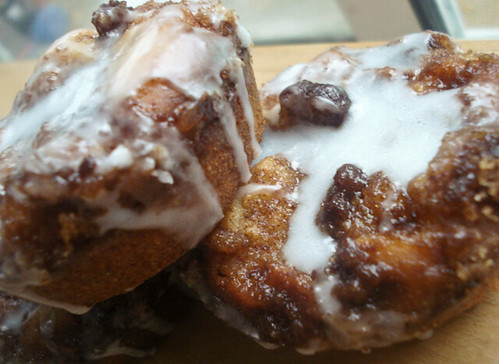
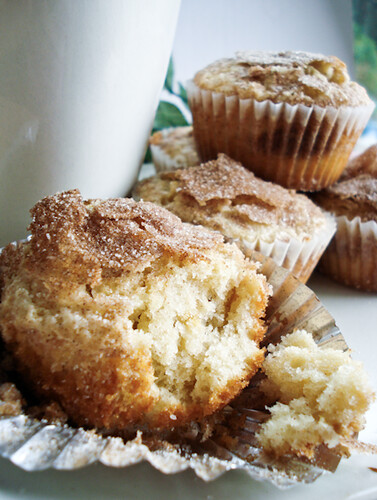
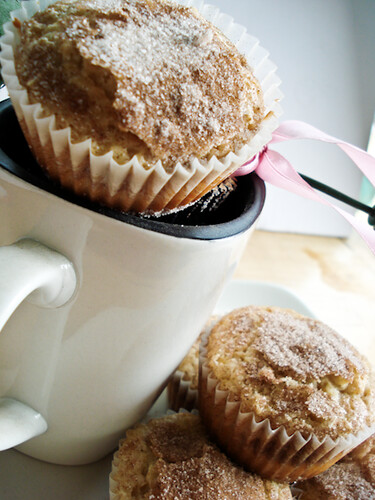
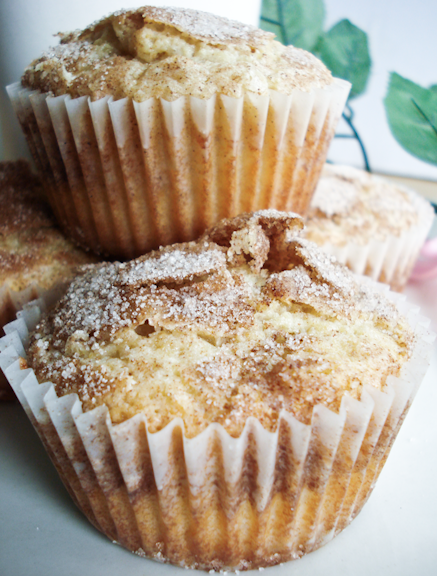
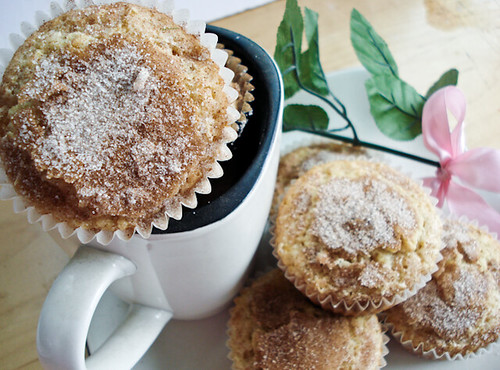
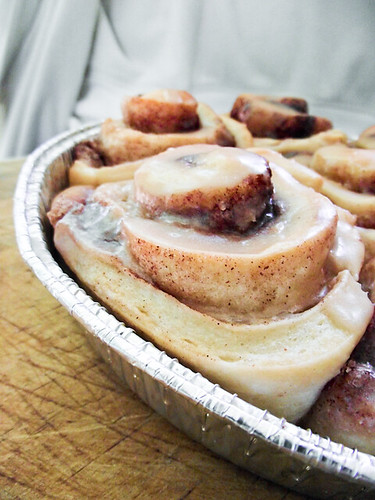
Better Than Supermarket Cinnamon Rolls with Maple Frosting

INGREDIENTS


Rolls:
1 quart whole milk
1 cup vegetable oil
1 cup sugar
2 packages active dry yeast (o.25 oz packets)
8 cups (plus 1 cup flour, separated) all-purpose flour
1 teaspoon (heaping) baking powder
1 teaspoon (scant) baking soda
2 cups butter (4 sticks butter), melted
2 cups sugar
Generous amount of ground cinnamon


Maple Frosting

2lbs powdered sugar (1 large bag)
1/4 cup real maple syrup
1/2 cup milk
1/4 cup melted butter
1/4 cup brewed coffee
1/8tsp salt

INSTRUCTIONS

1. Mix the milk, vegetable oil and sugar in a pan. Scald the mixture (heat until just before the boiling point). Turn off heat and leave to cool 45 minutes to 1 hour. When the mixture is lukewarm to warm, but NOT hot, sprinkle in both packages of Active Dry Yeast. Let this sit for a minute. Then add 8 cups of all-purpose flour. Stir mixture together. Cover and let rise for at least an hour.

2. After rising for at least an hour, add 1 more cup of flour, the baking powder, baking soda and salt. Stir mixture together. (At this point, you could cover the dough and put it in the fridge until you need it – overnight or even a day or two, if necessary. Just keep your eye on it and if it starts to overflow out of the pan, just punch it down).

3. When ready to prepare rolls: Sprinkle rolling surface generously with flour. Take half the dough and form a rough rectangle. Then roll the dough thin, maintaining a general rectangular shape. Drizzle 1/2 to 1 cup melted butter over the dough. Now sprinkle 1 cup of sugar over the butter followed by a generous sprinkling of cinnamon.

4. Now, starting at the opposite end, begin rolling the dough in a neat line toward you. Keep the roll relatively tight as you go. Next, pinch the seam of the roll to seal it.

5. Spread 1 tablespoon of melted butter in a seven inch round foil cake or pie pan. Then begin cutting the rolls approximately ¾ to 1 inch thick and laying them in the buttered pans.

6. Repeat this process with the other half of the dough. Let the rolls rise for 20 to 30 minutes, then bake at 400 degrees (see note below) until light golden brown, about 15 to 18 minutes.

For the frosting, mix together all ingredients listed and stir well until smooth. It should be thick but pourable. Taste and adjust as needed. Generously drizzle over the warm rolls. Go crazy and don’t skimp on the frosting.

Saturday, March 26, 2011

New York Style Crumbcake


Every once in awhile, when my father wanted to treat us, he would drive us after church to a bakery called "Entenmans" off the side of the highway. I remember walking in and just looked at the boxes and boxes of pound cakes, chocolate donuts, cream cheese danishes and chocolate chip cookies. I would look through them excitedly, not straying far from my father. He would smile at me and say, "pick one thing you want", while picking out some things for himself and the rest of the family. My eyes would get wide with excitement, and I would stand there, stuck with a choice that as a child seemed so absolutely life-threatening. If I got the chocolate chip cookies, I wouldn't have any orange pound cake. But if I got the pound cake, then I wouldn't get any chocolate chip cookies. I remember always standing there anxiously, thinking hard.


But there was one item that they sold there that I was honestly addicted to. One of the best things I had ever eaten: New York Style Crumbcake. It had a brilliant small crumb on top, moist cake underneath and powdered sugar all around. If I ever came to a fork in the road about what I wanted, my hands immediately went for the crumb cake. I would constantly sneak into the kitchen, grabbing another slice, until my father would ask who was eating all of the crumb cake and I'd keep my mouth closed and grin to myself sheepishly.

Unfortunately the bakery near me closed down, and now we can only buy some in packages at the super market, which never tasted exactly like the ones that came from the place we went to. And no matter how hard I've tried, I've never been able to completely mimic the taste in a recipe. But I've come damn close with this cake. Infact, I am perfectly fine with settling for this if I cannot get the best, because aside from a bit of dryness at the cake part underneath, this crumb cake was 100% DELICIOUS. And if you are a fan of the crumb cake, then you will like this. I do recommend using something to keep the cake moister or richer... Maybe more butter, or perhaps sour cream in place of buttermilk. Either way, it's an awesome way to treat yourself or just eat something new. Just makes sure you poor some powdered sugar all over these... It's just not right without it.

New York-Style Crumb Cake
Adapted from America's Test Kitchen

INGREDIENTS:
For the crumb topping:
1/3 cup granulated sugar
1/3 cup dark brown sugar
1/8 teaspoon salt
3/4 teaspoon ground cinnamon
1/2 cup (1 stick) unsalted butter, melted, still warm
1 3/4 cups cake flour

For the cake:
1 1/4 cups cake flour
1/2 cup granulated sugar
1/4 teaspoon baking soda
1/4 teaspoon salt
6 tablespoons unsalted butter, at room temperature
1 large egg
1 large egg yolk
1 teaspoon pure vanilla extract
1/3 cup buttermilk, at room temperature

DIRECTION
Set an oven rack to the upper-middle position and preheat the oven to 325 degrees. Spray an 8-inch square baking dish with nonstick cooking spray and line it with a strip of parchment paper or aluminum foil that is just shy of the width of the dish and long enough to overhang the sides of the dish. Spray the parchment paper with nonstick spray as well.

In a medium bowl, stir together all the ingredients for the crumb topping until they form a smooth dough. Let the dough rest for 10 minutes while you prepare the cake.

In the bowl of an electric mixer, stir together the cake flour, sugar, baking soda and salt at low speed. With the mixer running on low, add the butter chunks one at a time, letting each one incorporate into the dry ingredients before adding another. When the mixture resembles even, moist crumbs, add the egg, egg yolk, vanilla and buttermilk, and increase the speed to medium. Beat until the batter is light and fluffy, about 2 minutes. Scrape the batter into the prepared pan.

Break apart the crumb topping into large pea-sized pieces, rolling them slightly in between your fingertips to get them to hold their shape. Spread the crumbs in even layer over the batter. Bake until the crumbs are golden and a cake tester inserted into the center of the cake comes out clean, 35 to 40 minutes. Cool on wire rack at least 30 minutes. Lift the cake out of the pan using the parchment handles. Dust with confectioners' sugar just before serving.

Friday, February 25, 2011

Donut Muffins


Lately, I've been finding myself missing out on my morning "me" time. You know, that point in the day where you're actually by yourself and stalking checking out other peoples facebooks...

If you have kids, this part of your life is probably missing. Don't fret, it isn't gone forever. Unless you're my mom, who hasn't had a kid in years and still has them in her house at all times.

Apparently it's because she makes killer hot wings. But I think they just are fascinated by the fact that she wears a weave.

Actually, I probably wasn't suppose to mention that on the internet...


Anyway, "me" time... It's something I literally go out of my way to obtain. If I don't have a moment in the day where I'm literally by myself for an hour or two, I usually am in a horrible mood for the whole day. I just can't stand going a day without being able to sit down and just chill out. I like to get up early, early in the morning and do this. Everyone's sleeping and I can check my e-mail/facebook/etc in peace without having to worry about talking to anyone or doing anything. It's also my prime time to write, do devotionals, and pray.

But mostly, it's a time to enjoy my first meal of the day. Which for me is a big deal, because I absolutely love breakfast. If I had it my way, I'd probably eat breakfast for lunch and dinner as well. Whether it be waffles, pancakes, eggs/bacon sandwich, grilled cheese, yogurt and granola or apples with milk... I don't care. All I know is that I seriously dig breakfast.

Plus there's that whole bacon deal... Did I ever mention I used to eat plates of bacon for breakfast?

I also had really bad acne...

Yeah... Something to think about.

I also used to love to eat those powdered donut balls from Dunkin' Donuts. My Dad would occasionally buy them on Sunday mornings before church. Whenever he did, they were guaranteed to be gone by that night. I would sneak away with about five of them, washing them down with a cold glass of milk. Since I've moved to Louisiana, I scarcely have seen any Dunkin' Donuts... so those powdered donut holes haven't been in my life.

But thankfully, I found a substitute.

These babies are called Donut Muffins. While they can be rolled in coarse sugar or cinnamon sugar, I went with the powdered variety. Why? Because it's literally like biting into the love child of a beignet and a powdered donut. These babies are made with a good amount of butter, then brushed with MORE butter when they get out of the oven. Sweetened mostly by the powdered sugar, these beauties come out clean and neatly domed without the need of smoothing out the dough. They are soft, perfect, pillowy, and absolutely need to be drunk with milk or coffee. No doubt about it. And don't invite tea to the party. Save the biscotti for that.

Now, with a whole arsenal of these wrapped up and ready to be warmed and eaten, I'm definitel going to try a little bit harder to get that "me" time. I am literally counting down the hours until I can wake up and eat this delicious morsel. Maybe it's not the healthiest breakfast... but it's good for a treat every now and then. Hey, I won't tell if you won't.


Donut Muffins

INGREDIENTS:
3 cups unbleached all-purpose flour
2 ½ tsp baking powder
¼ tsp baking soda
Scant 1 tsp salt
½ tsp freshly ground nutmeg
¾ cup plus 1 Tbs whole milk
2 Tbs buttermilk
1 ½ sticks (6 ounces) unsalted butter, at room temperature
¾ cup plus 2 Tbs granulated sugar
2 large eggs

TOPPING
4 - 6 Tbs unsalted butter
1 ½ - 2 cups powdered sugar OR 1/2 cups cinnamon sugar OR 1/2 cup coarse sugar

DIRECTIONS:

1.Preheat the oven to 350. and set a rack to the middle position. Spray a standard-size muffin tin with cooking spray.

2. In a medium bowl, combine the flour, baking powder, baking soda, salt, and nutmeg, and whisk to mix them thoroughly. Set aside.

3. Combine the milk and the buttermilk in a measuring cup, and set aside.

4. Place the butter in the bowl of a stand mixer fitted with the paddle attachment (or, alternatively, in a large mixing bowl with electric beaters nearby), and beat on medium speed for a few seconds, until the butter is soft and creamy. With the motor running, add the sugar in a steady stream. Continue beating, scraping down the sides of the bowl once or twice, until the mixture increases in volume and lightens to pale yellow. It should look light, fluffy, and wonderfully creamy, like frosting. This could take a couple of minutes.

5. Add the eggs one at a time, beating until they are just combined.

6. With a wooden spoon, mix ¼ of the flour mixture into the butter mixture. Add 1/3 of the milk mixture. Continue to add the dry and wet ingredients alternately, ending with the dries. Mix until the dough is smooth and well combined, but do not overmix.

7. Divide the batter between the cups of the muffin tin. Bake until the muffins are firm to the touch and a toothpick inserted in the center comes out clean, about 25-32 minutes.

8. When the muffins are still slightly warm prepare the topping: melt the butter in the microwave or on the stovetop, and pour the powdered sugar/cinnamon sugar/sugar into a deep bowl.

9. Using a pastry brush and working one muffin at a time, lightly brush the entire outside of the muffin with butter, and then roll it in the powdered sugar/sugar/cinnamon sugar. Shake off any excess, and place the finished muffins on a rack or serving platter. Serve.

Thursday, December 2, 2010

Upside-Down Pear Gingerbread Cake

I am not good at Christmas shopping.

Actually, that's a lie. I'm not bad at Christmas shopping at all.

I just have some issues when it comes to it.

For example, when I'm Christmas shopping, economic value goes straight out the window. It then becomes what I would like to call the "Aunt" value. In layman terms, what can I buy all my nieces and nephews that can trump the other 20 other uncles and aunts?

Suddenly, it's like I do not see price-tags on anything. Instead, I see a "lame" to "awesome" value of everything I contemplate buying my nieces and nephews. $2 dollar stuffed polar bear at walmart with a funky smell? Lame. Freakin' incredibly huge stuffed polar bear/pillow that smells like victory? Totally awesome.

Christmas. It's a time for giving, loving, family, being thankful... and competition.


Of course, this has put in motion some minor setbacks. Like...buying one niece #1 two things and niece #2 just one thing because I saw something niece #1 might like and therefore grabbed it and rang it up without thinking twice.

And then returning it once I realized I had already bought her a present. And then having a huge argument with myself on whether or not I should just buy everyone two things or just stick with one thing for all. Thus bringing me into a spinning mental state of what I should do ending in me being in the fetal position in the parking lot of Toys'R'Us.

Which isn't really an odd thing to witness this time of year.


Either way, Christmas shopping is both a blessing and a curse. Which is why after I come home from a nights worth of fighting with my brain about the whole Christmas present deal, I go into my kitchen and I bake something that fills the house with a very simple reminder. It's not about who gets the best gift, but about the fact that someone cared enough to get one for you.

I baked this the morning of one of those crazy Christmas shopping days, and honestly, just how beautiful it came out and how wonderful the apartment smelled afterward was enough to get me ready for the day.

It's a Upside-Down Pear Gingerbread Cake. You may think that sounds odd, but pears are often quite complimentary for gingerbread. Right next to apple, it has a fruity sweetness that works in harmony with the spices inside the cake. It is an incredibly fragrant cake that has a glossy brown sugar shine on the top. The white chocolate drizzle is spiced with pumpkin spice, but if you don't have that on hand, a dash each of ground cinnamon/ginger/nutmeg/cloves will do the trick just fine. It really does complete the cake, I think. This is incredibly moist. I'm sure if this cake was an aunt, it'd probably win the "awesome" award right off the bat (unless, of course, its competition was a cheesecake). With just the right amount of spices, and caramlized pear slices on top... it makes a perfect brunch, breakfast, or light dessert. Plus, it makes your house smell like heaven. Who wouldn't want that?


Upside-Down Pear Gingerbread Cake
(adapted from Gourmet)
INGREDIENTS:
2 ripe pears
1/4 cup of salted butter, melted
1/2 cup of packed light brown sugar
2 1/2 cups of flour
1 1/2 teaspoons of baking soda
1 teaspoon of ground cinnamon
1 teaspoon of ground ginger
1/2 teaspoon of ground cloves
1/2 teaspoon of salt
1 cup of molasses
1 cup of boiling water
1/2 cup of salted butter, softened
1/2 cup of packed light brown sugar
1 large egg, lightly beaten

DIRECTIONS:

1. Preheat oven to 350F. Peel and core pears and cut each into thin slices. Arrange pears in the bottom of an 8 inch springform pan. Drizzle with melted butter and sprinkle with brown sugar.

2. Whisk together flour, baking soda, cinnamon, ginger, cloves, and salt in a bowl. Whisk together molasses and boiling water in a small bowl. Beat together butter, brown sugar, and egg in a mixer at medium speed until creamy, about 2 minutes, then alternately mix in one third of the flour mixture and half of the molasses mixture at low speed until smooth, starting and ending with the flour mixture. Pour batter over topping, being careful not to disturb pears, and bake in middle of oven until a tester comes out clean, 40 to 50 minutes.

3. Cool cake in pan on a rack for 5 minutes. Run a thin knife around the edge, then remove sides and invert a large plate with a lip over the bottom of the cake and, using pot holders to hold the pan and plate tightly together, invert cake onto plate. Replace any pears that stick to skillet. Serve warm or at room temperature.

Friday, November 12, 2010

Brown Sugar Bundt Cake with Maple Espresso Glaze


A long time ago, when I was a itty-bitty Alex who liked to run around in her PJ's all day and refused to wear actual clothes until she was well past 8 years old, my Mother baked me my own cake for my birthday.

It was a lovely box mix yellow cake with lovely Pillsbury white frosting slathered all over it. She made it in her Bundt Cake pan, and after she had frosted it completely, she decided it would be a great idea to stick a little doll figure angel in the middle of the cake. She then had an even better idea, which was to surround said doll figure with candles.

Candles.

Lit. Candles.

With fire.

Fiery candles of death.

I don't think anyone in the room thought it was the best idea, but she went with it anyway. And as she lit the candles, I still remember to this day the image in my head of that poor helpless doll sitting on top the middle of a thickly frosted bundt cake, surrounded in flames. As if the doll was being made as an ancient sacrifice to Chthulu and the candles were the natives lighting their torches getting ready for the sacrifice to their angry God.

Ok, so I wasn't exactly thinking that when I was a kid. But when I think about it today, that's all I see.

Now-a-days, It's hard for me to look at a bundt cake without thinking about that moment. It's not often that I eat bundt cakes. Anyone who knows me knows that I don't like cake. It's not my preferred dessert of choice and given the chance I will always pick something other than cake at the dessert table or party. Sure, I'll try it to be nice, but that's about as far as it goes for me. As I've touched on numerous times in my blog, it's no specific thing about cake that makes me dislike it. I just don't like the cake/frosting combo. Doesn't sit well with me or my tummy.

The thing about cake is that often, it has a dry crumb that gives it that kind of "stick to the roof of your mouth" chew that can be both unpleasant and yucky to many people. Dry crumbs are often caused by 1. using cake mix and 2. having not enough moisture in your cake. I've always thought anyone who can pull off a moist but not "wet" cake had a one in a million skill of being able to perfect the balance between a cake that has enough dryness in it to keep it together but has enough moisture to make it both tender, sweet, and melt-in-your-mouth quality.


This cake...is nothing like that. In fact, it's a superb way to end any meal, or start any day with a thick slice for breakfast. The glaze on top is subtley sweet, giving a perfect finish to the caramely tasting insides. The crumb is both moist and satisfying, and the chocolate chips inside are just a fantastic added bonus that ties it all together and makes it much more than just a regular ol' cake with some glaze on it. Even I myself could be found picking off pieces of this cake here and there throughout the day. And that's definitely saying something.

If you wanted to, you could make the glaze a lot thicker. I like a thinner glaze on my cakes, so I used a bit more heavy cream. But if you like a thicker, more visually apparent glaze, go ahead and stick with the recipe below. And please, do not disclude the chocolate chips. They are worth the extra trip to the store. Promise.

Brown Sugar Bundt Cake with Maple Espresso Glaze
(Recipe by Bon Appétit)

INGREDIENTS:

Cake:
Nonstick vegetable oil spray
1 12-ounce package semisweet chocolate chips
3 cups all purpose flour, divided
2 teaspoons baking soda
1 teaspoon baking powder
3/4 teaspoon salt
1 cup (2 sticks) unsalted butter, room temperature
1 1/2 cups (packed) golden brown sugar
2 1/2 teaspoons vanilla extract
1 teaspoon maple extract
4 large eggs
1 cup buttermilk

Glaze:
1 cup powdered sugar
2 tablespoons pure maple syrup
2 tablespoons (or more) whipping cream
1 1/2 teaspoons instant espresso powder

DIRECTIONS:

1. Preheat oven to 325°F. Butter 12-cup Bundt pan. Spray pan generously with nonstick spray. Dust pan lightly with flour.

2. Mix chocolate chips and 2 tablespoons flour in medium bowl.

3. Sift remaining flour with baking soda, baking powder, and salt into another medium bowl.

4. Using electric mixer, beat butter and brown sugar in large bowl until fluffy, about 3 minutes. Beat in vanilla extract and maple extract. Add eggs, 1 at a time, beating well after each addition.

5. Mix in flour mixture in 3 additions alternately with buttermilk in 2 additions, beginning and ending with flour mixture. Fold in chocolate chip mixture. Transfer batter to prepared pan, spreading evenly.

6. Bake cake until tester inserted near center comes out clean and cake begins to pull away from sides of pan, about 1 hour. Cool cake in pan on rack 30 minutes. Invert cake onto rack and cool completely.

7. For the glaze, Combine powdered sugar, maple syrup, 2 tablespoons cream, and espresso powder in medium bowl. Whisk until smooth, adding more cream by 1/2 teaspoonfuls if glaze is too thick to drizzle. Spoon glaze decoratively over top of cake; let stand at room temperature until glaze is firm, about 1 hour. DO AHEAD: Can be made 1 day ahead. Cover with cake dome and let stand at room temperature

Thursday, October 28, 2010

Apple Muffins with Maple Icing

Apples. I love them. No, seriously, I love them.

There hasn't been a time in my life where apples have not been present in whatever place I'm housing. It's true.

Ask my Dad. He has the Costco receipts.


When fall comes around, I get giddy. Sure, apples are widely available at all times of the year but it's this time in specific that they really start to get tasty. Not only that, but you've got a wide variety at your disposable. Granny Smith. Jazz. Red Delicious. Fuji. Pink Lady. And I guess we can include the Grapple in there, too (although I am not a fan of the grape/apple hybrid species).

Out of all of them, I prefer my Red Delicious and Fuji. Fuji when I want something a little lighter and sweeter. Red Delicious when I want that CRUNCH every time I bite in. Yeah, i'm a crunchy-sweet-apple fan.

Which means I hate Granny Smith. In everything. Including Apple Pie. I don't know who decided a tart apple would be the best kind of apple to use for pie, but I highly disagree on all levels. That clever Granny Smith may look all sparkling green in the apple bin... but it's just to fool you. No wonder they call them Granny Smith. It's like biting into a bitter old lady with 9 cats. Grainy. Tart. Yuck.

No offense to bitter old ladies with 9 cats or Granny Smith fans... I love you. Just not the apples. Sorry.

These apple muffins in particular are fantastic. And while you could go ahead and use Granny Smith if that's your preference, I prefered a combo of my two favorites: Fuji and Red Delicious. One of each, to be specific. And as unhealthy as they may look, the only guilty thing about these babies is the brown sugar topping and perfect maple icing that pairs along with it. Seriously. Maple Icing... Where have you been all my life? I could have sat there dunking apple pieces in that stuff until I had a sugar stroke. No lie.

They are made primarily with applesauce in replace of butter and oil, with a little bit of yogurt to help keep them moist. I sifted the flours together twice to get a more light crumb but you can just go ahead and whisk them if you prefer. They are loaded with cinnamon and have just a tad bit of actual sugar in them. I couldn't really find one recipe for these in specific so I just ended up mixing some recipes together and bam: Apple Muffins.

By the way, these are worth going to the store and buying real maple syrup for. Don't use that fake pancake stuff. It's not the same AT ALL.

I hope you all are enjoying apple season as much as I am. Even if you do like Granny Smith.


Apple Muffins with Maple Icing

Ingredients:
1 cup whole wheat flour
1 cup all-purpose flour
1 teaspoon baking powder
1 teaspoon baking soda
1/4 teaspoon salt
1 tablespoon cinnamon
1 cup unsweetened applesauce
1/4 cup granulated sugar
2/3 cup brown sugar
2 egg whites, lightly beaten
1/2 cup plain fat-free yogurt
2 medium sized apples, cored and coarsely chopped
1/4 cup toasted slivered almonds (optional)

Crumble Topping:
1/4 cup brown sugar or granulated sugar
1/4 cup oats, rolled or quick-cooking
1/4 cup whole wheat flour
1/2 teaspoon ground cinnamon
3-4 tablespoons butter, cold
handful of toasted slivered almonds, optional
(if you like A LOT of topping, double this)

Maple Icing:
1/3 cup powdered sugar
2 tablespoons REAL maple syrup (NO PANCAKE SYRUP)
1 teaspon to 1 tablespoon milk, to thin

Directions:
1. Preheat oven to 400F degrees. Prepare muffin tins with nonstick cooking spray or liners.
2. Sift or whisk the flours, baking soda, baking powder, cinnamon and salt together in a medium bowl. Set aside.

3. Whisk together the sugars and applesauce in a large mixing bowl. Add eggs and yogurt. Mix until smooth.

4. Combine the flour with the applesauce mixture and stir until no trace of flour remains. Mixture will be thick. Fold in chopped apples and almond slivers, if using.

5. To make the crumble topping, combine brown sugar, cinnamon, flour, oats, and almonds together. Using a pastry cutter or your fingers, cut in the butter in small pieces until mixture is crumbly.

5. Distribute batter evenly between muffin cups, sprinkling the crumble topping on each one as desired. Bake at 400F for 18-20 minutes (NOTE: Mine were done in 14 minutes so make sure to check them with a toothpick a little earlier on). Cool on wire rack when done.

6. While muffins are baking, make the maple icing. Simply whisk together the powdered sugar, maple syrup. Add milk in teaspoonfuls until icing drizzles easily off the tip of a spoon or fork.

7. Once muffins are done and cooled, drizzle maple icing on each one. Don't be flimsy with it either. I'm watching you.

Makes 16-18 Muffins.

Monday, October 11, 2010

Persimmon Coffee Cake


Fuyu Persimmons.

Does anyone else know what they are? Huh? Anyone out there?

Hello? Japan? Can you please explain yourself, here? Because I seriously need to know why these haven't been apart of my life until now. What else are you hiding from me?

Fuyu Persimmns. They blow my mind.

Upon my first meeting of the Fuyu Persimmon (not to be confused with its sister fruit, Hachiya Persimmon), I thought it was a tomato. Imagine my surprise when I brought a buttload of them home under the impression that I'd be eating BLT's all week, only to be told that those were definitely not tomatoes, but a fruit instead (yes, I know tomatoes are technically a fruit but I would rather not get into a political discussion about fruit today). I didn't believe it until I ran a knife through it and heard the familiar *crunch* noise that followed. It was as if I was cutting a juicy, firm, ripe apple. Except the taste was entirely different. Subtly sweet with a hint of what seems like cinnamon or honey, Fuyu Persimmons quickly became one of my favorite fruit the minute I snacked on it.

Which is why I had to take a perfectly healthy fruit and throw it in some butter and brown sugar and make a coffee cake.

What? It's only the logical thing to do.


In most persimmon recipes, they tell you to puree the fruit first due to its hard texture. But I merely chopped these up, threw them with some baking powder and then folded them into the batter like you would do for apples or pears. The result was a still slightly firm but mostly soft fruit buried within the coffee cake, giving bursts of flavor in every bite. Not only that, but the perfect crumble on top brings it all together for an awesome sunday morning treat or weekday brunch.

Or just a snack every time you pass by the kitchen. I'm not kidding. You won't be able to pass by this without grabbing little bits here and there.

I plan on experimenting with this fruit a little more since I still have quite a few left over. If you want you could easily substitute the persimmons for apples, pears, or any other fall fruit.

Just don't confuse them for tomatoes. It might mess up everything. Especially if you planned to use them for spaghetti sauce. Although, Fuyu Persimmon Spaghetti Sauce might turn out pretty awesome... Y'never know.


Fuyu Persimmon Coffee Cake

Coffee Cake Ingredients:
1 cup whole wheat flour
1 cup all-purpose flour
1 teaspoon ground cinnamon
1teaspoon ground cloves
1/4 teaspoon nutmeg
2 teaspoon baking powder, divided
1 stick butter, softened
1 1/2 cup granulated sugar
2 eggs
2 teaspoons vanilla extract
3 cups chopped fuyu persimmons (3 medium persimmons, chopped)
1/2 cup of golden raisins (optional)

Crumble Topping Ingredients:
1/2 all-purpose flour
1/4 cup brown sugar, packed
1 1/2 teaspoon ground cinnamon
1/4 cup butter, cold
powdered sugar (optional)

Directions:
1. Preheat oven to 350F. Butter and flour a 9x13in. pan. Stir 1 teaspoon baking powder with chopped fuyu persimmons in a medium bowl to coat. Set aside.

2.
Sift together all dry ingedients (flour through 1 teaspoon baking powder) in a medium bowl and set aside.

3. Mix together butter and sugar until creamy. Blend in eggs and vanilla until the batter is light and fluffy. Fold in the fuyu mixture into the batter.

4. Blend the flour mix into the fuyu mix until no trace of flour remains.

5. In a seperate bowl, make the crumble topping. Whisk together flour, brown sugar, and cinnamon. Cut in the butter with a pastry cutter or your fingers until the batter is crumbly.

6. Pour the fuyu batter into the 9x13 pan, sprinkle the crumble topping evenly ontop.

5. Bake at 350F for 30-50 minutes or until a knife/toothpick comes out without crumbs when inserted into the middle. Let cool on a wire rack. Dust with powdered sugar if desired.

Tuesday, October 5, 2010

Roasted Banana Muffins with Brown Sugar Topping


Bananas.

Gwen Stefani and I can relate to them.

Because apparently, a lot of things make me bananas.


For example, when I walk past the kids section of our bookstore on a saturday night after a family of six have been sitting there for 3 hours.

I go bananas.

When it's 8 in the morning and I am ready for my cuppa coffee only to find that the coffee bin is bone-dry empty,

I go bananas.

When my bank decides to withhold 300+ dollars from me for 2 weeks just 'cause they feel like it,

I go bananas.


When I'm in a public bathroom and at the last possible second I realize that there is no toilet paper left for the stall,

I go bananas.

And then I panic and start having violent convulsions and delusional thoughts about how I am going to get said toilet paper without coming into another humans contact or leaving the stall with my pants on the ground.

But mostly I just go bananas.


The point is, bananas and I have a long history together. I know how bananas feel. Which is why I couldn't help but feel just a little bit bad when I threw them in the oven, roasted them until they were caramelized and then mashed them all together to make a muffin.

But then I ate them with some coffee, and I didn't feel bad anymore.


These muffins are incredibly moist, low in sugar, and really not that bad nutritional wise for you. Especially if you skip the brown sugar topping (but that might drive you bananas). Since I didn't completely mash them up they have little chunks of banana sticking out here and there making them really visually pleasing when you open them up. Made with mostly whole wheat flour, no eggs, 3 lovely black as night bananas and 1/2 cup sugar, they are an appropriate breakfast item especially if you schmear some all natural peanut butter on top. Mmm.

Try 'em out. Their delicious, and roasting them doesn't take too long and certainly makes all the difference.
Roasted Banana Muffins with Brown Sugar Topping

Banana Muffin Ingredients:
1 1/2 cup whole wheat flour (I used 1 cup whole wheat, 1/2 cup all-purpose)
1 teaspoon baking soda
1 teaspoon baking powder
1/4 teaspoon salt
1/2 teaspoon cinnamon
1/4 teaspoon nutmeg
1/2 cup white sugar or brown sugar (I used white)
3 very ripe bananas
1 egg, whisked (optional, I omitted and it came out great)
1/3 cup fat-free sour cream
1/2 teaspoon vanilla extract

Brown Sugar Topping
1 tablespoon quick cooking oats
1 tablespoon whole wheat flour
1/3 cup brown sugar
dash of cinnamon

Directions:
1. Preheat oven to 425F

2. First, make 3 in. slits into the bananas skin. Place them into the oven (or a conventional oven) for 15-20 minutes or until juices start flowing out of the slits. Remove from oven and let them cool down a bit. Reduce oven heat to 350F.

3. In a small bowl, whisk together dry ingredients (flour through nutmeg)

4. Briefly mash bananas together with the sugar, sour cream, vanilla and egg if using until it just combined and still chunky in some areas.

5. Fold flour mixture with banana mixture until there is no trace of flour left. Do not overmix.

6. Pour into prepared muffin tin about 3/4th full.

7. In another small bowl mix the topping ingredients together. Sprinkle evenly over all muffins.

8. Bake muffins at 350F for about 10-15 minutes or until a knife inserted in the center comes out clean.

Makes 12 regular sized muffins and 16-17ish mini muffins.

Thursday, March 11, 2010

Cinnamon Roll Muffins


cinnamon roll muffins

I love going to the dentist.

For serious.

No, not because of the drugs (I swear).
No, not because my doctor looks like one of those dorky guys in medical school with their smartypants black-rim glasses and "I know i'm totally awesome/smart but I'm all laid back about it" demeanor.
Not even because of the lollipop you get afterwards. Although that's always a welcomed bonus...

None of those things are reasons why I love the dentist.

I love the dentist... 'cause I love getting my teeth drilled.

There is something oddly comforting about someone working on my teeth. Whether it be extracting a tooth or somethin' else... It feels like a nice mouth massage. I know, I am so totally weird. And I mean, the headache afterwards really sucks, but man... The whole vibration in the mouth, against my tooth? So calming! Don't ask me why. I don't know. All I know is that it almost, ALMOST makes up for the fact that they stuck a needle in my mouth. Almost.

Now if they can only switch the lollipops for chocolate, we'll be in business.

I bring this up because I got one my lovely teeth taken out today. Thank God. There is nothing worse than a toothache... for real. I can take burning my hands on a hot pan. Heck, I can even take stepping on a piece of glass every now and then! And migraines. Pfft. One aleve and a nice nap and I'll be better in no time...

But toothaches? Nuh uh. No way. Toothaches = me curled up in bed for five hours crying. No fun. No fun at all.

So even though I'm sitting here, biting down on some gauze and still getting over the fact that ohmygodtheyputafreakingneedleinmymouth, I feel pretty relaxed. And very, very happy. No more toothaches for me. No sir.

Thankfully, I made these wonderful cinnamon roll buns before I went to the dentist. And he didn't even notice. Pffttt.


cinnamon roll muffins


I know, I know. A blog post about cinnamon roll muffins and dentists...Something isn't right here. But that's okay. Because cinnamon roll muffins are involved.

I've been wanting to make a REAL batch of cinnamon rolls for quite some time now... but to be honest, I fear yeast. Using it scares me. And the whole wait-for-an-hour-thing? Yeah. No thanks. When it comes to my cinnamon rolls, I am a woman of conveniance. Sure, maybe one day I'll make 'em from scratch. But till then, I think I'll just fall back on these cinnamon roll muffins. Not only are they dasterdly cute, but they are a quick breakfast/brunch delight and totally warming from the inside out on a very rainy, yucky day. And although they do use yeast, they came out great and I really didn't have any troubles at all.


cinnamon roll muffins

Make 'em! Surprise your family. They make your house smell heavenly. And they will kick any craving you may have to go down to your nearest cinnabun. Promise.

Just remember to brush your teeth after you eat one. ;)

Cinnamon Roll Muffins
(Adapted from Joy the Baker)


1 1/2 cups all purpose flour
1/3 cup sugar
1/4 tsp salt
4 tsp active dry or rapid rise yeast
2/3 cup warm milk (100-110F; low fat is fine)
3 tbsp vegetable oil
1/2 tsp vanilla extract
1 large egg

Filling/Topping

2 tbsp butter, room temperature
2/3 cup brown sugar
3/4 tsp ground cinnamon
pinch ground cardamom

Icing
1 cup powdered sugar
1-2 tbsp milk or cream

DIRECTIONS:
1. In a large bowl, combine flour, sugar and salt. Dissolve the yeast in a measuring cup filled with the warmed milk, then stir milk mixture, vegetable oil, vanilla extract and egg into the flour mixture. Mix well, until very smooth. Pour into prepared pan and let rest for 15 minutes.

2. While the dough rests, mix together butter, brown sugar, cinnamon and cardamom in a small bowl using a fork until all the butter has been incorporated into the sugar and mixture is crumbly. Divide the batter between 12 greased muffin cups. Sprinkle evenly on top of rested dough and press the mixture down into the dough with your fingertips (or swirl in with a spatula.)

3. Place pan into a cold oven, then set the oven temperature to 350F.

4. Bake for about 20 minutes, until bread is lightly browned at the edges and the center of the bread springs back when lightly pressed. Some of the sugar mixture on top may still be bubbling.

5. Cool for at least 30 minutes before whisking the powdered sugar and milk together to form an icing and drizzling it onto the bread. Serve warm. Leftovers can be reheated in the microwave.

Friday, March 5, 2010

Swedish Visiting Cake

Swedish visiting cake


I have to apologize for going (once again) randomly A.W.O.L on my blog. But somewhere between the excitement of finally finding a good job (that I liked), fitting that job into my daily schedule, fitting my baking/social life/videogames/cookie-eating around my job, quitting my job half a week later due to harrassment from my manager, being depressed about said job and eating copious amounts of cookies to cheer me up and then feeling even more depressed due to the fact that I ate copious amounts of cookies, I was just not really in the mood to blog.

Throw in the fact that I'm not allowed to go running and you got yourself a recipe for stress.

But thankfully... thankfully there are simple things in life. Thankfully there is flour, eggs, and sugar. Thankfully, there is an oven that works and mouths to be fed. Cookbooks to be read and ovens to be turned on at 350 degrees.

Thankfully there is... cake.

Swedish visiting cake


If there is anything more simple than this cake... I would like to find out what it is. Or, rather, if there is anything as simple and good tasting than this cake.

Dorie Greenspan... you're a genius, man (like my little rhyme there? Smoooooth).

This cake, a "swedish visiting cake", is spectacular. Though it uses common ingredients found in most cakes, it has a different way of mixing, thus giving the cake a very crumbly, almost sweet bready taste. With this particular dessert, there is no shame in using your finger tips to eat it. As long as it's accompanied with a napkin to catch the crumbs that will inevitably scream mutiny and try to escape from your grasp, leaving its brothers and sisters to accept their fate...

The crumb. It lives to see another day.

If you've got some almonds, sugar, butter, lemon zest and eggs on hand...then I highly recommend making this cake. It's simple. It's easy. It won't get you fired from your job. In fact, it might just get you promoted. And the cool part is? You can even make it in a cast-iron skillet for ultra awesome presentation. Or you can be like me and use a cake pan. Whatever works.

Swedish visiting cake
Swedish Visiting Cake
(adapted from Baking, From My Home to Yours by Dorie Greenspan)


INGREDIENTS:
1 cup sugar, plus extra for sprinkling
Grated zest of 1 lemon
2 large eggs
1/4 teaspoon salt
1 teaspoon pure vanilla extract
1/2 teaspoon pure almond extract
1 cup all-purpose flour
1 stick (8 tablespoons) unsalted butter, melted and cooled
About 1/4 cup sliced almonds (blanched or not)

DIRECTIONS:

1. Center a rack in the oven and preheat the oven to 350 degrees F. Butter a seasoned 9-inch cast-iron skillet or other heavy ovenproof skillet, a 9-inch cake pan or even a pie pan.

2. Pour the sugar into a medium bowl. Add the zest and blend the zest and sugar together with your fingertips until the sugar is moist and aromatic. Whisk in the eggs one at a time until well blended. Whisk in the salt and the extracts. Switch to a rubber spatula and stir in the flour. Finally, fold in the melted butter.

3. Scrape the batter into the pan and smooth the top with a rubber spatula. Scatter the sliced almonds over the top and sprinkle with a little sugar. If you're using a cake or pie pan, place the pan on a baking sheet.

4. Bake the cake for 25 to 30 minutes, or until it is golden and a little crisp on the outside; the inside will remain moist. Remove the pan from the oven and let the cake cool for 5 minutes, then run a thin knife around the sides and bottom of the cake to loosen it. You can serve the cake warm or cooled, directly from the skillet or turned out onto a serving plate.

Saturday, January 30, 2010

Spiced Buckwheat Pancakes with Sautee'd Apples

buckwheat pancakes with sautee'd applies

Oh yeah. You heard right. Buckwheat. It happened.

Don't worry, I'm not gettin' all fancy and organic on ya.

Anyone who knows me knows that I am not typically a pancake person. Sure, they are good... but I only get a craving for them maybe once or twice a year. Preferably on thanksgiving morning with a tub of whip cream, maple syrup and bacon on the side. Other than that, I'm not really into the whole pancake obsession thing. But after today, I think I might be.

I forget whose blog I was looking at, but I had seen pictures on foodbuzz for buckwheat pancakes, and they looked so beautifully brown and sounded so good I vowed that very moment that at some time of the week, I was going to track down buckwheat flour and make them. And after four trips to the store turned up nothing, I had pretty much given up. It seemed that this flour had disappeared from the world, even in organic supplied markets. I was a sad panda.

But then, last night, at a last minute trip to the store for some milk and chocolate covered pretzels, I thought 'eh, hey, why not' and trudged over to the flour aisle. Surprise, surprise! What did I see? Buckwheat flour.
I was a very, very happy foodie.

buckwheat pancakes with sautee'd applies


While I'm not personally vegan, vegetarian, or anything like that, I am obsessed with this pancake recipe. And with buckwheat added in, it's a lot better for you health-wise than most pancakes. Not that that's going to stop you (or me) from drenching it in maple syrup but hey -- you only live once. And maple syrup... it makes everything better. Except, maybe, brussel sprouts (no offense to any maple syrup brussel sprout lovers out there). I also have an aversion to dairy so this recipe is easily adaptable so that I can make my cake and eat it too (Hah, cake, pancake, get it?).

If you have time, and you can find it -- make these pancakes. Make them with buckwheat flour. Make them with sautee'd apples. Make them with blueberries. Heck, If you're feeling extra decadent, make them with chocolate chips. I won't judge you.

Just don't leave out the maple syrup. Seriously. Maple syrup. Pancakes. It's essential.

buckwheat pancakes with sautee'd applies


Or, if you're my brother, serve yourself a pair with a generous scoop of vanilla bean ice-cream.
It'll be our little secret.

Spiced Buckwheat Pancakes with Sautee'd Apples
(makes about 8 medium sized pancakes, and around a dozen silver dollar sized ones)

INGREDIENTS:

Pancakes
3/4 cup buckwheat flour
1/4 cup whole wheat flour
1/2 teaspoon baking powder
1/4 teaspoon baking soda
1-2 tablespoons sugar (depends how sweet you like your pancakes)
1/2 teaspoon salt
1 teaspoon cinnamon
3/4 teaspoon nutmeg
1/4 teaspoon ginger
3/4 cup almond milk mixed with 1 teaspoon lemon juice (or 3/4 cup buttermilk)
1/4 cup water (or additional milk)
1 egg white, beaten until foamy
1 teaspoon vanilla
2 tablespoons unsalted vegan butter, melted (or regular butter) and cooled completely

1/2 cup add-ins (optional, such as blueberries, nuts, chocolate chips, etc)
1 tablespoon sugar mixed with 1/2 teaspoon cinnamon, for sprinkling (optional)

Sautee'd Apples
1 large apple, thinly sliced
1 teaspoon butter
1 teaspoon cinnamon
1 tablespoon sugar

DIRECTIONS:

1. Combine dry ingredients and any mix-ins (such as blueberries/chocolate chips/nuts) in a large bowl with a whisk, set aside.

2. In a large liquid measuring cup, combine almond milk, water, egg white, vanilla extract and melted butter. Whisk together till just combined.

3. Slowly pour wet ingredients into dry ingredients, stirring gently with a spatula or wooden spoon. Stir JUST UNTIL there are no signs of flour left. Don't worry if it's lumpy. It's suppose to be. Do not overmix.

4. Heat up a skillet to medium heat and spray lightly with cooking spray. When skillet is hot enough, test the heat by sprinkling water on it. If the water drops start to sizzle and dance, it's hot enough. If they evaporate immediately, turn down the heat a notch. If they don't evaporate or dance, turn the heat up.

5. Drop by 1/4 cupfuls (use a 1/4 measurement cups or 3 tablespoons) onto skillet. When the top of the pancakes start bubbling (it shouldn't take very long), flip pancakes over with a spatula and cook just a minute longer. Take off skillet and continue until there is no batter left. Makes about 8 medium sized pancakes, or a dozen silver dollar sized ones. Sprinkle with sugar/cinnamon mix if using.

6. To sautee' apples, take a seperate skillet and melt 1 teaspoon of butter over low heat. Throw in sliced apples, cinnamon, and sugar, and stir together until apples are coated. Cook until apples are soft, but still slightly firm.

7. Serve pancakes warm with sautee'd apples, real maple syrup, whip cream and freshly brewed coffee. And vanilla ice-cream, if you're feeling particularly naughty.

Thursday, December 31, 2009

Brown Butter Snickerdoodle Muffins

snickerdoodlemuffins


When it comes to New Years... I'm not too big on whole "I'm gonna be a better person" or "i'm gonna eat healthy" or "I'm gonna do something great this year" switch that seems to get hit everytime our calenders restart and January rears its head back into our lives. Not that I'm against anyone who does do that. In fact, if it really does help you to set goals for yourself every year -- be my guest and do it man. I'll be right here rooting you on (yeah! eat those veggies!)

But as for me... setting goals at the start of the year makes me feel like, if I should need an exact date to change something important about myself, to better myself as a person, then why even bother at all? I should be wanting to do that every day. I should be wanting to treat my family nice all the time. I should be wanting to show the people I love that I love them every day. I should be eating healthy because It's good for me, not because I have to shed off all the pounds I may have gained by eating a cookie or two (or five). I shouldn't need one day out of the year to be the starting point of becoming the person I want to be. And really, I just feel like I'm setting myself up for failure more than anything else. Because when I make resolutions, I tend to go the "welp, there goes that" approach and just give up altogether. Well, not this year!

snickerdoodlemuffins


Instead of sitting here thinking of ways to better myself this year... I'll just keep doing what I've been doing. Trying to follow God as best that I can, being the person He wants me to be, and in the process treating everyone I love with the respect and care that they have given me. I'll count my blessings and instead about worrying of what will come three or two months from now, focus on today.

And most of all, I will keep baking whatever I friggin' want -- healthy resolutions or not!

And I am totally not saying that just because these muffins are probably one of the most delicious things to have ever graced my kitchen. Not even joking with you.

snickerdoodlemuffins


All new years talk aside... these muffins are amazing. I can't even begin to explain to you how good these are. They have even converted a muffin hater like myself to be tempted for another bite.

These are definitely no ordinary cinnamony/sugar muffins. They have a beautiful depth of buttery flavor that comes from browning the butter in a saucepan until the butter is a nice bronze, emitting a wonderful nutty aroma that will make you want to shove your face in the saucepan (disclaimer: I am by no way responsible for any known injuries if you actually do this) and forget the muffins altogether. But please, please refrain from doing so. Because these muffins are just too good to pass up. And don't you even think of using plain, normal butter. Brown butter is definitely the way to go with these babies.

Not only that, but they have a gorgeous cinnamon sugar crust on top. While you could do a crumble crust, or just simply sift some powdered sugar over the muffins instead once they've cooled -- the crust really does make for a simple and elegant presentations and a wonderful crunch right before you hit the soft, slightly dense snickerdoodley crumbs that lay underneath; truly living up to its name as a "Snickerdoodle Muffin".

So if you're not totally sick of the holiday sweets, and you've got a soft spot for snickerdoodles (we're all big snickerdoodle lovers in my family), make these! And if you really don't trust yourself around them but still want to make them, do what I did and give them to your awesome neighbors as a New Years gift. Ten bucks says as soon as they smell the warm, cinnamon fragrance coming from these babies, they aren't gonna dare turn them down.

snickerdoodlemuffins


Or you could just hog them all to yourself and love them and call them George. Your call.

Snickerdoodle Muffins
(Adapted from Culinary Concoctions by Peabody)


Makes about 12 normal muffins and 20ish mini muffins.

INGREDIENTS:
1 stick unsalted butter, browned (see directions for instructions on browning butter)
3/4 teaspoon baking soda
3/4 teaspoon cream of tarter
1/2 teaspoon cinnamon
2 cups all-purpose flour
1 cup sugar
2 teaspoons vanilla extract
2 eggs
1/2 cup milk
1/2 cup sour cream

1/2 cup sugar and 1 tablespoon cinnamon mixed together for topping (optional)

DIRECTIONS:

1. First, to brown your butter, get out a non-stick saucepan and set the heat on medium-low. Stick your stick (hah) of butter inside the pan and let melt completely. Butter should start foaming up on top, which will make it hard to see if it is "browning" or not. Don't worry, if this happens, determine if it's done or not by smell. As soon as the butter begins to starts to emit a nutty smell, give it a stir or two with your fork. It may start bubbling (thats ok). Keep the butter over medium-low heat for about 2 minutes after it starts to smell nutty. Stir again and let it bubble for a little longer, about 1 minute or so. You should see a bit of caramelization on the sides of the saucepan building up, and the smell should be getting stronger and more "caramel"-y. When this happens, take the saucepan off the heater and let cool. The foam will die down and you should be left with a glorious bronze color. If your butter does not foam (some dont) then just wait for the butter to get a bronze color before pulling it off the saucepan.

2. After browning your butter, LET IT COOL COMPLETELY. This is important because we do NOT want hot butter to go with the eggs as they will start cooking.

3. Preheat your oven to 375F degrees, spraying a paper-lined 12 cup muffin or 2 mini muffin tins with nonstick spray.

4. In separate bowl, mix together flour, baking soda, cream of tartar and cinnamon.

5. In your mixing bowl (the one that will hold your muffin batter), take a whisk and whisk together the sugar, eggs, COOLED brown butter, vanilla, milk, and sour cream. Do not over whisk. It's okay if there are a few lumps from the sour cream.

6. Add flour mixture and whisk in JUST UNTIL there are no signs of flour left. Once again, DO NOT OVERMIX. It's okay if the batter is lumpy -- it's suppose to be.

7. If using the sugar and cinnamon topping mix, GENEROUSLY cover the top of each muffin with the mix (about a heaping tablespoon for each).

8. Bake muffins at 375F for 15-20 minutes, sticking a toothpick in the middle of one of the muffins to check for doneness (in other words, the toothpick should come out with only a few moist crumbs). Take out and cool muffins on wire wrack.

9. Muffins can be frozen and then warmed in the oven or microwave if desired. These are best served warm and out of the oven with a strong cup of coffee.

Monday, November 30, 2009

Cranberry Almond Cream Cheese Muffins


Can I be honest for a second?

I am not a muffin person.
At all.

When I sit down and think about what I want for breakfast, I never think: "Gosh, I could really go for a jumbo blueberry muffin right now..."

New York crumb cake on the other hand, is an entirely different story. But that's irrelevant.

Muffins aren't usually on my list of things I crave; I'd go for a bowl of oatmeal with some sliced bananas and cinnamon before I'd go for a banana muffin, even if it had the same taste as my oatmeal.

I guess what I'm trying to say is that I'd rather eat something that looks like more for breakfast than just a hand-sized muffin.

I'm also not a cranberry person... unless those cranberries are reduced to a sauce with balsamic vinegar and lots and lots of sugar. They are way too tart for my liking and I even dislike craisins, to an extent, because they are too sweet. Cranberries seem to get a bad rep in my life for being too tart or too sweet, so I never got into the habit of using them or eating them or including them in my every-day diet.

So the fact that one of the first baking recipes I ever made from scratch was: 1) A muffin and 2) filled with cranberries; is sort of ironic in a funny "wow, that's unexpected" kind of way.

But I've come to realize that bakers are just that. Unexpected. Weird. A little funky. And a little too quick to lick the spatula.

(Yeah, right. Since when is anyone too quick to lick the Spatula/bowl/detachable mixer handles?)

Personally, I love my little almondy cranberry muffins. They pack some serious moistness due to the fact that they are made out of 8 ounces of cream cheese instead of a cup of butter. In fact, these little muffins are probably low-carb power houses and if you happen to be on a low-carb diet then you'll wanna whip these babies up in no time because they are pretty gosh darn filling.

They don't need any additional oil to keep them nice and mosit -- the cream cheese does all the work. And the fact that they've got about 3/4 cup of oats thrown into them just means you're getting your whole-grain carbs, too!

Okay, now I'm just looking for excuses to make a muffin sound healthier than it is.
Forgive me. Some days I'm a baker. Some days I'm a dietitian. It's a rough line to balance on.

While you can choose to bake these in regular muffin tins, I go for the mini muffins one, just because that means that I have more of them and plus -- everything looks cuter when it's mini. Except Minnie Mouse. She's just creepy.

So if you're not like me, and you like cranberries and muffins, definitely make these. They're good. They're kinda good for you. And they are totally yummy.

Cranberry Almond Cream Cheese Muffins
(Recipe By: Alexandra Ramirez)

INGREDIENTS
1/2 cup all-purpose flour
1/2 cup whole wheat flour
1/2 cup almond meal/almond flour
3/4 cup oats, quick-cooking
1/2 teaspoon salt
4 teaspoons baking powder
1/4 teaspoon cinnamon
8 oz cream cheese, softened
3/4 cup sugar, divided
1/4 teaspoon vanilla extract
2 eggs
2/3 cup buttermilk
1/2 cup fresh chopped cranberries
1/2 cup finely chopped almonds or slivered almonds

CRUMB TOPPING
1/2 cup almond meal
1/4 cup chopped or slivered almonds
6-7 tablespoons butter, melted
2 tablespoons sugar

DIRECTIONS

1. Preheat oven to 350F and grease 2 12 cup mini muffin tins (or a 12 cup regular muffin tin)

2. Whisk together flours, oats, salt, baking powder, and cinnamon in a small bowl. Set aside.

3. In a large bowl, beat together cream cheese with 1/2 cup sugar until smooth and creamy. Add vanilla extract, and beat in briefly.

4. In another seperate bowl, whisk together 2 eggs and remaining sugar until smooth and thick. Pour into the bowl with cream cheese, and blend on low until just combined (be careful not to overbeat here).

5. With a wooden spoon or spatula, begin to stir in flour mixture slowly. As you are stirring in the flour to the cream cheese mix, slowly pour the buttermilk in along with it. Continue to stir until there is no flour left. Your batter should be very lumpy but still wet.

6. Stir in cranberries and almonds.

7. Fill in muffin cups with batter about 3/4 of the way (a heaping tablespoon should do it for the mini muffin tins).

8. Prepare crumb topping by stirring the almond meal, chopped almonds and sugar together. Add melted butter. Stir until thoroughly coated and crumbly. Sprinkle generously over muffin tops.

10. Bake at 350F for 15-18 minutes. Muffins should be lightly brown on their sides but still generally light colored. When out of the oven, loosen the edges of the muffin from the tin with a clean, slick knife. Remove and cool on wire wracks.

Makes 24 mini muffins or 12 regular sized ones.
 

Dunk Twice Copyright © 2009 Cookiez is Designed by Ipietoon for Free Blogger Template