Showing posts with label cake. Show all posts

Wednesday, April 20, 2011

Vanilla Cupcakes with Vanilla Bean Lemon Buttercream

Sometimes, I forget why I love baking.

I get so caught up in all the hustle and bustle of the day that I just...forget. I forget what butter and sugar look like mixed together. I forget what it's like to feel dough kneaded between my fingers. I forget what it's like to spread homemade icing on a cake, or pressing down buttery delicious graham cracker crumbs into a springform pan. I forget the heat of the oven, the smell of freshly baked cinnamon apple muffins, the first bite into a homemade cookie...

I forget all of the things that are so important to me. That keep me calm, balanced, and happy.

Baking has always been my get-away vacation from the norm. It's time I spend alone in a kitchen with nothing but frantic ideas. It's relaxing, for the most part. And even when it's not -- even when you take a task on so great that you end up curled into a ball on the kitchen floor with icing in your hair and a mess on the counters... you still feel like you conquered the world once that awesome dessert you spent 5 hours to perfect is on your table ready to be served, its demanding presence drawing everyone in.

They ooh, and ahh, and smile, and become happy with each bite. Therefore, making you happy in the process. Because not only did you totally kick that recipes BUTT, but you made people smile and forget their problems.

Baking is a gift. And I need to find more time in my life to do it.

That's why I forced myself in the kitchen yesterday. Though I dreaded the pile of dishes that would follow, I proceeded with confidence. I thought up a recipe. I mixed it all together. I baked them at 350F. And then I frosted them.

Thus, the birth of Vanilla Cupcakes with Vanilla Bean Lemon Buttercream.

And despite the natural light outside not doing well for my little starter DSLR, I went ahead and posted anyway.

'Cause honestly? These cupcakes could make anyones day ten times better.
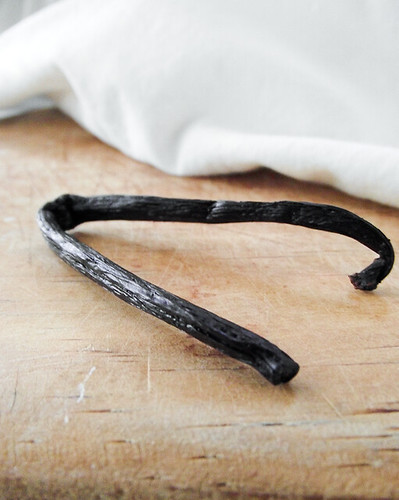
I've never actually used real vanilla bean in a recipe before, so I was excited when I did for this one. I practically jumped around the room, showing everyone my vanilla bean.

I must've sounded like some kind of Ina Garten obsessed freakshow.

"Look! LOOK! It's a VANILLA BEAN. A REAL VANILLA BEAN! Oh my God. It's the pod and everything! Holy crap! I've only seen this on the teevee!"

Sadly, no one seemed as enthralled by it as I was.

Whatever. Don't judge me.

Anyway, I'm glad I mixed this into the buttercream. It added a fantastic vanilla flavor that I just loved. I used just a little bit of lemon, not enough to overpower it. I didn't want to get rid of that vanilla bean flavor. But you can definitely taste undertones of it. And when your teeth hit the perfect, fluffy vanilla cupcake underneath, you will be in spring HEAVEN.

It's really great to make for any spring-time get together, for church or just for friends coming over for a bit. I highly recommend eating it outside with a pitcher of lemonade while it's nice and sunny...preferably by a pool :) (If you don't have a pool, that's ok -- i'm sure those weird neighbors across the street wont mind you using theirs.)
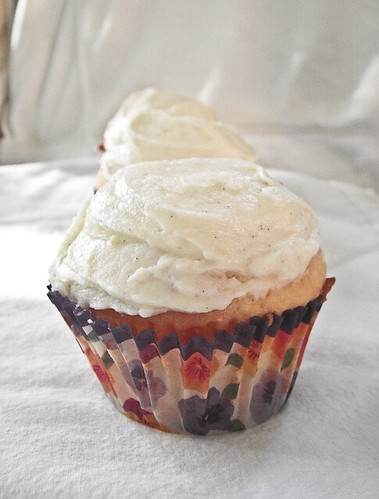

Vanilla Cupcakes with Vanilla Bean Lemon Buttercream

INGREDIENTS:

Vanilla Cupcakes
1 1/2 cups all-purpose flour
1 cup sugar
1 1/2 teaspoon baking powder
1 stick butter (8tbsp), room temperature (VERY important!)
1 egg
2 egg yolks
1/2 cup sour cream or full-fat yogurt
1 1/2 tsp vanilla extract

Vanilla Bean Lemon Buttercream
1 vanilla bean
1 large lemon (or 2 small)
1 tbsp vanilla extract
2 sticks butter (16tbsp), room temperature
3-4 cups powdered sugar

INSTRUCTIONS:

1. Preheat oven to 350F. Place cupcake liners in a 12pc cupcake pan or spray with nonstick spray or bakers spray.

2. In an electric mixer with a paddle attachment (or hand mixer), combine the flour, sugar and baking powder together. Add in the butter, eggs, vanilla, and sour cream/yogurt, and mix for 30 seconds (or 1 minute for hand mixer) until the dough is smooth with no clumps, making sure to scrape down the sides.

3. Disperse batter evenly into cupcake pan. Place in the oven and bake for 20-25 minutes or until tops are pale golden and a toothpick through the middle cupcake comes out clean. Once done, leave to cool on a wire wrack.

4. Meanwhile, make the frosting. To a bowl, add the butter, vanilla extract, the zest of 1 large lemon, and the juice of the same lemon. Mix together briefly to combine. Using a sharp knife, cut down the middle of the vanilla bean and scrape the beans inside out and into the mixing bowl. Mix again until the beans are incorporated into the butter. Add 3-4 cups gradually to the bowl until your frosting has the consistency you like, checking for taste after each addition (make sure it's not TOO sweet!)

5. Once cupcakes are cooled COMPLETELY, frost cupcakes as you desire (I just swirled them on with a knife... I'm simple.)
Saturday, March 26, 2011

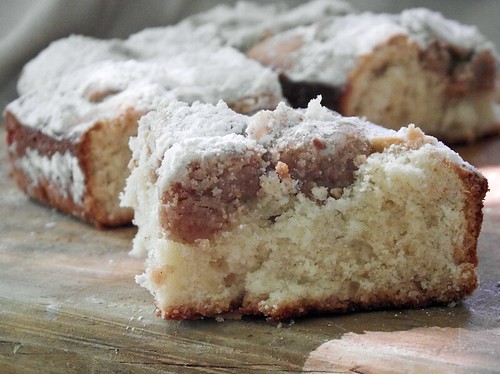
New York Style Crumbcake


Every once in awhile, when my father wanted to treat us, he would drive us after church to a bakery called "Entenmans" off the side of the highway. I remember walking in and just looked at the boxes and boxes of pound cakes, chocolate donuts, cream cheese danishes and chocolate chip cookies. I would look through them excitedly, not straying far from my father. He would smile at me and say, "pick one thing you want", while picking out some things for himself and the rest of the family. My eyes would get wide with excitement, and I would stand there, stuck with a choice that as a child seemed so absolutely life-threatening. If I got the chocolate chip cookies, I wouldn't have any orange pound cake. But if I got the pound cake, then I wouldn't get any chocolate chip cookies. I remember always standing there anxiously, thinking hard.


But there was one item that they sold there that I was honestly addicted to. One of the best things I had ever eaten: New York Style Crumbcake. It had a brilliant small crumb on top, moist cake underneath and powdered sugar all around. If I ever came to a fork in the road about what I wanted, my hands immediately went for the crumb cake. I would constantly sneak into the kitchen, grabbing another slice, until my father would ask who was eating all of the crumb cake and I'd keep my mouth closed and grin to myself sheepishly.

Unfortunately the bakery near me closed down, and now we can only buy some in packages at the super market, which never tasted exactly like the ones that came from the place we went to. And no matter how hard I've tried, I've never been able to completely mimic the taste in a recipe. But I've come damn close with this cake. Infact, I am perfectly fine with settling for this if I cannot get the best, because aside from a bit of dryness at the cake part underneath, this crumb cake was 100% DELICIOUS. And if you are a fan of the crumb cake, then you will like this. I do recommend using something to keep the cake moister or richer... Maybe more butter, or perhaps sour cream in place of buttermilk. Either way, it's an awesome way to treat yourself or just eat something new. Just makes sure you poor some powdered sugar all over these... It's just not right without it.

New York-Style Crumb Cake
Adapted from America's Test Kitchen

INGREDIENTS:
For the crumb topping:
1/3 cup granulated sugar
1/3 cup dark brown sugar
1/8 teaspoon salt
3/4 teaspoon ground cinnamon
1/2 cup (1 stick) unsalted butter, melted, still warm
1 3/4 cups cake flour

For the cake:
1 1/4 cups cake flour
1/2 cup granulated sugar
1/4 teaspoon baking soda
1/4 teaspoon salt
6 tablespoons unsalted butter, at room temperature
1 large egg
1 large egg yolk
1 teaspoon pure vanilla extract
1/3 cup buttermilk, at room temperature

DIRECTION
Set an oven rack to the upper-middle position and preheat the oven to 325 degrees. Spray an 8-inch square baking dish with nonstick cooking spray and line it with a strip of parchment paper or aluminum foil that is just shy of the width of the dish and long enough to overhang the sides of the dish. Spray the parchment paper with nonstick spray as well.

In a medium bowl, stir together all the ingredients for the crumb topping until they form a smooth dough. Let the dough rest for 10 minutes while you prepare the cake.

In the bowl of an electric mixer, stir together the cake flour, sugar, baking soda and salt at low speed. With the mixer running on low, add the butter chunks one at a time, letting each one incorporate into the dry ingredients before adding another. When the mixture resembles even, moist crumbs, add the egg, egg yolk, vanilla and buttermilk, and increase the speed to medium. Beat until the batter is light and fluffy, about 2 minutes. Scrape the batter into the prepared pan.

Break apart the crumb topping into large pea-sized pieces, rolling them slightly in between your fingertips to get them to hold their shape. Spread the crumbs in even layer over the batter. Bake until the crumbs are golden and a cake tester inserted into the center of the cake comes out clean, 35 to 40 minutes. Cool on wire rack at least 30 minutes. Lift the cake out of the pan using the parchment handles. Dust with confectioners' sugar just before serving.

Friday, March 4, 2011

Dulce De Leches Cheesecake


For some reason, gossip never seems to go out of style no matter how old you are. You could be 40 years old and still stuck in a inferno of twisted stories. Sure, they may start off innocent. One person telling another person that they saw some hot golfer guy that lives down the street from them helping Crazy Old Lady Tooters with her groceries. Then the person you told says something about it to someone else, then that someone else says it to someone, and suddenly it turns into:

"Did you hear about what's going on with Crazy Old Lady Tooters that lives down the street?! I heard she's having an affair with the hot golfer guy that's married to that one chick that works at Kmart... I even heard that he got her pregnant! I know she's like 5038 years old but oh, my, GOD!"

Then someone decides it would be a good idea to actually ask the people in question what's going on instead of assuming something. Nine out of ten times they hear something completely different than what their peers said. What was thought to be an affair actually turns into Crazy Old Lady Tooters needing help putting away her groceries because she was too weak to put them up in her cabinets, and hot golfer guy was just being a good ol' gentlemen. No affair. No pregnancy. No bomb conspiracies. No wife who works at kmart being cheated on.

Rumors. They can get sticky pretty fast.


Unfortunately, no matter where you go in life, rumors will eventually find their way to you. I'm currently stuck in one that has been blown so much out of logic that at this point all I can do is laugh that anyone could even come up with stuff. It really is ridiculous. I like a good story now and then, but life isn't a Jerry Springer Show. When it comes to gossiping, I try to keep my mouth shut. I've always lived by the philosophy that whatever people tell me, I won't go blabbing to someone else unless I want to know the truth. And in that case, why not just ask that person straight up? This is one of my favorite bible verses concerning this:

“A gossip betrays a confidence, but a trustworthy man keeps a secret.” Proverbs 11:13

I try to live by this verse when it concerns gossip. Afterall, no one needs to know eachothers private lives.

Now, if you're going to spread rumors about me... At least have it to do something with my baking. Good rumors. Like, "hey, I heard Alex bakes a mean dulce de leches cheesecake"... that, I can live with. Totally. Absolutely. Go right ahead and say stuff about me if you're gonna be saying that.

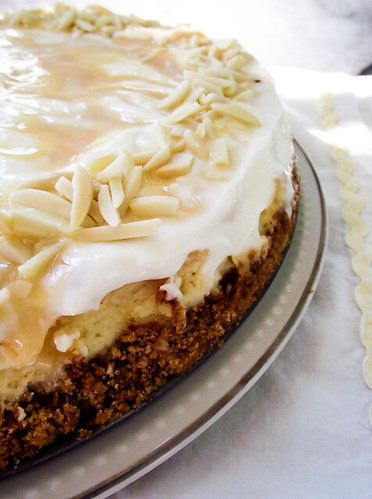
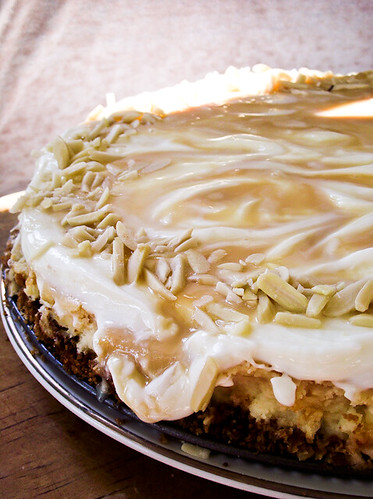
While you're at it, mention that my dulce de leches has a spiced graham cracker and almond crust. And that it's got a sour-cream dulce de leches swirl on top. Tell them it's absolutely splendid, not too sweet not too bitter... A beautiful medium.

And tell them that I will totally make one for them, too.


Dulce De Leches Cheesecake

INGREDIENTS

Crust:
1 1/2 cup graham cracker crumbs (about 12 crackers)
3 tablespoons granulated sugar
6 tablespoons butter, melted and still warm (not scorching hot) to the touch
1 teaspoon cinnamon
1/2 teaspoon nutmeg
3/4 cups almonds


Cheesecake:
3 8oz packages of cream cheese, room temperature
1 cup granulated sugar
2 tablespoons flour
1 teaspoon vanilla extract
1 teaspoon almond extract (can replace with vanilla extract)
3 eggs, room temperature
1/2 cup homemade or store bought dulce de leches (from a 14 oz. can)

Topping:
2 cups full-fat sour cream
3 tablespoons granulated sugar (I added more sugar to this cause I like the topping more sweet, but add more to your own preference)
1/2 cup or whatever remains of the dulce de leches
1/4 cup slivered almonds (to decorate)


DIRECTIONS:


1. Preheat your oven to 320 degrees. Spray a 9in springform pan with non-stick baking spray.

2. To make the crust, take all of the crust ingredients and pulse together in a food processor or blender until fully combined. Press into the springform pan, moving up the sides about an inch or two. Put the crust into the oven for about 10 minutes or until slightly brownish. Take out and let cool while you make the cheesecake filling.

3. Using an electric mixer or handmixer, on a low speed combine the cream cheese with the sugar, extracts, and flour until smooth. Add in eggs one at a time, making sure to mix each egg in completely before adding another. Be careful not to overmix. Reserve 1/2 cup of the cheesecake and set to the side.

4. Pour the filling into the cooled crust. Pour the 1/2 cup of dulce de leches into the reserved 1/2 cup of the cheesecake filling. Whisk together, then drop spoonfuls of the cheesecake dulce de leches filling into the regular cheesecake filling. Swirl together with a butter knife.

5. Bake cheesecake for about an hour or until the cheesecake wiggles only slightly in the middle and the outside of the cheesecake is set.

6. Run a knife around the side of the cheesecake to loosen. Let cool at room temperature for another hour, then pop into the fridge for 5 hours or overnight.

Wednesday, February 16, 2011

Tres Leches Cake (Three Milk Cake)

So I decided to go pink on Valentine's Day.

Real pink.

As in... Pink eye pink. Or should I say blood red.

Yeah. A box of chocolates has never been more needed.

It wouldn't have been so bad if I didn't have to go to the ER two days before Valentine's Day and have my eye forced open by a doctor because it was swollen shut. I was literally blind for the entirety of Saturday. I have never felt so helpless in my life before. You don't realize how much you need your eyes to do everything until you have nothing anymore.

So unfortunately, I spent my Valentine's Day inside, making this delicious Three Milk Cake.

In other words, it wasn't that bad. Plus, eye pain is the perfect excuse for second helpings of anything.

"But sweetie, my eye likes calories... it needs the energy to feel better!"

My boyfriend totally fell for it.
My doctor... ehh, not so much.

But what do they know anyway.

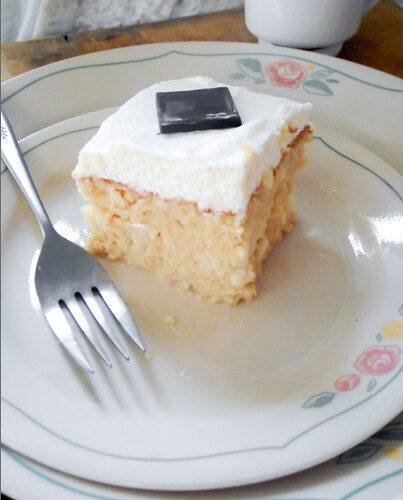
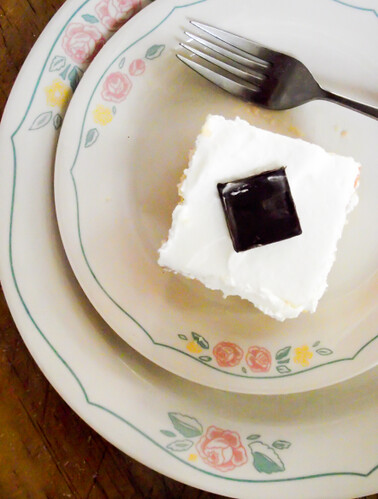
Tres Leches Cake, or Three Milk Cake, is a dessert quite popular in Latin America. Not only is it ridiculously easy but it's ridiculously delicious and most of the ingredients are pantry staples. I made it for my boyfriends mother, whose birthday falls on Valentine's Day. When I asked her what she wanted, it seemed to be a tie between a cheesecake and Tres Leches Cake.

Obviously, if she picked this over cheesecake, that says something.

My favorite part about this cake is the fact that it's a sponge and it literally does not dry out. Even if you leave it at room temperature or leave a piece uncovered in the fridge on accident, you wont have a dried out piece of cake. It stays moist and delicious, usually with a small pool of milk underneath. And the whipped cream on top stays soft and fluffy. Just the way it's suppose to be.

If you ever make a dessert for any Puerto Rican, Mexican, Honduran, etc, in your life, I guarantee you they will love it if you bring this to their house as a dessert. Just make sure you bring more than one.

Us hispanics like our food in bulk.

Don't judge.

(P.S. Do not, and I repeat, DO NOT buy premade whipped topping for this cake. It will not taste the same. If you're gonna make the cake, you gotta go with homemade topping.)


Tres Leches Cake
(adapted from the Pioneer Woman Cooks)
INGREDIENTS:

1 cup All-purpose Flour
1-½ teaspoon Baking Powder
¼ teaspoons Salt
5 whole Eggs
1 cup Sugar, Divided
1 teaspoon Vanilla
⅓ cups Milk
1 can Evaporated Milk
1 can Sweetened, Condensed Milk
¼ cups Heavy Cream

WHIPPED TOPPING
1 pint Heavy Cream, For Whipping
5 Tablespoons Sugar

INSTRUCTIONS:

1. Preheat oven to 350 degrees. Spray a 9 x 13 inch pan liberally until coated.

2. Combine flour, baking powder, and salt in a large bowl. Separate eggs.

3. Beat egg yolks with 3/4 cup sugar on high speed until yolks are pale yellow. Stir in milk and vanilla. Pour egg yolk mixture over the flour mixture and stir very gently until combined.

4. Beat egg whites on high speed until soft peaks form. With the mixer on, pour in remaining 1/4 cup sugar and beat until egg whites are stiff but not dry.

5. Fold egg white mixture into the batter very gently until just combined. Pour into prepared pan and spread to even out the surface.

6. Bake for 35 to 45 minutes or until a toothpick comes out clean. Turn cake out onto a rimmed platter and allow to cool. While cake is cooling, stick your mixing bowl and your spinners (whether its from a kitchenaid or handmixer) into the freezer along with the heavy cream for the whipped topping.

7. Combine condensed milk, evaporated milk, and heavy cream in a small pitcher. When cake is cool, pierce the surface with a fork several times. Slowly drizzle all but about 1 cup of the milk mixture—try to get as much around the edges of the cake as you can.

8. Allow the cake to absorb the milk mixture for 30 minutes.

9. To ice the cake, take out your thoroughly chilled mixing bowl and spinners and whip 1 pint heavy cream with 5 tablespoons of sugar until thick and spreadable.

10. Spread over the surface of the cake. Decorate cake with whole or chopped maraschino cherries. Cut into squares and serve.

Saturday, February 5, 2011

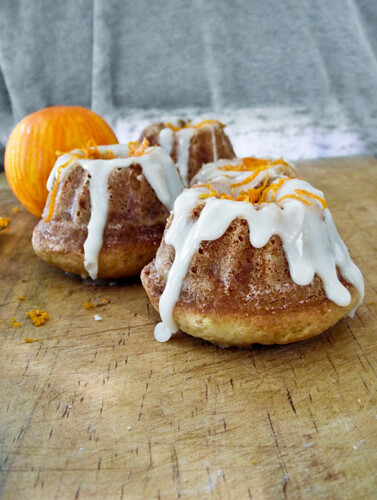
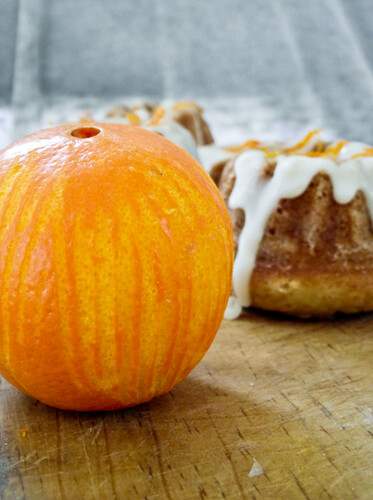
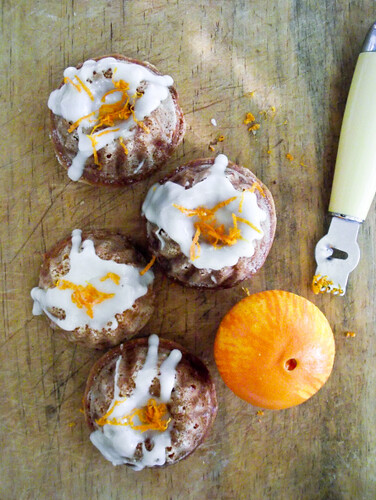
Orange Mini Bundt Cakes with Orange Glaze

Holidays seemed to have kicked me straight in the butt this year. Usually, I'd be baking up a storm all the way 'till Valentine's Day but I seem to have taken a long hiatus from the kitchen despite my beautiful new KitchenAid that I got for Christmas.

It definitely made things a heck of a lot easier... Though I'm pretty sure I pulled some kind of weird shoulder muscle getting that hunk of a machine out of the box and onto the counter.

Homegirl needs to go on a diet ASAP.

Maybe Christmas and New Years burned me out. Shafted along with Chris's 22nd birthday and our anniversary, blogging kind of had to take a backseat for a bit.

But now I'm back. And the Florida sunshine has not followed me into Louisiana territory.

I'm pretty sure it was so cold one night I could see my breath inside the car.

With the heater on.

Totally not awesome.


Among my KitchenAid I did get a lot of more cool gadgets...AKA, this awesome mini bundt pan. Along with one of those brownie pans, a gorgeous glass cake platter (that turns into a punch bowl), and some other little baking goodies in my stocking. Yeah... I got out good this year. And yes, I do still get a stocking. My mother and I made an agreement that I get to have a stocking until I'm married. And I'm not married yet. So there.


While I've made a couple of things already with this pan, It's really fun to make bite-sized versions of little cakes that just look so beautiful glazed or even dusted with powdered sugar. This cake in particular was delicious. Soaked up with an orange syrup and then finished with a zesty citrus glaze...if you're a fan of oranges, this is right up your alley.

I'll be posting more often soon, so be on the lookout for new posts. BTW, you can totally make these in a cupcake pan as well or double the recipe for a full-size bundt cake Just sayin'.


Orange Mini Bundts with Orange Glaze
(makes 12 mini bundt cakes or cupcakes)

Bundt Cake Ingredients:

1 3/4 cups unbleached, all-purpose flour
1 1/2 teaspoons baking powder
1/2 teaspoon baking soda
1/2 teaspoon kosher salt
8 tablespoons (1 stick) unsalted butter
1 cup granulated sugar
3 eggs
1 teaspoon pure vanilla extract
zest of 2 oranges
1 cup sour cream

Orange Syrup Ingredients:
1/3 cup freshly squeezed orange juice
1/3 cup sugar
1/2 teaspoon vanilla

Glaze Ingredients:
1 1/2 cup confectioner’s sugar
1 tablespoon cream
2 tablespoons freshly squeezed orange juice

INSTRUCTIONS:

1. Preheat the oven to 325 degrees. Spray a mini bundt pan with nonstick cooking spray (or line a standard muffin tin with 12 cupcake papers). In a medium size bowl, combine flour, baking powder, baking soda, and salt.

2. In the bowl of an electric mixer fitted with the paddle attachment, cream together butter and sugar and mix until light and fluffy, about 2 minutes. Add in eggs, one at a time, incorporating well after each addition. Add in vanilla and zest. Incorporate sour cream.

3. With the mixer on low, slowly add in dry ingredients and mix until well-incorporated, scraping down the bowl as necessary. Fill each bundt mold halfway with batter (if there is any extra, pour into cupcake liners in a muffin tin). Bake for 15-20, or until a toothpick entered into the center bundt comes out clean.

5. For the glaze: While the cakes are baking, in a small saucepan set over medium heat, combine sugar and orange juice. Boil for 1 minute. When the cakes come out of the oven, allow to cool for 5 minutes, then invert on a wire cooling rack. Pour warm syrup over each of the cakes.

6. Combine all ingredients for the glaze in a small bowl and drizzle over warm or cool cakes.

Monday, December 20, 2010

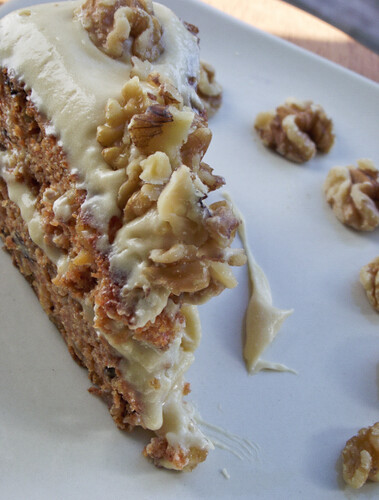
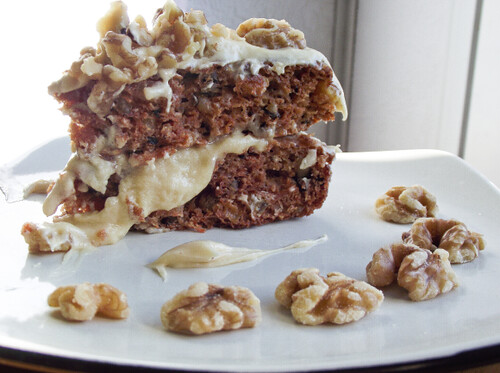
Carrot Cake with Brown Sugar Cream Cheese Frosting


You know how whenever you're having a really bad day, and you say to yourself, "it can't get any worse" and then ten minutes later it gets worse?
Yeahhhh... That was Sunday.

This weekend was my mother and I's birthday weekend. I get told a lot that my birthday kind of gets shafted, you know, with my mom's birthday the day before mine and Christmas 6 days away. You'd think it'd be like, "oh cool! I get double the presents!" but that's totally not the case.

It's more like... "oh, cool! my birthday present is my Christmas present too!"

*Awkward silence*

"....waaaaaaaaitaminute."

Yeah.

Totally not bitter or anything like that. Nope.

Kidding, in all honesty, I don't really mind. After I turned 15 I got really weird about birthdays. I just never liked them after that. Call me crazy, but a whole day devoted to me is not something I'm too into. And no, it's not because I'm Ms. Humble ;) It's because that every time my birthday rolls around, something happens that ends up ruining my whole day. Don't believe me? I can pretty much list every single birthday since I was 14 where somethings gone wrong. It's crazy.

My birthday is like an excuse for the universe to play russian roulette or rather, "let's-press-all-of-alex's-buttons" day. So I prefer to skip the whole birthday thing. It just makes it easier.


However, this year, I decided to bite the bullet and do something.

Instead of being a "party-pooper" on my own birthday, I went ahead and planned to do something I actually wanted to do. What better excuse? It's my birthday. You gotta do it, or else you'll end up on Santa's naughty list and get no presents.

At least that's what I tell my nieces and nephews.

What? It's the only perk of having a birthday close to Christmas. ;)

Anyway, I decided I wanted to bake my own cake (aka the only cake I'll eat besides rum cake), have all my family members over to play a board game, and just really spend time with my family. Something that I have been lacking horribly the past 5 months.

The day didn't start off bad... In fact, it was great. Filled with new york crumb cake and lots of (caffeinated) tea. It was wonderful. Church was awesome, and everyone sang me happy birthday, which caused me to sink into my chair, turn into a tomato and run to North Korea.

Then, all it took was a text message. Our vacuum had broken in the middle of my mother cleaning the house back at home. "Ok, figures," I think to myself, "at least that's all it was".

That should've been the first sign.

Next thing you know, I realize I have no ingredients for the cake I want to make. Ok, another bump in the road, not too bad... Go to the store, get the ingredients, and then see that I forgot the most crucial part of carrot cake.

Carrots.


So, there goes another trip to the store. I start to get jittery at this point, watching the clock all the while. I get home and try to get going as quickly as possible. I get all my ingredients ready, set everything up, butter my cake pans, preheat the oven....

And then the oven catches on fire.

Yeah.

Fire.
Flames.
Fiery flamey flames.

Next thing I know the whole house is filled with smoke and my neighbors are asking if I'm letting Bob Marley stay at my house. The smoke is so dense I can barely see the other side of the kitchen, and as the oven stays on it's not getting any better.

It's at this point that the universe wins and Alex goes into breakdown mode.

"I knew this was going to happen," I cried, shaking an invisible fist to the universe. "This always happens!"

Thankfully, my mom was there. And since she can magically make everything better, the day didn't end in disaster and fiery flames. She helped me calm down, clean up the oven, keep baking, and get everything done in time.

And you know what? Everything came out perfectly. The cake. The frosting. The party. The everything.

Overall, I did have a good birthday. And I had a freakin' delicious carrot cake to go with it. I honestly adore carrot cake. Probably the only cake I'll ever eat. And the brown sugar cream cheese frosting was such a complement to the cake... I loved it. The best part about this cake is that it has virtually no fat in it. I had even used 0 calorie granulated sugar and it was still amazing. I kept it moist with 0% greek yogurt and REAL brown sugar. The taste was tremendous and just lightly spiced. Over all the cake came out great. Although there is no coconut in this cake. I'm seriously against coconut in carrot cake... Sue me.

Carrot Cake with Brown Sugar Cream Cheese Frosting

INGREDIENTS:
2 cups flour
2 teaspoons ground cinnamon
2 teaspoons baking soda
1 teaspoon ground ginger
1/2 teaspoon ground cloves
1 cup greek yogurt (fat-free works fine)
1 cup brown sugar
1 cup granulated sugar (zero calorie sugar substitutes work fine for this cake)
4 eggs (I used 1 cup egg substitute)
1/2 cup crushed pineapple, drained of most its juice
2 teaspoons vanilla extract
1 cup chopped walnuts (I used more than this cause I love walnuts in carrot cake)
1 cup golden raisins
3 cups grated carrots (I finely grate mine to a pulp)

BROWN SUGAR CREAM CHEESE FROSTING INGREDIENTS:
8oz cream cheese, room temperature ( I used fat-free)
1/2 cup butter, room temperature (I used light)
1/2 cup brown sugar
1/2 teaspoon vanilla extract
1/2 teaspoon ground cinnamon (or pumpkin pie spice)
3 cups powdered sugar (add more as needed)

DIRECTIONS:

1. Whisk together flour, baking soda, spices and salt in a medium bowl. Set aside.

2. Preheat your oven to 350F degrees. Grease 1 9x13 inch pan or 2 8x8 cake pans with butter and flour.

3. Mix together greek yogurt and sugars until fully combined. Mix in egg substitute until incorporated (if using real eggs, beat in one at a time), and then proceed to mix in the crushed pineapple and vanilla extract.

4. Gently fold in walnuts, raisins and carrots, being careful not to overmix.

5. Pour into prepared cake pans and bake at 350F for about 40-50 minutes or until a toothpick comes out of the center clean and the cake is a slightly dark golden brown.

6. While cake is cooling, make the frosting. Blend together the cream cheese, butter, brown sugar, vanilla extract and cinnamon until smooth. Add in powdered sugar 1 cup at a time until you've reached a stiff, smooth frosting. In other words, if you use a spatula to pick up the frosting from the bowl and the frosting is dripping off your spatula, you need more powdered sugar. Set the frosting aside or put in covered container in the fridge until cake is cooled and ready.

7. Cool in pan for 10 minutes before transferring to a plate. Cover with plastic wrap and refrigerate until you are ready to frost (this is also helpful for cooling the cake down quicker so the frosting does not melt). Once cake is cooled, frost with brown sugar cream cheese frosting any way you'd like.

Thursday, December 2, 2010

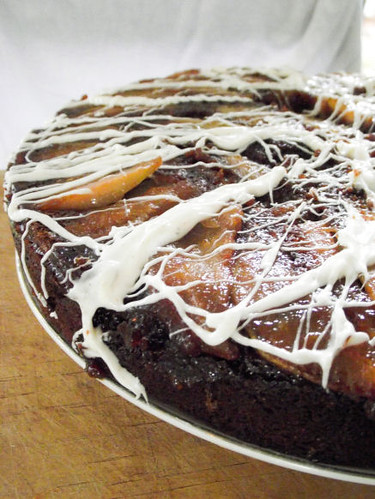
Upside-Down Pear Gingerbread Cake

I am not good at Christmas shopping.

Actually, that's a lie. I'm not bad at Christmas shopping at all.

I just have some issues when it comes to it.

For example, when I'm Christmas shopping, economic value goes straight out the window. It then becomes what I would like to call the "Aunt" value. In layman terms, what can I buy all my nieces and nephews that can trump the other 20 other uncles and aunts?

Suddenly, it's like I do not see price-tags on anything. Instead, I see a "lame" to "awesome" value of everything I contemplate buying my nieces and nephews. $2 dollar stuffed polar bear at walmart with a funky smell? Lame. Freakin' incredibly huge stuffed polar bear/pillow that smells like victory? Totally awesome.

Christmas. It's a time for giving, loving, family, being thankful... and competition.


Of course, this has put in motion some minor setbacks. Like...buying one niece #1 two things and niece #2 just one thing because I saw something niece #1 might like and therefore grabbed it and rang it up without thinking twice.

And then returning it once I realized I had already bought her a present. And then having a huge argument with myself on whether or not I should just buy everyone two things or just stick with one thing for all. Thus bringing me into a spinning mental state of what I should do ending in me being in the fetal position in the parking lot of Toys'R'Us.

Which isn't really an odd thing to witness this time of year.


Either way, Christmas shopping is both a blessing and a curse. Which is why after I come home from a nights worth of fighting with my brain about the whole Christmas present deal, I go into my kitchen and I bake something that fills the house with a very simple reminder. It's not about who gets the best gift, but about the fact that someone cared enough to get one for you.

I baked this the morning of one of those crazy Christmas shopping days, and honestly, just how beautiful it came out and how wonderful the apartment smelled afterward was enough to get me ready for the day.

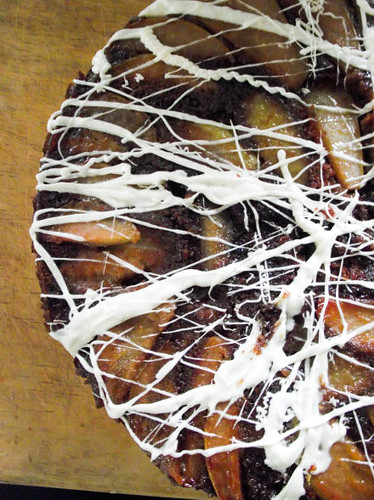
It's a Upside-Down Pear Gingerbread Cake. You may think that sounds odd, but pears are often quite complimentary for gingerbread. Right next to apple, it has a fruity sweetness that works in harmony with the spices inside the cake. It is an incredibly fragrant cake that has a glossy brown sugar shine on the top. The white chocolate drizzle is spiced with pumpkin spice, but if you don't have that on hand, a dash each of ground cinnamon/ginger/nutmeg/cloves will do the trick just fine. It really does complete the cake, I think. This is incredibly moist. I'm sure if this cake was an aunt, it'd probably win the "awesome" award right off the bat (unless, of course, its competition was a cheesecake). With just the right amount of spices, and caramlized pear slices on top... it makes a perfect brunch, breakfast, or light dessert. Plus, it makes your house smell like heaven. Who wouldn't want that?


Upside-Down Pear Gingerbread Cake
(adapted from Gourmet)
INGREDIENTS:
2 ripe pears
1/4 cup of salted butter, melted
1/2 cup of packed light brown sugar
2 1/2 cups of flour
1 1/2 teaspoons of baking soda
1 teaspoon of ground cinnamon
1 teaspoon of ground ginger
1/2 teaspoon of ground cloves
1/2 teaspoon of salt
1 cup of molasses
1 cup of boiling water
1/2 cup of salted butter, softened
1/2 cup of packed light brown sugar
1 large egg, lightly beaten

DIRECTIONS:

1. Preheat oven to 350F. Peel and core pears and cut each into thin slices. Arrange pears in the bottom of an 8 inch springform pan. Drizzle with melted butter and sprinkle with brown sugar.

2. Whisk together flour, baking soda, cinnamon, ginger, cloves, and salt in a bowl. Whisk together molasses and boiling water in a small bowl. Beat together butter, brown sugar, and egg in a mixer at medium speed until creamy, about 2 minutes, then alternately mix in one third of the flour mixture and half of the molasses mixture at low speed until smooth, starting and ending with the flour mixture. Pour batter over topping, being careful not to disturb pears, and bake in middle of oven until a tester comes out clean, 40 to 50 minutes.

3. Cool cake in pan on a rack for 5 minutes. Run a thin knife around the edge, then remove sides and invert a large plate with a lip over the bottom of the cake and, using pot holders to hold the pan and plate tightly together, invert cake onto plate. Replace any pears that stick to skillet. Serve warm or at room temperature.

Friday, November 12, 2010

Brown Sugar Bundt Cake with Maple Espresso Glaze


A long time ago, when I was a itty-bitty Alex who liked to run around in her PJ's all day and refused to wear actual clothes until she was well past 8 years old, my Mother baked me my own cake for my birthday.

It was a lovely box mix yellow cake with lovely Pillsbury white frosting slathered all over it. She made it in her Bundt Cake pan, and after she had frosted it completely, she decided it would be a great idea to stick a little doll figure angel in the middle of the cake. She then had an even better idea, which was to surround said doll figure with candles.

Candles.

Lit. Candles.

With fire.

Fiery candles of death.

I don't think anyone in the room thought it was the best idea, but she went with it anyway. And as she lit the candles, I still remember to this day the image in my head of that poor helpless doll sitting on top the middle of a thickly frosted bundt cake, surrounded in flames. As if the doll was being made as an ancient sacrifice to Chthulu and the candles were the natives lighting their torches getting ready for the sacrifice to their angry God.

Ok, so I wasn't exactly thinking that when I was a kid. But when I think about it today, that's all I see.

Now-a-days, It's hard for me to look at a bundt cake without thinking about that moment. It's not often that I eat bundt cakes. Anyone who knows me knows that I don't like cake. It's not my preferred dessert of choice and given the chance I will always pick something other than cake at the dessert table or party. Sure, I'll try it to be nice, but that's about as far as it goes for me. As I've touched on numerous times in my blog, it's no specific thing about cake that makes me dislike it. I just don't like the cake/frosting combo. Doesn't sit well with me or my tummy.

The thing about cake is that often, it has a dry crumb that gives it that kind of "stick to the roof of your mouth" chew that can be both unpleasant and yucky to many people. Dry crumbs are often caused by 1. using cake mix and 2. having not enough moisture in your cake. I've always thought anyone who can pull off a moist but not "wet" cake had a one in a million skill of being able to perfect the balance between a cake that has enough dryness in it to keep it together but has enough moisture to make it both tender, sweet, and melt-in-your-mouth quality.


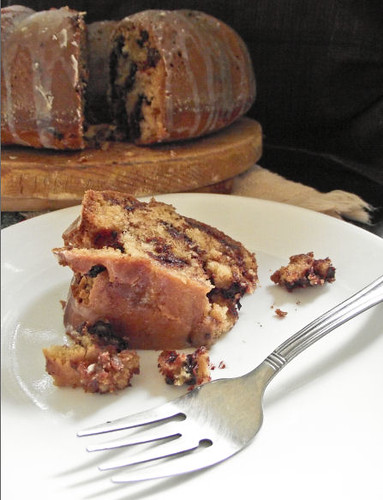
This cake...is nothing like that. In fact, it's a superb way to end any meal, or start any day with a thick slice for breakfast. The glaze on top is subtley sweet, giving a perfect finish to the caramely tasting insides. The crumb is both moist and satisfying, and the chocolate chips inside are just a fantastic added bonus that ties it all together and makes it much more than just a regular ol' cake with some glaze on it. Even I myself could be found picking off pieces of this cake here and there throughout the day. And that's definitely saying something.

If you wanted to, you could make the glaze a lot thicker. I like a thinner glaze on my cakes, so I used a bit more heavy cream. But if you like a thicker, more visually apparent glaze, go ahead and stick with the recipe below. And please, do not disclude the chocolate chips. They are worth the extra trip to the store. Promise.

Brown Sugar Bundt Cake with Maple Espresso Glaze
(Recipe by Bon Appétit)

INGREDIENTS:

Cake:
Nonstick vegetable oil spray
1 12-ounce package semisweet chocolate chips
3 cups all purpose flour, divided
2 teaspoons baking soda
1 teaspoon baking powder
3/4 teaspoon salt
1 cup (2 sticks) unsalted butter, room temperature
1 1/2 cups (packed) golden brown sugar
2 1/2 teaspoons vanilla extract
1 teaspoon maple extract
4 large eggs
1 cup buttermilk

Glaze:
1 cup powdered sugar
2 tablespoons pure maple syrup
2 tablespoons (or more) whipping cream
1 1/2 teaspoons instant espresso powder

DIRECTIONS:

1. Preheat oven to 325°F. Butter 12-cup Bundt pan. Spray pan generously with nonstick spray. Dust pan lightly with flour.

2. Mix chocolate chips and 2 tablespoons flour in medium bowl.

3. Sift remaining flour with baking soda, baking powder, and salt into another medium bowl.

4. Using electric mixer, beat butter and brown sugar in large bowl until fluffy, about 3 minutes. Beat in vanilla extract and maple extract. Add eggs, 1 at a time, beating well after each addition.

5. Mix in flour mixture in 3 additions alternately with buttermilk in 2 additions, beginning and ending with flour mixture. Fold in chocolate chip mixture. Transfer batter to prepared pan, spreading evenly.

6. Bake cake until tester inserted near center comes out clean and cake begins to pull away from sides of pan, about 1 hour. Cool cake in pan on rack 30 minutes. Invert cake onto rack and cool completely.

7. For the glaze, Combine powdered sugar, maple syrup, 2 tablespoons cream, and espresso powder in medium bowl. Whisk until smooth, adding more cream by 1/2 teaspoonfuls if glaze is too thick to drizzle. Spoon glaze decoratively over top of cake; let stand at room temperature until glaze is firm, about 1 hour. DO AHEAD: Can be made 1 day ahead. Cover with cake dome and let stand at room temperature

Saturday, October 23, 2010

Red Velvet Cupcakes with Cream Cheese Frosting


I have an aversion to cupcakes.

I don't know why or what it is about cupcakes that are unappealing/unappetizing to me. And I'm not talking about just a particular part of the cupcake. I don't eat the cake and leave the frosting or vice versa. No, I just flat out leave the whole thing in tact.

It doesn't even matter if they are homemade or store-bought. If the frosting is cream cheese or buttercream. Either way, chances are I'm going to pass them by the dessert table and go straight for the out of the box brownies.

I didn't realize how alone I was in this feeling until my co-workers and I had a huge discussion about cake and desserts in the break room one night, where I stated briefly that I "didn't like to eat cupcakes".

The jaws dropped to the floor and it was like in seconds I was Jason Bourne trying to figure out what was wrong with me and why everyone wanted me dead. "You don't like cupcakes?!" they exclaimed, following with statements like: "cupcakes are my favorite! how can you not like cupcakes?" "I've never met anyone who didn't like cupcakes!" "Alex, you can't be a baker and not like cupcakes." As I sat there, my reputation as a baker diminished for my dislike of cake and frosting and everything else, I decided to do what any hard-headed baker would do.

I asked someone what their favorite cupcake was and I baked it that very week.


Of course, out of all the types of cupcakes that could be requested, Red Velvet made it's way to the top of the list. Sure, yeah. Pick the cake with the five gallons of food coloring in it, I thought, as I grumpily grabbed a whole bottle of it from the grocery shelf. Three dollars to prove my worth. All because of a cupcake debate.

As I woke up that very morning at 9AM to bake those cupcakes to take to work, I couldn't help but try to figure out in my head all the reasons of why I don't like cupcakes. So far, this is all that I have:

1. I ate too much pillsbury chocolate frosting out of the can as a child, and have ruined myself forever.

2. I ate five cupcakes at a party once and ended up puking up sprinkled cake mix, and have ruined myself forever.

3. Frosting cupcakes sucks.

4. Frosting cupcakes suck when you have no pastry bags.

5. Frosting cupcakes suck when you have no frosting tips.

6. Frosting cupcakes sucks.

7. I am too impatient to frost a cake or a cupcake and make it look nice.

8. I am too impatient to bake five hundred cupcakes and make them look nice.

9. I am too impatient.

10. At least when you eat 5 cookies as a midnight snack you don't have 5 empty wrappers waiting on the desk/counter/trashcan to give you a guilt-trip in the morning.

11. In fact, why the hell do cupcakes have to have wrappers? What makes them so special that I have to spend an extra 2 dollars just to make them look pretty? They already have frosting, what more do you want from me!?

12. Cupcakes are divas. Divas with wrappers. And sprinkles.

13. I'm poor.

Now that I think about it, I'm pretty sure that my relationship with cupcakes has absolutely nothing to do with that list and I just am one of those people who prefer the apple to the orange. But at least I can go home happy knowing that while I may not like everything that I bake, at least I can bake it and know it will taste good regardless. Even if it doesn't have sprinkles on it. Or a wrapper. Whatever.

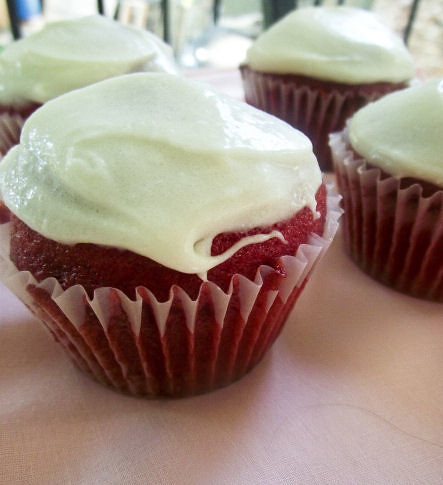
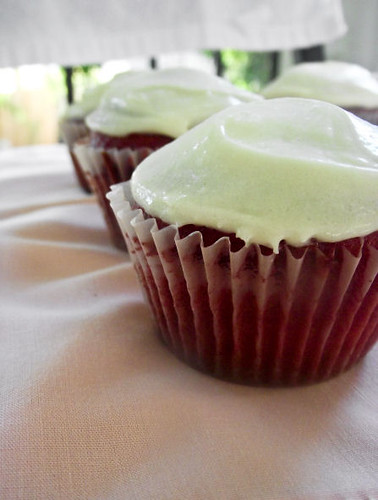
These cupcakes will definitely hit home for any red velvet cake fan. Please, do not skimp on this one. The cream cheese frosting is a must, as is the cake flour. If you leave those two out, you will only be left with an unsatisfying heavy cake that is most definitely not red velvet. And just a tip: Don't forget to check if you have enough red food coloring. 2 tablespoons is more than that little container you get when you buy a pack of assorted colors. Trust me on this one. I know from experience... and failed "pink" velvet cakes.

Red Velvet Cupcakes with Cream Cheese Frosting
(Adapted from Annie Eats)

INGREDIENTS:

For the cake:
2½ cups cake flour
1½ cups sugar
1 tsp. baking soda
1 tbsp. cocoa powder
1 tsp. salt
2 large eggs
1½ cups vegetable oil
1 cup buttermilk
2 tbsp. (1 oz.) liquid red food coloring
1 tsp. vanilla extract
1 tsp. distilled white vinegar

For the frosting:
8 oz. cream cheese
5 tbsp. unsalted butter, at room temperature
2 tsp. vanilla extract
2½ cups confectioners’ sugar, sifted


DIRECTIONS:

1. Preheat the oven to 350° F. Line cupcake pans with paper liners.

2. In a medium bowl, combine the cake flour, sugar, baking soda, cocoa powder and salt; whisk to blend.

3. In the bowl of an electric mixer, combine the eggs, vegetable oil, buttermilk, food coloring, vanilla and vinegar. Beat on medium speed until well blended. Mix in the dry ingredients on low speed and beat until smooth, about 2 minutes.

4. Divide the batter evenly between the prepared liners. Bake, rotating the pans halfway through baking, until a toothpick inserted in the center comes out clean, about 18 minutes.

5. Let cool in the pans 5-10 minutes, then transfer to a wire rack to cool completely.

6. To make the frosting, combine the cream cheese and butter in the bowl of an electric mixer. Beat on medium-high speed until well combined and smooth, about 2-3 minutes. Mix in the vanilla extract. Gradually beat in the confectioners’ sugar until totally incorporated, increase the speed and then beat until smooth. Frost cooled cupcakes as desired.

Yield: 24 Cupcakes

Tuesday, March 16, 2010

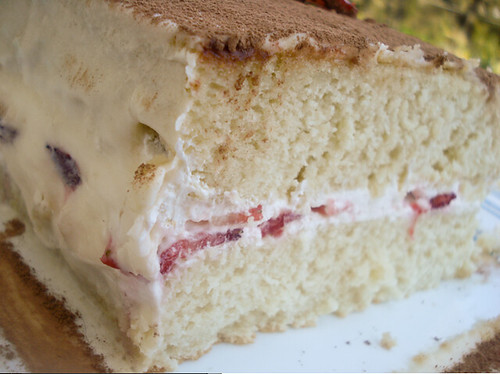
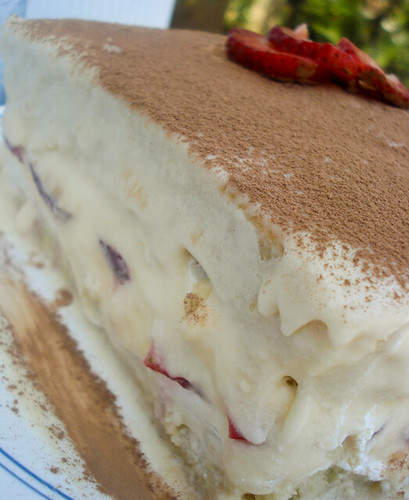
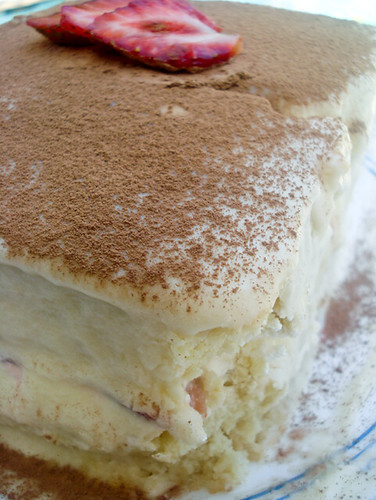
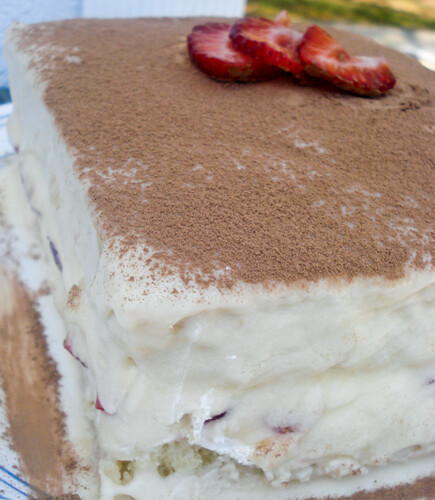
Identity Crisis White Cake with Strawberries

strawberryneopolitancakething


I truly believe that reality T.V. should come with a warning. Maybe like...

"WARNING! Please do not watch this show if you have any desire to keep hope for mankind." Or, "WARNING! Please do not watch this show if you have 4 feet of clean clothes to fold and put away and a sink full of dishes." Or even, "WARNING! Please do not watch unless you absolutely enjoy spending your time watching/making fun of/staring in disbelief at general human stupidity." Etc, etc...

Maybe, then, I wouldn't get stuck watching it so much. Then again, I could always get up and turn my T.V. off or change the channel... but every time I do that, I end up going to the food network, and for some reason Giada is always on. And while she's definitely not a horror to watch... I'm much more interested in seeing food than cleavage. Might as well go back to VH1 for that.

My mother and I were discussing reality T.V. last night. I'm definitely not as addicted* as her when it comes to keeping up with all the episodes but I shamefully enjoy a couple of them. My favorites happen to be celebrity fit club, tool academy, and occasionally celebrity rehab. And the next one that just started, Jessica Simpsons "the price of beauty" has already shown some kind of promise. I wouldn't even really count that as reality T.V. More like a comedy central skit with meaningful undertones. I mean seriously, Jessica... giggling in the middle of meditation with a bhuddist? Who does that?

Wait, i'm talking about Jessica Simpson, here. Why am I surprised? Kidding, kidding. Jessica, don't worry. I love ya for who you are. Really.

strawberryneopolitancakething


Anywho, so my mom and I were discussing reality T.V. and I had to laugh at what she was telling me. "You know," she began, "if these people want to lose weight (referring to celebrity fit club), they should just go on drugs. Then, they won't be hungry. And then they can go to celebrity rehab. And then they can go to sex rehab. Which will then lead them back to celebrity fit club..."

"Then they can make a show about finding their true love!" I piped in. "Yes, yes!" My mom laughed, agreeing. "...And then go right back to sex rehab." I slipped in smugly. We both broke out into fits of giggles.

I don't think that there's anything really wrong with some Reality T.V... I think that I, along with everyone else in the world, have a hard time turning away from watching a train wreck. And that's basically what reality T.V. is half the time. Fake or not, it is pretty darn funny to watch if you don't take it so seriously.

Plus, it's the perfect thing to watch when you're eating this cake. Because just like every single person on Reality T.V., this cake seems to be having identity issues. It can really relate.

strawberryneopolitancakething


I mean, it really just can't decide what it wants to be. When it comes to fashion, it leans towards the whole strawberry tiramisu look... but in terms of taste, it's more like a frosted version of a strawberry shortcake. Some may even say it's borderline neopolitan. But me? Well... I just see it as exactly what it is. A white cake filled with strawberries, frosted with vanilla buttercream and dusted with cocoa powder.

So in other words, a really gosh darn good cake that came out way better than expected.

I don't know what compelled me to bake a cake yesterday morning. I just kind of winged it, putting together different things that my family enjoyed and throwing it all together. Thankfully, the end product is a divinely fluffy white cake, a not-too-sweet buttercream, a perfectly light fruity filling and a wonderful burst of cocoa powder that just rounds it all out. I like it a lot.

It's not hard to make, at all. Though, I do recommend frosting it better than I did, letting the cake cool in the fridge before frosting. I admit, I suck at frosting cakes. Don't ask me why, I just do. Something about my whole "too-impatient-to-wait-to-put-a-second-layer-on" thing... Who knows. All I know is that this cake is awesome and you should definitely try it if you want something light and sweet. Or if you're having an identity crisis, too.

strawberryneopolitancakething

Identity Crisis White Cake with Strawberries

(Makes 2 8 or 9in. cake pans, or 9x13 pan)

INGREDIENTS:

Cake
2 1/4 cup cake flour
4 teaspoon baking powder
1 teaspoon salt
3/4 cup granulated sugar
1/4 cup butter, softened
6oz (scant 1/2c) vanilla yogurt (fat free is fine)
1 tablespoon orange zest (optional, but highly recommended)
1 teaspoon vanilla extract
3/4 teaspoon almond extract
1/2 cup milk (I used unsweetened vanilla almond milk, but whole, soy or skim milk will work fine)
1/2 cup water
6 egg whites

1/2 cup raw organic cacao powder (or another good quality cocoa powder)

Filling
1/2 tub whipped cream (or make about 1 cups worth of homemade)
1/2 pint of strawberries, sliced thin

Vanilla Buttercream
1/3 cup butter, softened
2 1/2 cups powdered sugar
1/2 teaspoon vanilla extract
2-3 tablespoons milk

DIRECTIONS:

1. Preheat your oven to 350F and spray 2 9in. cake pans or a 9x13 baking dish with nonstick spray. Line with parchment paper if desired (RECOMMENDED).

2. To prepare the cake, sift the flour, baking powder and salt in a bowl. Set aside.

3. In a large bowl or mixing bowl, blend the butter, yogurt, sugar and orange zest if using together until smooth and light.

4. In a pyrex measuring cup or just a plain cup, combine 1/2 cup milk, 1/2 cup water, and extracts together.

5. In another separate, small bowl, using CLEAN mixers, whip the 6 egg whites until they form a nice soft peak (they don't have to be hard peaks, soft is fine... just make sure it isn't liquidy soft but structurally soft).

6. Alternating with the flour mixture and milk mixture, slowly blend in the flour, then the milk, then the flour, then the milk, then the rest of the flour, until well combined.

7. Take about 1/3rd of your egg white mixture and blend it straight in with a spatula to your cake batter. Proceed to FOLD NOT BLEND the rest of the egg white mixture to the bowl until there are only a few noticeable spots (do not over-mix at this point).

8. Pour batter in prepared pans, giving the side of the pan a nice little hit with your hand to smooth out the top of the batter. Bake for about 20-30 minutes or until a toothpick comes out clean in the middle.

9. Allow cake to cool before removing and storing in the refrigerator, tightly wrapped, or just allow to cool COMPLETELY before frosting.

10. To prepare vanilla buttercream, mix the butter and vanilla extract together until smooth. Add in the powdered sugar and 1-2 tablespoons milk (if your mixture is too thick, thin it out with a little more milk).

11. To assemble cake, either cut through the middle of the two cakes to create a four-layer cake, or simply keep them as is (your choice). You may also cut off the tops of the cakes for a more smooth surface, if desired (recommended). On the top of one layer of your cake, fill the top with about 1/4 of your whipped cream (prepared or homemade), smoothing out to around the edges. Top with strawberry slices, slightly overlapping. Place the other cake ontop of it, and smooth out the whipped cream around the edges with an offset spatula. Place in refrigerator to set for about 20 minutes.

12. Once filling has set, take the cake back out, and proceed to use about 1/2 of your frosting to do an initial crumb coating on your cake. Frost your cake as desired with 1/2 of the frosting, then place back into the fridge until crumb coating is set. Take back out, and frost the cake with the rest of the frosting. Smooth with offset spatula for a clean look.

13. Sift the top of the cake with cocoa powder before storing, covered, in the refrigerator, or keeping covered at room temp. Unfrosted/unfilled cake can be frozen for up to 2-3 weeks.

Friday, March 5, 2010

Swedish Visiting Cake

Swedish visiting cake


I have to apologize for going (once again) randomly A.W.O.L on my blog. But somewhere between the excitement of finally finding a good job (that I liked), fitting that job into my daily schedule, fitting my baking/social life/videogames/cookie-eating around my job, quitting my job half a week later due to harrassment from my manager, being depressed about said job and eating copious amounts of cookies to cheer me up and then feeling even more depressed due to the fact that I ate copious amounts of cookies, I was just not really in the mood to blog.

Throw in the fact that I'm not allowed to go running and you got yourself a recipe for stress.

But thankfully... thankfully there are simple things in life. Thankfully there is flour, eggs, and sugar. Thankfully, there is an oven that works and mouths to be fed. Cookbooks to be read and ovens to be turned on at 350 degrees.

Thankfully there is... cake.

Swedish visiting cake


If there is anything more simple than this cake... I would like to find out what it is. Or, rather, if there is anything as simple and good tasting than this cake.

Dorie Greenspan... you're a genius, man (like my little rhyme there? Smoooooth).

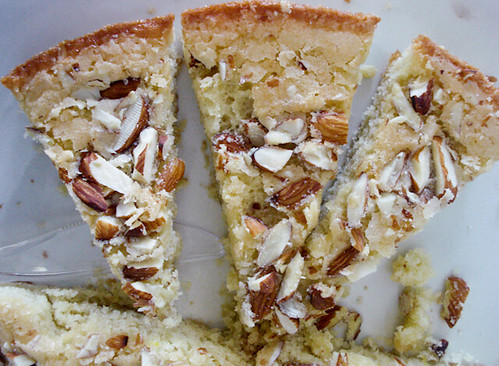
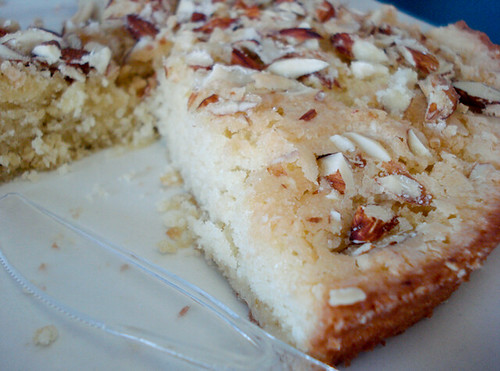
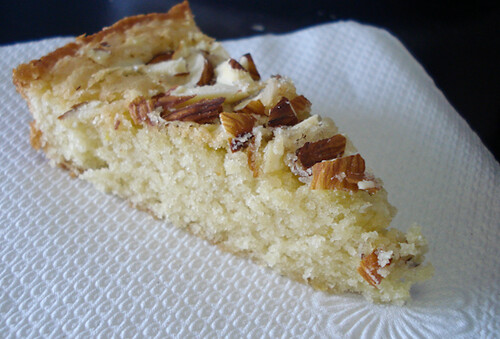
This cake, a "swedish visiting cake", is spectacular. Though it uses common ingredients found in most cakes, it has a different way of mixing, thus giving the cake a very crumbly, almost sweet bready taste. With this particular dessert, there is no shame in using your finger tips to eat it. As long as it's accompanied with a napkin to catch the crumbs that will inevitably scream mutiny and try to escape from your grasp, leaving its brothers and sisters to accept their fate...

The crumb. It lives to see another day.

If you've got some almonds, sugar, butter, lemon zest and eggs on hand...then I highly recommend making this cake. It's simple. It's easy. It won't get you fired from your job. In fact, it might just get you promoted. And the cool part is? You can even make it in a cast-iron skillet for ultra awesome presentation. Or you can be like me and use a cake pan. Whatever works.

Swedish visiting cake
Swedish Visiting Cake
(adapted from Baking, From My Home to Yours by Dorie Greenspan)


INGREDIENTS:
1 cup sugar, plus extra for sprinkling
Grated zest of 1 lemon
2 large eggs
1/4 teaspoon salt
1 teaspoon pure vanilla extract
1/2 teaspoon pure almond extract
1 cup all-purpose flour
1 stick (8 tablespoons) unsalted butter, melted and cooled
About 1/4 cup sliced almonds (blanched or not)

DIRECTIONS:

1. Center a rack in the oven and preheat the oven to 350 degrees F. Butter a seasoned 9-inch cast-iron skillet or other heavy ovenproof skillet, a 9-inch cake pan or even a pie pan.

2. Pour the sugar into a medium bowl. Add the zest and blend the zest and sugar together with your fingertips until the sugar is moist and aromatic. Whisk in the eggs one at a time until well blended. Whisk in the salt and the extracts. Switch to a rubber spatula and stir in the flour. Finally, fold in the melted butter.

3. Scrape the batter into the pan and smooth the top with a rubber spatula. Scatter the sliced almonds over the top and sprinkle with a little sugar. If you're using a cake or pie pan, place the pan on a baking sheet.

4. Bake the cake for 25 to 30 minutes, or until it is golden and a little crisp on the outside; the inside will remain moist. Remove the pan from the oven and let the cake cool for 5 minutes, then run a thin knife around the sides and bottom of the cake to loosen it. You can serve the cake warm or cooled, directly from the skillet or turned out onto a serving plate.

Saturday, February 6, 2010

Classic American Yellow Cake with Chocolate Ganache

Yellow Cake with Chocolate Ganache


Dear 9,000 year old Bundt Pan,

Look. I know how it is. You sit, unused, at the bottom of my cabinet, alone and abandoned. I understand how scary it must be in there... forced to sleep in the shadows every night. And with the broken old bent springform pans, no less. Feeling so neglected, collecting dust, and being nothing more than a home for the ocassional bug or fly. Getting your hopes up every time you see a speck of light dawn on you from the bright kitchen that you see so little of, only to have those hopes crushed when you realize that someone was just looking for the frying pan that got carelessly shoved all up in your personal space in someones careless rush to clean the kitchen. I know. It sucks to be forgotten. It sucks to be unused, especially when you have so much potential. So much to offer.

But Bundt Pan, you shouldn't be so bitter. You see, when you do get used, you really shouldn't do horrible things that make people never want to use you again.

For example...

1) Hanging onto half of my cake even though I rubbed shortening all over you 10x.
2) BURNING the top half of my cake regardless of the extra procedures I went through to ensure that didn't happen.
3) Did I mention the hanging onto half of my cake part? Yeah. That wasn't cool, Bundt Pan.

I really do want to use you more. I do. But when you do stuff like this... no matter what I do to avoid it, you always end up throwin' off my groove, Bundt Pan. And it makes me want to never use you. Ever. Ever ever ever ever.

Yellow Cake with Chocolate Ganache


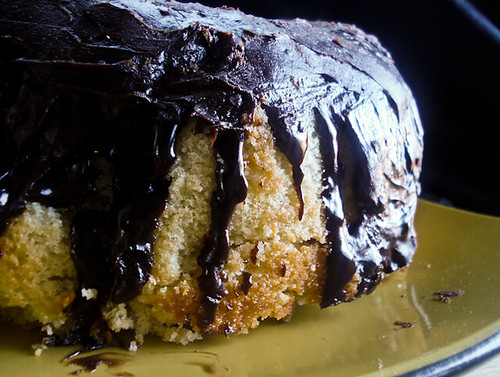
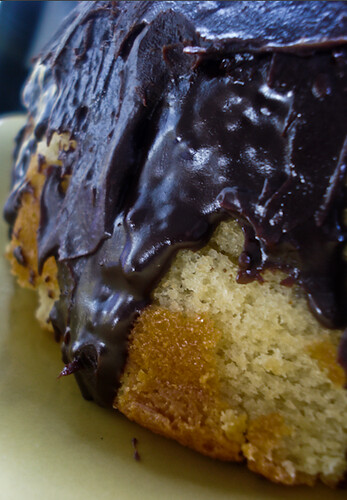
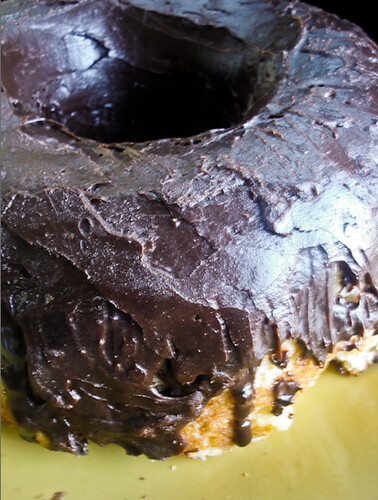
I don't know if I can use you again, Bundt Pan. You really screwed up this time, man. You're lucky I had lots of ganache in the fridgerator. Real lucky. Or else, I might have thrown you out this morning. You're even luckier that this recipe is so kick butt that it's good enough for me to post regardless of your little tactics to try and ruin my cake making desires. Seriously... perfectly, all-american golden cake, tender and moist underneath two thick layers of ganache? Not even you can ruin that, Bundt Pan. Though you try.

I really am serious, man. Maybe if you got your act together, I'd use you more, and then you'd be happier, and so would I. Just sayin'. A little cooperation is all i'm askin' for.

Hopefully, this isn't an omen for the Saints to lose on Sunday. 'Cause if they do... I'm blaming you, Bundt Pan.

With Love,
Your Frusterated Owner Alexandra

Yellow Cake with Chocolate Ganache

Classic American Yellow Cake with Chocolate Ganache
(Adapted from a Passion for Baking by Marcy Goldman)


Note: I highly recommend not using a bundt pan for this recipe like I did, and instead making a layer cake or cupcakes.

INGREDIENTS:

CAKE
1 cup (2 sticks)unsalted butter, softened
1 cup sugar, pulverized in food processor
3 large eggs, room temperature
2 1/2 teaspoons vanilla extract
3 cups all-purpose flour
1/4 teaspoon salt
4 teaspoons baking powder
1 1/2 cups warm milk

GANACHE
1 cup semi-sweet chocolate chips
1 cup heavy cream
1/4 cup butter

DIRECTIONS:

1. Preheat oven to 350F. Generously spray two 9-inch round cakepans with nonstick cooking spray and place pans on large parchment paper-lined baking sheet (or spray 24 cupcake liners).

2. In a mixer bowl or large food processor, blend butter and sugar until fluffy and thoroughly combined. Then add eggs and vanilla and blend well. Add flour, baking powder, and salt, drizzling in milk as mixture blends to make a smooth batter. Spoon batter into prepared cakepans.

3. Bake until cake springs back when gently pressed with fingertips, 35-40 minutes. Cool slightly. Unmold cakes from pans, cool on wire wracks, and then gently wrap in wax paper or plastic wrap. Chill in freezer 30 minutes or wrap and refrigerate until you are ready to frost.

4. To make chocolate ganache, melt in a double boiler or in the microwave the heavy cream, chocolate chips and butter until smooth and velvetty. Cover and place in refrigerator for 30 minutes.

5. To assemble cake, take cake and ganache out. Give the ganache a quick stir to make it velvetty smooth again. Spread 1/4 of the ganache between the cake layers. Spread half of the remaining ganache mixture ontop of the cake, letting it drip down the sides. Return ganache and cake to the refrigerator for 5-10 minutes. Take back out, and give the top of the cake another helping of ganache. Let ganache set on the cake before serving.
 

Dunk Twice Copyright © 2009 Cookiez is Designed by Ipietoon for Free Blogger Template