Sunday, November 21, 2010

Pumpkin Pie Butterscotch Bars

So I was wondering if I was the only person currently with 5 cans of pumpkin puree in their pantry? No? Good.

I wouldn't want to feel like the only one who has been trying to figure out a way to make the most of an abundance of pumpkin. Apparently, thanksgiving in all it's turkey glory cannot come fast enough for me to use up all of this pumpkin that I bought a month ago thinking to myself it would be a smart investment to get it now before it disappears thanksgiving week and I'm having panic attacks in the kitchen ripping my hair out because the pumpkin shortage of '09 has come back to haunt me.

By the look of my local supermarkets, I think I acted a little too quickly.


I can't really be upset about it though. Because if I had never bought those numerous cans of pumpkin puree, I would've never stumbled upon these addicting Pumpkin Pie Butterscotch Bars.

That's right.

Pumpkin. Pie. Butterscotch. Bars.

Now, I don't usually go off the map for thanksgiving and make anything outside of pie or cheesecake.... but honestly, I would have no shame in bringing these crustless square beauties. Delicious does not even begin to describe. It is far better than any pumpkin pie or cheesecake I have ever had or made. And I do not take my pumpkin desserts very lightly.

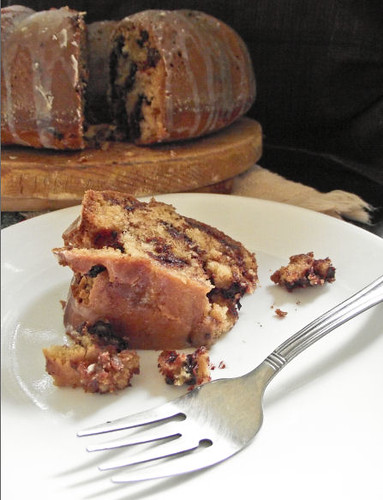
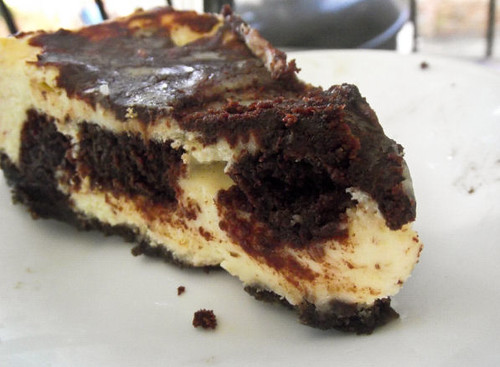
As you can probably tell from the pictures, my bars are very custard-y. That's because I took 'em out of the oven a little bit earlier than I was suppose to. Do I regret it? NO. In fact, I think they taste better this way. Sure, you'll have to eat it with a napkin next to you but that is a sacrifice I'm willing to make. I'm sure any trees that had to die in order for me to use said napkin would do the same thing in my place. I'm positive of it. Yup.


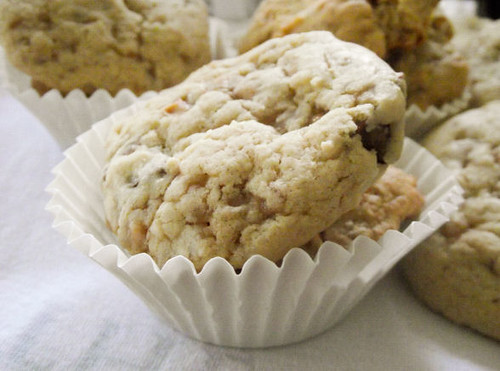
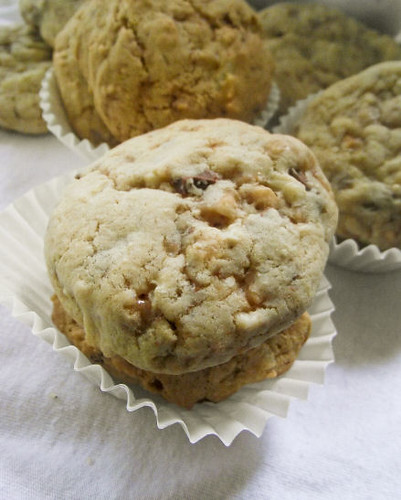
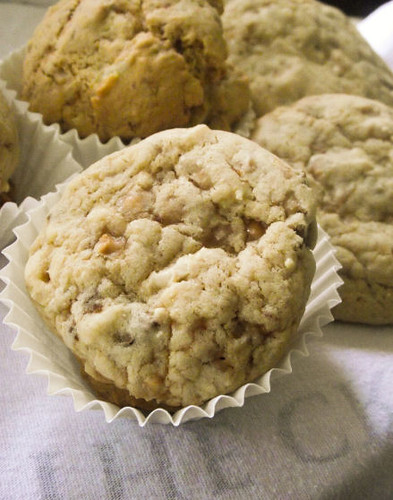
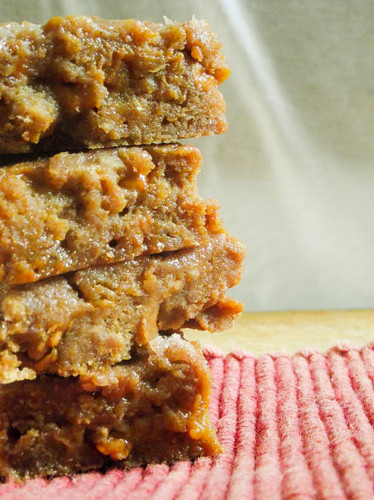
While the pumpkin pie bars themselves are ahhhmazing on their own (due to the fact that this baby is packed with brown sugar and butter up the wa-hoo), the butterscotch chips are a must and I would not recommend leaving them out less you may cause me to cry at night for your loss. It's worth the extra $$$, I promise you that. The caramelized taste paired with the sweetness of the butterscotch chips just tie the flavors together so beautifully that it's hard to believe I have gone so long without realizing the potential of using the two together.

If you are looking for a thanksgiving pumpkin dessert that differs from the norm while still staying on the same track of a "pumpkin" theme... then I swear by this recipe. I cannot imagine any person being able to pass a second helping of these up. It's just not possible.

Please. Make these. If you are a pumpkin fan: MAKE THEM. Eat them. Eat them lots. Eat them lots, get a tummy ache, and send the rest to your neighbor. Or make them for thanksgiving and watch everyone else eat them and sing your praises until your ego is so big you decide you deserve a shot of rum in your egg nog. I won't tell. Just please, please, PLEASE.... Make these.


Pumpkin Pie Butterscotch Bars
(Recipe adapted from Brown Eyed Baker)
INGREDIENTS:
2 cups all-purpose flour
2½ teaspoons cinnamon
1 teaspoon ground ginger
¼ teaspoon ground nutmeg
½ teaspoon salt
1 cup (8 ounces) butter, melted
2 cups dark brown sugar
2 eggs
2 teaspoons vanilla extract
1 can (15 oz) pumpkin
1 2/3 cups butterscotch chips

TOPPING:
2 tablespoons granulated sugar
1 teaspoon ground cinnamon
2 tablespoons flour

DIRECTIONS:

1. Preheat oven to 350 degrees F. Butter a 9×13-inch baking pan and line with parchment paper, leaving an overhang on both sides.

2. In a medium bowl whisk together the flour, cinnamon, ginger, nutmeg and salt; set aside.

3. In a large bowl whisk together the sugar and butter. Add the eggs and vanilla extract and whisk until combined. Add the pumpkin and whisk until thoroughly combined. Add the flour mixture and, using a rubber spatula, gently stir or fold the flour into the pumpkin mixture until just combined.

4. Scraped the batter into the pan and smooth the top. In a small bowl, stir together the granulated sugar and cinnamon, and then sprinkle evenly over the top of the batter. Bake for about 30 minutes, or until a thin knife inserted into the center has just a few moist crumbs on it. Cool completely and then, using the parchment as handles, lift out of the pan and cut into 24 squares. Store at room temperature in an airtight container.

Thursday, November 18, 2010

Toffee Almond Cookies

Every time this year, there is an outburst of random acts of kindness. It's like, as soon as Halloween is over, everyones got the satan out of them (Okay, not everyone, but some people) and they all want to start sending out cookies and calling up relatives and oohh, santa's comin', you better be good! kind of deal to all the children. It's almost as if people suddenly realize, "oh CRAP, Christmas is coming... better get my sunday best on!" -- y'know, that kind of thing...

It's also the time of year where donators start popping up everywhere. Outside your shopping mall. Inside your grocery store, stalking you down dorito lane. After any transaction you make, you are usually asked to decide whether you would like to donate to so-and-so's foundation or not and that it goes to a great cause and it will only cost you $$ amount of money.

I know this, because I'm doing it at my store as well.


Never doing a donation run before during the holidays has shown me a lot about people. It has shown me: 1. how giving people can be; and: 2. how downright ridiculously unreasonable people can be. Sure, if a donation is like, over 7 dollars, I can imagine the pause in someones thought process when you ask them if they'd like to donate. But when someone is asking you if you'd like to donate $1.25 to a local childrens hospital charity, and you say "no, I can't right now" and then hand me a $100 dollar bill to pay for your $20 dollar purchase, there is something very, very, very wrong.

Sure, there are some of you out there who really can't donate. And I can understand that. But those of you who can... should. Not because Santa or God is watching over you but because it's the right thing to do. I don't always want to spend that extra 4-5 dollars as a donation, but you know what? I get paid. I have a job. Five bucks cut from my salary won't hurt me. And if it doesn't hurt you, then really, is there any reason not to do it? Nope.

I don't mean to get on anyones case about it. I know people have been ripped off by christmas charities before and we're all a little wary of where our money goes. But still. Helping is helping, and yes, even a $1.25 makes a difference.

Now that I've gotten that out of the way... these cookies are very good. Slivered almonds and 1 cupful of toffee make these a great little gift to anyone (who doesn't have a nut allergy). If you wanted to, you could also use milk-chocolate covered toffee. Either one tastes amazing. The cookies are a little on the soft side, making them perfect for dunking twice since they soap up the liquid fast and then it's just a brilliant symphony of toffee, cool milk or hot coffee and the subtle crunch of almonds in your mouth. Yeah, these babies are good for any time of the day.

If you wanted to, you could probably throw in 1/2 cup of oatmeal in there too if you want a chewier cookie. I was going to do that, but unfortunately I didn't have enough oatmeal. Thus, my dreams were ruined forever.

Make the cookies. Make donations when you can. Make cookie donations when you can. Helping in any way is better than doing nothing. Even if it's just $1.25, I promise you it's worth it. Just cause you can't see a sick child in front of you, doesn't mean they don't exist.


Toffee Almond Cookies

INGREDIENTS
1/2 cup softened butter
1/2 cup white sugar
1 cup brown sugar
1 1/2 tsp vanilla extract
2 eggs
2 1/4 cups AP flour
1/2 tsp salt
1 tsp baking soda
1 cup of toffee pieces, milk chocolate or otherwise
1 cup almond slivers

DIRECTIONS:
1. Preheat oven to 375 degrees.

2. Mix dry ingredients together in a separate bowl: all purpose flour, baking soda, & salt.

3. Cream together butter & both sugars. Add eggs & vanilla, mix well. Slowly incorporate the dry mixture into the sugar mixture.

4. Stir in the chocolate chips, toffee pieces, & almond slivers.

5. Drop by tablespoons onto baking sheet. Bake 8-10 minutes. Let cool completely on wire wrack.


Friday, November 12, 2010

Brown Sugar Bundt Cake with Maple Espresso Glaze


A long time ago, when I was a itty-bitty Alex who liked to run around in her PJ's all day and refused to wear actual clothes until she was well past 8 years old, my Mother baked me my own cake for my birthday.

It was a lovely box mix yellow cake with lovely Pillsbury white frosting slathered all over it. She made it in her Bundt Cake pan, and after she had frosted it completely, she decided it would be a great idea to stick a little doll figure angel in the middle of the cake. She then had an even better idea, which was to surround said doll figure with candles.

Candles.

Lit. Candles.

With fire.

Fiery candles of death.

I don't think anyone in the room thought it was the best idea, but she went with it anyway. And as she lit the candles, I still remember to this day the image in my head of that poor helpless doll sitting on top the middle of a thickly frosted bundt cake, surrounded in flames. As if the doll was being made as an ancient sacrifice to Chthulu and the candles were the natives lighting their torches getting ready for the sacrifice to their angry God.

Ok, so I wasn't exactly thinking that when I was a kid. But when I think about it today, that's all I see.

Now-a-days, It's hard for me to look at a bundt cake without thinking about that moment. It's not often that I eat bundt cakes. Anyone who knows me knows that I don't like cake. It's not my preferred dessert of choice and given the chance I will always pick something other than cake at the dessert table or party. Sure, I'll try it to be nice, but that's about as far as it goes for me. As I've touched on numerous times in my blog, it's no specific thing about cake that makes me dislike it. I just don't like the cake/frosting combo. Doesn't sit well with me or my tummy.

The thing about cake is that often, it has a dry crumb that gives it that kind of "stick to the roof of your mouth" chew that can be both unpleasant and yucky to many people. Dry crumbs are often caused by 1. using cake mix and 2. having not enough moisture in your cake. I've always thought anyone who can pull off a moist but not "wet" cake had a one in a million skill of being able to perfect the balance between a cake that has enough dryness in it to keep it together but has enough moisture to make it both tender, sweet, and melt-in-your-mouth quality.


This cake...is nothing like that. In fact, it's a superb way to end any meal, or start any day with a thick slice for breakfast. The glaze on top is subtley sweet, giving a perfect finish to the caramely tasting insides. The crumb is both moist and satisfying, and the chocolate chips inside are just a fantastic added bonus that ties it all together and makes it much more than just a regular ol' cake with some glaze on it. Even I myself could be found picking off pieces of this cake here and there throughout the day. And that's definitely saying something.

If you wanted to, you could make the glaze a lot thicker. I like a thinner glaze on my cakes, so I used a bit more heavy cream. But if you like a thicker, more visually apparent glaze, go ahead and stick with the recipe below. And please, do not disclude the chocolate chips. They are worth the extra trip to the store. Promise.

Brown Sugar Bundt Cake with Maple Espresso Glaze
(Recipe by Bon Appétit)

INGREDIENTS:

Cake:
Nonstick vegetable oil spray
1 12-ounce package semisweet chocolate chips
3 cups all purpose flour, divided
2 teaspoons baking soda
1 teaspoon baking powder
3/4 teaspoon salt
1 cup (2 sticks) unsalted butter, room temperature
1 1/2 cups (packed) golden brown sugar
2 1/2 teaspoons vanilla extract
1 teaspoon maple extract
4 large eggs
1 cup buttermilk

Glaze:
1 cup powdered sugar
2 tablespoons pure maple syrup
2 tablespoons (or more) whipping cream
1 1/2 teaspoons instant espresso powder

DIRECTIONS:

1. Preheat oven to 325°F. Butter 12-cup Bundt pan. Spray pan generously with nonstick spray. Dust pan lightly with flour.

2. Mix chocolate chips and 2 tablespoons flour in medium bowl.

3. Sift remaining flour with baking soda, baking powder, and salt into another medium bowl.

4. Using electric mixer, beat butter and brown sugar in large bowl until fluffy, about 3 minutes. Beat in vanilla extract and maple extract. Add eggs, 1 at a time, beating well after each addition.

5. Mix in flour mixture in 3 additions alternately with buttermilk in 2 additions, beginning and ending with flour mixture. Fold in chocolate chip mixture. Transfer batter to prepared pan, spreading evenly.

6. Bake cake until tester inserted near center comes out clean and cake begins to pull away from sides of pan, about 1 hour. Cool cake in pan on rack 30 minutes. Invert cake onto rack and cool completely.

7. For the glaze, Combine powdered sugar, maple syrup, 2 tablespoons cream, and espresso powder in medium bowl. Whisk until smooth, adding more cream by 1/2 teaspoonfuls if glaze is too thick to drizzle. Spoon glaze decoratively over top of cake; let stand at room temperature until glaze is firm, about 1 hour. DO AHEAD: Can be made 1 day ahead. Cover with cake dome and let stand at room temperature

Thursday, November 4, 2010

Brownie Mosaic Cheesecake

This cheesecake is magical.

In one bite, it can do so many different things.

It will change your life.
It will change your perspective of everything.
It will make you question reality.
How can something taste so good?


It will impress your drama-queen manager who is always PMSing. Even if he's a guy.
It will make your boyfriend stop playing Fable 3 and Halo: Reach for more than just a potty break.
It will cause odd and excessive groaning/moaning noises from everyone that eats it.
It will make anyone who hates you, love you. Forever.
It pretty much brings all the boys to the yard. And not for milkshakes.

This cheesecake...is just far too much.

Smooth. Creamy. Sweet enough to balance out the brownies. Decadent enough to satisfy with one serving, but addicting enough to go back for more sometime around midnight when no one can see you lick it off the fork. Oh, and a chocolate wafer crust to top it all off.

Yeah. You can't really get better than this without enticing a heart attack on yourself.

The best part about this cheesecake is that it's easy. Sure, it includes some patience. But it's so very, very worth it. If you've got a big event coming up, or maybe just want to do something nice for someone... this is the way to go. Plus, it looks so impressive when you cut into it. The brownie chunks make such a beautiful pattern, it will make anyone "ooh" and "aah" all over again when they take a slice. Please, make this cheesecake. You won't regret it.


Brownie Mosaic Cheesecake
(recipe from Smitten Kitchen)

Brownie Ingredients:

1 family-size box of brownie mix, baked as directed
or
1 9x13 pan of your favorite brownie recipe

Crust:
(measurements to double crust in parenthesis)

1 1/2 cups or 5 ounces (3 cups or 10 ounces to double) finely ground cookies such as chocolate wafers. Or Chocolate Teddy Grahams.
5 tablespoons (10 tablespoons to double) unsalted butter, melted
1/3 cup (2/3 cup to double) sugar
1/8 (1/4 teaspoon to double) teaspoon salt

Cheesecake

3 (8 ounce) packages cream cheese, softened
4 large eggs
1 teaspoon vanilla
1 cup sugar
2 cups brownie cubes

Chocolate Ganache:
3 ounces bittersweet chocolate, broken up, or 1/2 cup chocolate morsels
2 ounces butter
1/4 cup heavy cream
1/2 teaspoon vanilla extract
1 tablespoon confectioners sugar

Directions:

1.
Bake brownies as directed on the box or bake your own recipe. Once brownies are cool, store in the refrigerator or freezer before you cut them for cleaner cuts.

2.
Stir together crust ingredients and press onto bottom and 1 inch up side of a buttered 24-centimeter springform pan. Fill right away or chill up to 2 hours.

3. Make crumb crust as directed above for 24-centimeter cheesecake. Preheat oven to 350°F.

4. Make filling and bake cake: Beat cream cheese with an electric mixer until fluffy and add eggs, 1 at a time, then vanilla and sugar, beating on low speed until each ingredient is incorporated and scraping down bowl between additions.

5. Fold brownie cubes in very gently and pour mixture into prepared pan. Put springform pan with crust in a shallow baking pan. Pour filling into crust and bake in baking pan (to catch drips) in middle of oven 45 minutes, or until cake is set 3 inches from edge but center is still slightly wobbly when pan is gently shaken.

When completely cool, top glaze.

6. To make the ganache, grind the chocolate into powder in the food processor, scald the butter and cream in a saucepan (or in a Pyrex cup in the microwave). With the machine running, pour the hot cream/butter mixture slowly through the feed tube onto the chocolate. Blend until completely smooth, stopping machine to scrape down sides once or twice.

7. Add the extract and sugar and process until smooth. Spread over cheesecake while ganache is still warm. Chill until ready to serve.
 

Dunk Twice Copyright © 2009 Cookiez is Designed by Ipietoon for Free Blogger Template