Showing posts with label cream cheese. Show all posts

Monday, December 20, 2010

Carrot Cake with Brown Sugar Cream Cheese Frosting


You know how whenever you're having a really bad day, and you say to yourself, "it can't get any worse" and then ten minutes later it gets worse?

Yeahhhh... That was Sunday.

This weekend was my mother and I's birthday weekend. I get told a lot that my birthday kind of gets shafted, you know, with my mom's birthday the day before mine and Christmas 6 days away. You'd think it'd be like, "oh cool! I get double the presents!" but that's totally not the case.

It's more like... "oh, cool! my birthday present is my Christmas present too!"

*Awkward silence*

"....waaaaaaaaitaminute."

Yeah.

Totally not bitter or anything like that. Nope.

Kidding, in all honesty, I don't really mind. After I turned 15 I got really weird about birthdays. I just never liked them after that. Call me crazy, but a whole day devoted to me is not something I'm too into. And no, it's not because I'm Ms. Humble ;) It's because that every time my birthday rolls around, something happens that ends up ruining my whole day. Don't believe me? I can pretty much list every single birthday since I was 14 where somethings gone wrong. It's crazy.

My birthday is like an excuse for the universe to play russian roulette or rather, "let's-press-all-of-alex's-buttons" day. So I prefer to skip the whole birthday thing. It just makes it easier.


However, this year, I decided to bite the bullet and do something.

Instead of being a "party-pooper" on my own birthday, I went ahead and planned to do something I actually wanted to do. What better excuse? It's my birthday. You gotta do it, or else you'll end up on Santa's naughty list and get no presents.

At least that's what I tell my nieces and nephews.

What? It's the only perk of having a birthday close to Christmas. ;)

Anyway, I decided I wanted to bake my own cake (aka the only cake I'll eat besides rum cake), have all my family members over to play a board game, and just really spend time with my family. Something that I have been lacking horribly the past 5 months.

The day didn't start off bad... In fact, it was great. Filled with new york crumb cake and lots of (caffeinated) tea. It was wonderful. Church was awesome, and everyone sang me happy birthday, which caused me to sink into my chair, turn into a tomato and run to North Korea.

Then, all it took was a text message. Our vacuum had broken in the middle of my mother cleaning the house back at home. "Ok, figures," I think to myself, "at least that's all it was".

That should've been the first sign.

Next thing you know, I realize I have no ingredients for the cake I want to make. Ok, another bump in the road, not too bad... Go to the store, get the ingredients, and then see that I forgot the most crucial part of carrot cake.

Carrots.


So, there goes another trip to the store. I start to get jittery at this point, watching the clock all the while. I get home and try to get going as quickly as possible. I get all my ingredients ready, set everything up, butter my cake pans, preheat the oven....

And then the oven catches on fire.

Yeah.

Fire.
Flames.
Fiery flamey flames.

Next thing I know the whole house is filled with smoke and my neighbors are asking if I'm letting Bob Marley stay at my house. The smoke is so dense I can barely see the other side of the kitchen, and as the oven stays on it's not getting any better.

It's at this point that the universe wins and Alex goes into breakdown mode.

"I knew this was going to happen," I cried, shaking an invisible fist to the universe. "This always happens!"

Thankfully, my mom was there. And since she can magically make everything better, the day didn't end in disaster and fiery flames. She helped me calm down, clean up the oven, keep baking, and get everything done in time.

And you know what? Everything came out perfectly. The cake. The frosting. The party. The everything.

Overall, I did have a good birthday. And I had a freakin' delicious carrot cake to go with it. I honestly adore carrot cake. Probably the only cake I'll ever eat. And the brown sugar cream cheese frosting was such a complement to the cake... I loved it. The best part about this cake is that it has virtually no fat in it. I had even used 0 calorie granulated sugar and it was still amazing. I kept it moist with 0% greek yogurt and REAL brown sugar. The taste was tremendous and just lightly spiced. Over all the cake came out great. Although there is no coconut in this cake. I'm seriously against coconut in carrot cake... Sue me.

Carrot Cake with Brown Sugar Cream Cheese Frosting

INGREDIENTS:
2 cups flour
2 teaspoons ground cinnamon
2 teaspoons baking soda
1 teaspoon ground ginger
1/2 teaspoon ground cloves
1 cup greek yogurt (fat-free works fine)
1 cup brown sugar
1 cup granulated sugar (zero calorie sugar substitutes work fine for this cake)
4 eggs (I used 1 cup egg substitute)
1/2 cup crushed pineapple, drained of most its juice
2 teaspoons vanilla extract
1 cup chopped walnuts (I used more than this cause I love walnuts in carrot cake)
1 cup golden raisins
3 cups grated carrots (I finely grate mine to a pulp)

BROWN SUGAR CREAM CHEESE FROSTING INGREDIENTS:
8oz cream cheese, room temperature ( I used fat-free)
1/2 cup butter, room temperature (I used light)
1/2 cup brown sugar
1/2 teaspoon vanilla extract
1/2 teaspoon ground cinnamon (or pumpkin pie spice)
3 cups powdered sugar (add more as needed)

DIRECTIONS:

1. Whisk together flour, baking soda, spices and salt in a medium bowl. Set aside.

2. Preheat your oven to 350F degrees. Grease 1 9x13 inch pan or 2 8x8 cake pans with butter and flour.

3. Mix together greek yogurt and sugars until fully combined. Mix in egg substitute until incorporated (if using real eggs, beat in one at a time), and then proceed to mix in the crushed pineapple and vanilla extract.

4. Gently fold in walnuts, raisins and carrots, being careful not to overmix.

5. Pour into prepared cake pans and bake at 350F for about 40-50 minutes or until a toothpick comes out of the center clean and the cake is a slightly dark golden brown.

6. While cake is cooling, make the frosting. Blend together the cream cheese, butter, brown sugar, vanilla extract and cinnamon until smooth. Add in powdered sugar 1 cup at a time until you've reached a stiff, smooth frosting. In other words, if you use a spatula to pick up the frosting from the bowl and the frosting is dripping off your spatula, you need more powdered sugar. Set the frosting aside or put in covered container in the fridge until cake is cooled and ready.

7. Cool in pan for 10 minutes before transferring to a plate. Cover with plastic wrap and refrigerate until you are ready to frost (this is also helpful for cooling the cake down quicker so the frosting does not melt). Once cake is cooled, frost with brown sugar cream cheese frosting any way you'd like.

Thursday, November 4, 2010

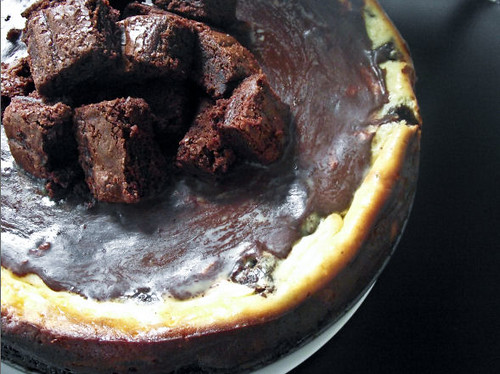
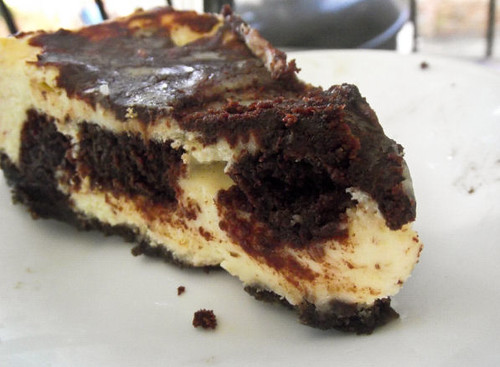
Brownie Mosaic Cheesecake

This cheesecake is magical.

In one bite, it can do so many different things.

It will change your life.
It will change your perspective of everything.
It will make you question reality.
How can something taste so good?


It will impress your drama-queen manager who is always PMSing. Even if he's a guy.
It will make your boyfriend stop playing Fable 3 and Halo: Reach for more than just a potty break.
It will cause odd and excessive groaning/moaning noises from everyone that eats it.
It will make anyone who hates you, love you. Forever.
It pretty much brings all the boys to the yard. And not for milkshakes.

This cheesecake...is just far too much.

Smooth. Creamy. Sweet enough to balance out the brownies. Decadent enough to satisfy with one serving, but addicting enough to go back for more sometime around midnight when no one can see you lick it off the fork. Oh, and a chocolate wafer crust to top it all off.

Yeah. You can't really get better than this without enticing a heart attack on yourself.

The best part about this cheesecake is that it's easy. Sure, it includes some patience. But it's so very, very worth it. If you've got a big event coming up, or maybe just want to do something nice for someone... this is the way to go. Plus, it looks so impressive when you cut into it. The brownie chunks make such a beautiful pattern, it will make anyone "ooh" and "aah" all over again when they take a slice. Please, make this cheesecake. You won't regret it.


Brownie Mosaic Cheesecake
(recipe from Smitten Kitchen)

Brownie Ingredients:

1 family-size box of brownie mix, baked as directed
or
1 9x13 pan of your favorite brownie recipe

Crust:
(measurements to double crust in parenthesis)

1 1/2 cups or 5 ounces (3 cups or 10 ounces to double) finely ground cookies such as chocolate wafers. Or Chocolate Teddy Grahams.
5 tablespoons (10 tablespoons to double) unsalted butter, melted
1/3 cup (2/3 cup to double) sugar
1/8 (1/4 teaspoon to double) teaspoon salt

Cheesecake

3 (8 ounce) packages cream cheese, softened
4 large eggs
1 teaspoon vanilla
1 cup sugar
2 cups brownie cubes

Chocolate Ganache:
3 ounces bittersweet chocolate, broken up, or 1/2 cup chocolate morsels
2 ounces butter
1/4 cup heavy cream
1/2 teaspoon vanilla extract
1 tablespoon confectioners sugar

Directions:

1.
Bake brownies as directed on the box or bake your own recipe. Once brownies are cool, store in the refrigerator or freezer before you cut them for cleaner cuts.

2.
Stir together crust ingredients and press onto bottom and 1 inch up side of a buttered 24-centimeter springform pan. Fill right away or chill up to 2 hours.

3. Make crumb crust as directed above for 24-centimeter cheesecake. Preheat oven to 350°F.

4. Make filling and bake cake: Beat cream cheese with an electric mixer until fluffy and add eggs, 1 at a time, then vanilla and sugar, beating on low speed until each ingredient is incorporated and scraping down bowl between additions.

5. Fold brownie cubes in very gently and pour mixture into prepared pan. Put springform pan with crust in a shallow baking pan. Pour filling into crust and bake in baking pan (to catch drips) in middle of oven 45 minutes, or until cake is set 3 inches from edge but center is still slightly wobbly when pan is gently shaken.

When completely cool, top glaze.

6. To make the ganache, grind the chocolate into powder in the food processor, scald the butter and cream in a saucepan (or in a Pyrex cup in the microwave). With the machine running, pour the hot cream/butter mixture slowly through the feed tube onto the chocolate. Blend until completely smooth, stopping machine to scrape down sides once or twice.

7. Add the extract and sugar and process until smooth. Spread over cheesecake while ganache is still warm. Chill until ready to serve.

Sunday, September 26, 2010

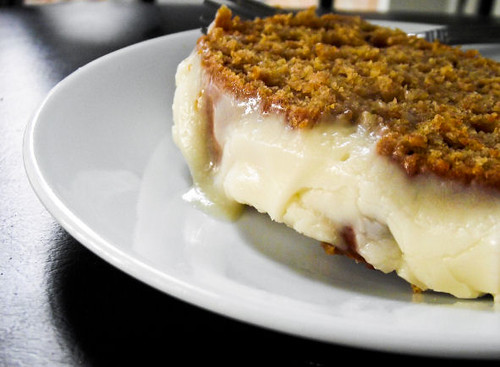
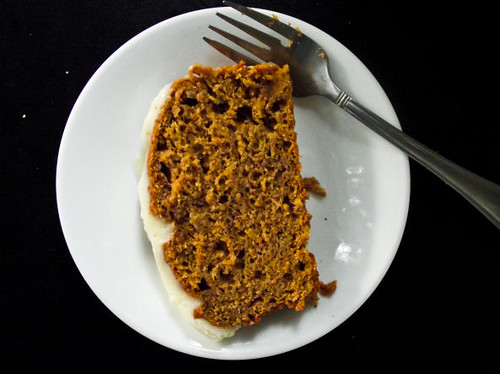
Pumpkin Spice Loaf with Cream Cheese Glaze


The fact that October is in 4 days hasn't hit me yet. The fact that Halloween is at hand and I feel like we're still just getting over Easter is bugging me. I've never been one to lose count of the months, or the days. Now it feels like the complete opposite.

And that whole Christmas is in 3 months thing...

Yeah. 3 months. I know everyone reading this just felt their stomach drop.

Even though fall is here it doesn't feel like it yet. Sure, we've put up all our fancy fall specials in the cafe of our store. Canned pumpkin is making its return full blast and Winter Squash is goin' for 69 cents a pound at the store. It should feel like it's Autumn, but where's the cold? Kind of hard to enjoy my butternut squash soup on a chilly night when it's hot enough to still be drinking pink lemonade and eating overpriced strawberries.


Regardless of the humidity, I'm still trying to get into the set of things. I know that as soon as I get that whiff of winter on a chilly, foggy morning here, I'll get the Christmas bug. I like to call it my CCD. Christmas Cookie Disorder. It begins whenever the first smell of winter arrives, and leaves any time after the store stops selling those awesome Danish Butter Cookies that come in the dark blue tins... Dang, those things are good.

This loaf is one of those things helping me remind myself that yes, it is almost October. Yes, there is pumpkin to be eaten. Yes, I do not have any freakin' idea what to get anyone for Christmas and Yes, this Pumpkin Spice Loaf goes great with Coffee or if you're feeling really ambitious, a Pumpkin Spice Latte'. Hey, man, if you're gonna go all the way.... ;)

The bread itself is moist, a little less sweeter than you're normal pumpkin bread just because I went ahead and cut the sugar in half so I wouldn't get a blood rush in the morning when I ate it for breakfast. It's virtually fat-free, replacing all the oil with unsweetened applesauce and only using one whole egg. The bread still stays delicious, though I could've definitely amped up the "spice" part of it, but I feared the end result would be a little too hardcore for my cinnamon-hating other half to handle. I'd say when and if you do make the bread, definitely throw in 2 teaspoons of cinnamon, 1 teaspoon of ground ginger, and maybe even add 1/4 teaspoon of allspice. Or you can just go with a healthy dose of pumpkin pie spice and call it a day. Whatever makes your skirt fly up.

Though the bread part of it is pretty much good for snacking and breakfast, the unsweet undertones of the bread are balanced out completely by the cream cheese frosting.

And yes. It is to die for. You will have leftovers. Use them wisely. As in.... insert spoon into vat of frosting and proceed to put it in your mouth. Don't worry! Even the frosting isn't that bad for you... Or at least that's what we can pretend.

I'm going to keep trying to get my mindset in the Autumn mood. Maybe buy a few fuzzy jackets. Make a few Christmas Cookies ahead of time. Eat some gingersnaps. Eat some gingersnaps in a crust with Pumpkin Pie. Eat some gingersnap in a crust with Pumpkin Cheesecake Pie. Heck, maybe I'll actually carve a pumpkin this year and make it look like Elvis.

And then I'll make another loaf of pumpkin spice bread. And eat all the frosting for breakfast. Yep. That sounds like a plan.


Pumpkin Spice Loaf with Cream Cheese Glaze

Pumpkin Spice Loaf Ingredients:
1 cup of pure canned pumpkin
3/4 cup unsweetened applesauce
1 egg white
1 egg
1 teaspoon vanilla extract
1/2 cup granulated sugar
1/4 cup brown sugar
1 1/4 cup whole wheat flour
1/2 cup all-purpose flour
2 teaspoons baking powder
1/4 teaspoon baking soda
1/4 teaspoon salt
1 teaspoon ground cinnamon (I would up this to 2 teaspoons next time)
1/2 teaspoon ground ginger (I would up this to 1 teaspoon next time)
1/4 teaspoon ground nutmeg
1/8 teaspoon ground cloves
1/4 teaspoon ground allspice (optional, but it wouldn't hurt)


Cream Cheese Glaze
4 tablespoons butter, room temperature (I used I Can't Believe It's Not Butter Light and it tasted fine)
4 oz 1/3 less than fat cream cheese, room temperature
2 cups powdered sugar
1/2 teaspoon vanilla extract
(yes, you will have leftover glaze. If you do not want leftover glaze, cut the ingredients in half)


Directions:
1.
Preheat oven to 325F.
2. Combine all wet ingredients, pumpkin through vanilla extract, into a medium bowl. In a larger mixing bowl, whisk together all dry ingredients, flours through allspice.
3. Mix the wet ingredients into the dry until no trace of flour is left
4. Pour the mixture into a well greased 9x5in. loaf pan, making sure the batter is even and flat on the surface.
5. Bake at 325F for 50-60 minutes or until a tooth pick inserted in the center comes out clean.
6. Meanwhile, while bread is baking, make the glaze. Mix together the cream cheese, butter, and vanilla until smooth. Add powdered sugar by 1/2 cupfuls, waiting until each one is incorporated until adding more. Once you've got the desired consistency, set aside.
7. When bread is finished baked, leave to cool in the pan for 5 minutes before taking it out and cooling completely on a wire wrack. Once bread is cooled, top off with half of the cream cheese mixture. Cover the bowl with plastic wrap and keep the rest in the fridge for later baking adventures. Or you can go all out and just pour all of that glaze on top of the bread. Whatever strikes your fancy. ;)

Serves 12 generously.
Or just one really ravenous lady at breakfast.

Saturday, March 13, 2010

St. Patty Whoopie Pies

st. patty whoopie pies


Imagine for me, if you will, a beautiful, crisp spring day. The sun is out. The skies are clear with maybe just a little puffy cloud here and there... A nice, refreshing breeze that blows up all the leaves that have fallen off the trees into the air, dancing around you as if trying to prove that there is life after death. That they are still beautiful even though they are broken, brown, and seemingly drained of their bright green pride. You are feeling new. You are feeling motivated. You are feeling like cozying up by a lake, reading a book, sipping coffee and maybe sharing a conversation with a friend or a stranger. You watch your kids outside, playing and getting dirt all over their gorgeous faces.

It's one of those days where you can't help but smile, open up the windows, breathe, and fully appreciate the oncoming brighter days. The knowledge that finally, the worst of winter has passed, and the time for sundresses, popsicles, beaches and lemonade has arrived.

When it comes to my favorite type of days... these have to be up there in my favorite. There is something just so renewing that comes with a gorgeous bright day that appears right after the more crummy, yucky ones.

It's gotta rain before it can shine, right? Right.

st. patty whoopie pies


So, with such a perfect day to take a hold of, I really wanted to make something pretty... and festive! Afterall, St. Patricks day is coming up, which means that making these cute little whoopie pies are a must. Best part about it? They are IN. CREDIBLY. EASY. Which means instead of staying inside and making these, you can quick whip 'em up, make 'em, prepare the frosting while they are baking and then all you have to do is assemble them and, if desired, roll them in some pretty bright green coarse sugar. Heck, even if you aren't irish... make 'em! Even better, find someone who is Irish and share them! Or just find someone who likes cookies and cream cheese frosting. I'm sure that can't be too hard. :)

Here's to brighter days for all of us.

And yes, I know I totally sounded like a hallmark card.

st. patty whoopie pies

Super-Easy-Peasy Whoopie Pies


INGREDIENTS:


For Cookies
1 box of french vanilla style cake mix (like duncan hines)
1/2 stick butter, softened
1 egg

For Frosting
4oz cream cheese, softened
1/4 cup butter, softened
2 to 2 1/2 cups powdered sugar
1 teaspoon vanilla
Coarse sugar, for decoration (*optional)

DIRECTIONS:

1. Prepare oven to 350F

2. For cookies, use a handmixer or kitchenaid to combine the cake mix, butter, and egg together until moist. Don't worry if mixture is a bit dry. For smaller, mini whoopie pies, drop by teaspoonfuls onto baking sheet. For normal whoopie pies, drop by tablespoonfuls.

3. Bake for 9-10 minutes. Take out and leave to set on pan for 2 minutes, then move to a wire rack to cool completely.

4. To prepare frosting, mix cream cheese and butter together until smooth. Add teaspoon of vanilla. Add powdered sugar in 1/4 cup intervals to mix until you get a consistency you like (I used 2 1/2 cups of powdered sugar).

5. When cookies have cooled completely, fill with about 1-2 teaspoons of cream cheese mixture, and sandwich cookies together. If desired, roll the edges of the cookies in coarse colored sugar. Store cookies in air-tight container in the refrigerator. Makes about 25 mini whoopie pies and 15 normal sized ones.

Sunday, December 6, 2009

Punitions with Rum Cream Cheese Icing


The chilly morning weather is rolling in and I am seriously finding it harder and harder to get out of bed in the morning. Seriously. You could be whippin' up a batch of cinnamony french toast and bacon and I'll still hesitate to get out from under the covers. It's just been one of those weekends where all you wanna do is snuggle inside your blanket, watch some awesome T.V. shows (*cough*THEFRINGE*cough*) and eat a lot of nice, warm, comforting, homey food.
Even though Christmas is coming, I really hardly feel like it is. It seems like the hype is so died down this year for everyone... But I'm still glad people are spreading the Christmas cheer anyway. That, and there is DEFINITELY no shortage of cookie making and consumption. No,
not at all.

Though I admit I was a total laze ball this weekend, I did manage to drag my butt out of bed and get some things done... And of course, those things came mostly in cookie form. Because it's Decemeber. And they can come in no other way but in cookie form.


I love these cookies because they are basic, simple, and still the bomb. Throw some snazzy cream cheesy icing on there that's been spiked with rum extract and you got yourself a class full of happy, hungry, cheery little kids all wanting to gobble these cute little snowmen up. And I don't blame them one bit!

Punitions, also known as "Punishment" cookies, are incredibly easy. You just mix flour, sugar, and butter together in the food processor, stick it in the fridge for a few hours, roll it out and cut it into traditional wedged circles or get all fancy-shmancy and use a snowman cut out. Your choice.

They're great on their own with a crumbly and snappy texture. But the icing really makes it even better. You really don't want to eat too many of these... they are truly for sweet tooths only. You know. The kind of people who can enjoy a few Hawaii'an sweet rolls with a good pat of butter on 'em.

Mmm. Hawaii'an sweet rolls...

Punitions (Punishment cookies)
(courtesy of smitten kitchen, adapted from Boulangerie Poilane, via Paris Sweets by Dorie Greenspan)
INGREDIENTS:

For cookies:

1 1/4 sticks salted butter, at room temperature
Slightly rounded 1/2 cup sugar
1 large egg, at room temperature
2 cups all-purpose flour

For rum cream cheese icing:
1/4 cup cream cheese, softened
2 cups powdered sugar
1/4 teaspoon rum extract
1 teaspoon light corn syrup
1 teaspoon water (optional, for thinning)

DIRECTIONS:
1. Put the butter in the work bowl of a food processor* fitted with the metal blade and process, scraping down the sides of the bowl as needed, until the butter is smooth. Add the sugar and process and scrape until thoroughly blended into the butter. Add the egg and continue to process, scraping the bowl as needed, until the mixture is smooth and satiny. Add the flour all at once, then pulse 10 to 15 times, until the dough forms clumps and curds and looks like streusel.

2. Turn the dough out onto a work surface and gather it into a ball. Divide the ball in half, shape each half into a disk, and wrap the disks in plastic. If you have the time, chill the disks until they are firm, about 4 hours. If you’re in a hurry, you can roll the dough out immediately; it will be a little stickier, but fine. (The dough can be wrapped airtight and refrigerated for up to 4 days or frozen for up to 1 month.)

3. Position the racks to divide the oven into thirds and preheat the oven to 350°F (180°C). Line two baking sheets with parchment paper.

4. Working with one disk at a time, roll the dough out on a lightly floured surface until it is between 1/8 and 1/4 inch (4 and 7 mm) thick. Using a 1 1/2-inch (4-cm) round cookie cutter, cut out as many cookies as you can and place them on the lined sheets, leaving about 1 inch (2.5 cm) space between them. (You can gather the scraps into a disk and chill them, then roll, cut, and bake them later.)

5. Bake the cookies for 8 to 10 minutes, or until they are set but pale. (If some of the cookies are thinner than the others, the thin ones may brown around the edges. M. Poilâne would approve. He’d tell you the spots of color here and there show they are made by hand.) Transfer the cookies to cooling racks to cool to room temperature.

6. For icing, beat cream cheese and powdered sugar together. Add extract and corn syrup. Beat until combined. If icing is too thick (it should have a drizzly consistency) add teaspoon of water or milk as desired. Ice cookies and leave for icing to harden.

Do ahead: The cookies can be kept in a tin at room temperature for about 5 days or wrapped airtight and frozen for up to 1 month.

Monday, November 30, 2009

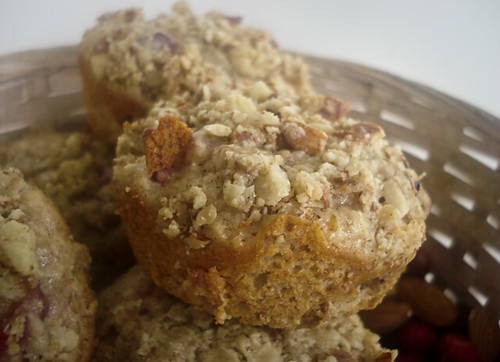
Cranberry Almond Cream Cheese Muffins


Can I be honest for a second?

I am not a muffin person.
At all.

When I sit down and think about what I want for breakfast, I never think: "Gosh, I could really go for a jumbo blueberry muffin right now..."

New York crumb cake on the other hand, is an entirely different story. But that's irrelevant.

Muffins aren't usually on my list of things I crave; I'd go for a bowl of oatmeal with some sliced bananas and cinnamon before I'd go for a banana muffin, even if it had the same taste as my oatmeal.

I guess what I'm trying to say is that I'd rather eat something that looks like more for breakfast than just a hand-sized muffin.

I'm also not a cranberry person... unless those cranberries are reduced to a sauce with balsamic vinegar and lots and lots of sugar. They are way too tart for my liking and I even dislike craisins, to an extent, because they are too sweet. Cranberries seem to get a bad rep in my life for being too tart or too sweet, so I never got into the habit of using them or eating them or including them in my every-day diet.

So the fact that one of the first baking recipes I ever made from scratch was: 1) A muffin and 2) filled with cranberries; is sort of ironic in a funny "wow, that's unexpected" kind of way.

But I've come to realize that bakers are just that. Unexpected. Weird. A little funky. And a little too quick to lick the spatula.

(Yeah, right. Since when is anyone too quick to lick the Spatula/bowl/detachable mixer handles?)

Personally, I love my little almondy cranberry muffins. They pack some serious moistness due to the fact that they are made out of 8 ounces of cream cheese instead of a cup of butter. In fact, these little muffins are probably low-carb power houses and if you happen to be on a low-carb diet then you'll wanna whip these babies up in no time because they are pretty gosh darn filling.

They don't need any additional oil to keep them nice and mosit -- the cream cheese does all the work. And the fact that they've got about 3/4 cup of oats thrown into them just means you're getting your whole-grain carbs, too!

Okay, now I'm just looking for excuses to make a muffin sound healthier than it is.
Forgive me. Some days I'm a baker. Some days I'm a dietitian. It's a rough line to balance on.

While you can choose to bake these in regular muffin tins, I go for the mini muffins one, just because that means that I have more of them and plus -- everything looks cuter when it's mini. Except Minnie Mouse. She's just creepy.

So if you're not like me, and you like cranberries and muffins, definitely make these. They're good. They're kinda good for you. And they are totally yummy.

Cranberry Almond Cream Cheese Muffins
(Recipe By: Alexandra Ramirez)

INGREDIENTS
1/2 cup all-purpose flour
1/2 cup whole wheat flour
1/2 cup almond meal/almond flour
3/4 cup oats, quick-cooking
1/2 teaspoon salt
4 teaspoons baking powder
1/4 teaspoon cinnamon
8 oz cream cheese, softened
3/4 cup sugar, divided
1/4 teaspoon vanilla extract
2 eggs
2/3 cup buttermilk
1/2 cup fresh chopped cranberries
1/2 cup finely chopped almonds or slivered almonds

CRUMB TOPPING
1/2 cup almond meal
1/4 cup chopped or slivered almonds
6-7 tablespoons butter, melted
2 tablespoons sugar

DIRECTIONS

1. Preheat oven to 350F and grease 2 12 cup mini muffin tins (or a 12 cup regular muffin tin)

2. Whisk together flours, oats, salt, baking powder, and cinnamon in a small bowl. Set aside.

3. In a large bowl, beat together cream cheese with 1/2 cup sugar until smooth and creamy. Add vanilla extract, and beat in briefly.

4. In another seperate bowl, whisk together 2 eggs and remaining sugar until smooth and thick. Pour into the bowl with cream cheese, and blend on low until just combined (be careful not to overbeat here).

5. With a wooden spoon or spatula, begin to stir in flour mixture slowly. As you are stirring in the flour to the cream cheese mix, slowly pour the buttermilk in along with it. Continue to stir until there is no flour left. Your batter should be very lumpy but still wet.

6. Stir in cranberries and almonds.

7. Fill in muffin cups with batter about 3/4 of the way (a heaping tablespoon should do it for the mini muffin tins).

8. Prepare crumb topping by stirring the almond meal, chopped almonds and sugar together. Add melted butter. Stir until thoroughly coated and crumbly. Sprinkle generously over muffin tops.

10. Bake at 350F for 15-18 minutes. Muffins should be lightly brown on their sides but still generally light colored. When out of the oven, loosen the edges of the muffin from the tin with a clean, slick knife. Remove and cool on wire wracks.

Makes 24 mini muffins or 12 regular sized ones.
 

Dunk Twice Copyright © 2009 Cookiez is Designed by Ipietoon for Free Blogger Template