Tuesday, December 14, 2010
Hot Chocolate Bars
Friday, November 12, 2010
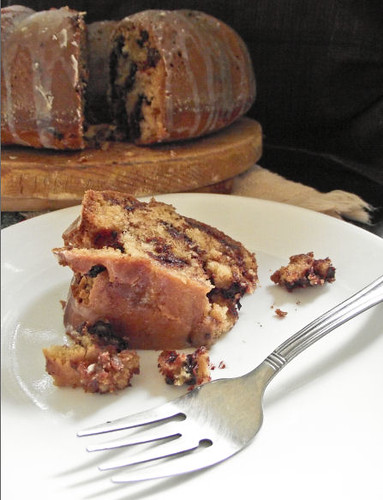
Brown Sugar Bundt Cake with Maple Espresso Glaze
A long time ago, when I was a itty-bitty Alex who liked to run around in her PJ's all day and refused to wear actual clothes until she was well past 8 years old, my Mother baked me my own cake for my birthday.
It was a lovely box mix yellow cake with lovely Pillsbury white frosting slathered all over it. She made it in her Bundt Cake pan, and after she had frosted it completely, she decided it would be a great idea to stick a little doll figure angel in the middle of the cake. She then had an even better idea, which was to surround said doll figure with candles.
Candles.
Lit. Candles.
With fire.
Fiery candles of death.
Ok, so I wasn't exactly thinking that when I was a kid. But when I think about it today, that's all I see.
Now-a-days, It's hard for me to look at a bundt cake without thinking about that moment. It's not often that I eat bundt cakes. Anyone who knows me knows that I don't like cake. It's not my preferred dessert of choice and given the chance I will always pick something other than cake at the dessert table or party. Sure, I'll try it to be nice, but that's about as far as it goes for me. As I've touched on numerous times in my blog, it's no specific thing about cake that makes me dislike it. I just don't like the cake/frosting combo. Doesn't sit well with me or my tummy.
The thing about cake is that often, it has a dry crumb that gives it that kind of "stick to the roof of your mouth" chew that can be both unpleasant and yucky to many people. Dry crumbs are often caused by 1. using cake mix and 2. having not enough moisture in your cake. I've always thought anyone who can pull off a moist but not "wet" cake had a one in a million skill of being able to perfect the balance between a cake that has enough dryness in it to keep it together but has enough moisture to make it both tender, sweet, and melt-in-your-mouth quality.
This cake...is nothing like that. In fact, it's a superb way to end any meal, or start any day with a thick slice for breakfast. The glaze on top is subtley sweet, giving a perfect finish to the caramely tasting insides. The crumb is both moist and satisfying, and the chocolate chips inside are just a fantastic added bonus that ties it all together and makes it much more than just a regular ol' cake with some glaze on it. Even I myself could be found picking off pieces of this cake here and there throughout the day. And that's definitely saying something.
If you wanted to, you could make the glaze a lot thicker. I like a thinner glaze on my cakes, so I used a bit more heavy cream. But if you like a thicker, more visually apparent glaze, go ahead and stick with the recipe below. And please, do not disclude the chocolate chips. They are worth the extra trip to the store. Promise.
(Recipe by Bon Appétit)
Nonstick vegetable oil spray
1 12-ounce package semisweet chocolate chips
3 cups all purpose flour, divided
2 teaspoons baking soda
1 teaspoon baking powder
3/4 teaspoon salt
1 cup (2 sticks) unsalted butter, room temperature
1 1/2 cups (packed) golden brown sugar
2 1/2 teaspoons vanilla extract
1 teaspoon maple extract
4 large eggs
1 cup buttermilk
Glaze:
1 cup powdered sugar
2 tablespoons pure maple syrup
2 tablespoons (or more) whipping cream
1 1/2 teaspoons instant espresso powder
DIRECTIONS:
1. Preheat oven to 325°F. Butter 12-cup Bundt pan. Spray pan generously with nonstick spray. Dust pan lightly with flour.
2. Mix chocolate chips and 2 tablespoons flour in medium bowl.
3. Sift remaining flour with baking soda, baking powder, and salt into another medium bowl.
4. Using electric mixer, beat butter and brown sugar in large bowl until fluffy, about 3 minutes. Beat in vanilla extract and maple extract. Add eggs, 1 at a time, beating well after each addition.
5. Mix in flour mixture in 3 additions alternately with buttermilk in 2 additions, beginning and ending with flour mixture. Fold in chocolate chip mixture. Transfer batter to prepared pan, spreading evenly.
6. Bake cake until tester inserted near center comes out clean and cake begins to pull away from sides of pan, about 1 hour. Cool cake in pan on rack 30 minutes. Invert cake onto rack and cool completely.
7. For the glaze, Combine powdered sugar, maple syrup, 2 tablespoons cream, and espresso powder in medium bowl. Whisk until smooth, adding more cream by 1/2 teaspoonfuls if glaze is too thick to drizzle. Spoon glaze decoratively over top of cake; let stand at room temperature until glaze is firm, about 1 hour. DO AHEAD: Can be made 1 day ahead. Cover with cake dome and let stand at room temperature
Thursday, November 4, 2010
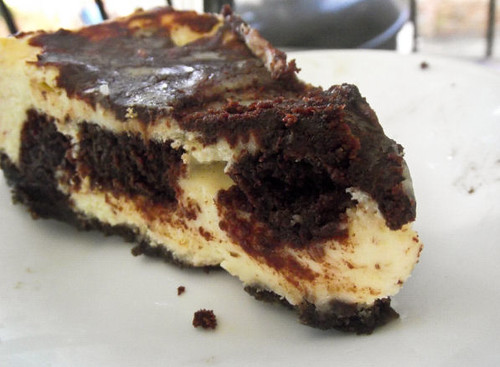
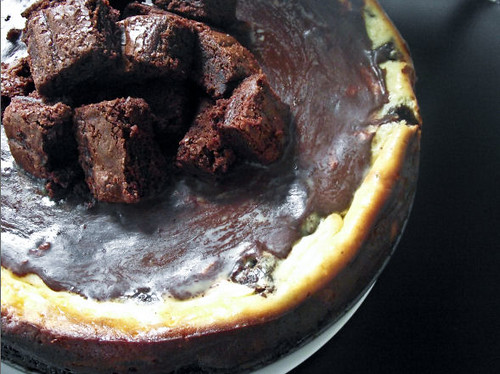
Brownie Mosaic Cheesecake
In one bite, it can do so many different things.
It will change your life.
It will change your perspective of everything.
It will make you question reality.
How can something taste so good?
It will make your boyfriend stop playing Fable 3 and Halo: Reach for more than just a potty break.
It will cause odd and excessive groaning/moaning noises from everyone that eats it.
It will make anyone who hates you, love you. Forever.
It pretty much brings all the boys to the yard. And not for milkshakes.
Smooth. Creamy. Sweet enough to balance out the brownies. Decadent enough to satisfy with one serving, but addicting enough to go back for more sometime around midnight when no one can see you lick it off the fork. Oh, and a chocolate wafer crust to top it all off.
Yeah. You can't really get better than this without enticing a heart attack on yourself.
The best part about this cheesecake is that it's easy. Sure, it includes some patience. But it's so very, very worth it. If you've got a big event coming up, or maybe just want to do something nice for someone... this is the way to go. Plus, it looks so impressive when you cut into it. The brownie chunks make such a beautiful pattern, it will make anyone "ooh" and "aah" all over again when they take a slice. Please, make this cheesecake. You won't regret it.
(recipe from Smitten Kitchen)
1 family-size box of brownie mix, baked as directed
or
1 9x13 pan of your favorite brownie recipe
Crust:
(measurements to double crust in parenthesis)
1 1/2 cups or 5 ounces (3 cups or 10 ounces to double) finely ground cookies such as chocolate wafers. Or Chocolate Teddy Grahams.
5 tablespoons (10 tablespoons to double) unsalted butter, melted
1/3 cup (2/3 cup to double) sugar
1/8 (1/4 teaspoon to double) teaspoon salt
Cheesecake
3 (8 ounce) packages cream cheese, softened
4 large eggs
1 teaspoon vanilla
1 cup sugar
2 cups brownie cubes
Chocolate Ganache:
3 ounces bittersweet chocolate, broken up, or 1/2 cup chocolate morsels
2 ounces butter
1/4 cup heavy cream
1/2 teaspoon vanilla extract
1 tablespoon confectioners sugar
Directions:
1. Bake brownies as directed on the box or bake your own recipe. Once brownies are cool, store in the refrigerator or freezer before you cut them for cleaner cuts.
2. Stir together crust ingredients and press onto bottom and 1 inch up side of a buttered 24-centimeter springform pan. Fill right away or chill up to 2 hours.
3. Make crumb crust as directed above for 24-centimeter cheesecake. Preheat oven to 350°F.
4. Make filling and bake cake: Beat cream cheese with an electric mixer until fluffy and add eggs, 1 at a time, then vanilla and sugar, beating on low speed until each ingredient is incorporated and scraping down bowl between additions.
5. Fold brownie cubes in very gently and pour mixture into prepared pan. Put springform pan with crust in a shallow baking pan. Pour filling into crust and bake in baking pan (to catch drips) in middle of oven 45 minutes, or until cake is set 3 inches from edge but center is still slightly wobbly when pan is gently shaken.
When completely cool, top glaze.
7. Add the extract and sugar and process until smooth. Spread over cheesecake while ganache is still warm. Chill until ready to serve.
Friday, October 8, 2010
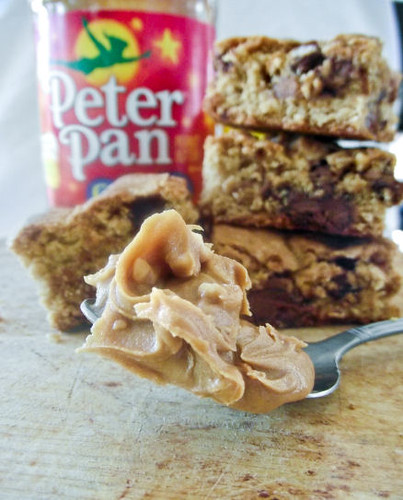
Reeses Peanut Butter Bar Blondies
Before I get into how awesome these blondies are, let me tell you a little bit about someone else who is just as equally awesome.
My sister.
Y'see, my sister is a little out there. She's a little strange. Possibly because she's related to me. Or maybe it's the other way around... whatever. Either way, my sister is in her own way one of the most special people I've ever met.
She's not TOO complicated. She enjoys the simple things in life. Like Lost. And Dexter. And Bones. She also was the person who got me hooked on The Fringe... which I haven't decided if that's a good thing or not.
When she was pregnant with her first kid, my sister craved starbursts and hersheys kisses. When I was younger, I would snuggle up to her and watch her play Zelda while we ate chocolate together. And then she'd get pissed off and go "What the hell do I do?" every five minutes. I'd just watch intently, trying to memorize everything she did so I could do it, too.
When my sister reads a good book, or gets hooked on a good videogame, she won't put it down until she's beat it. And I am not kidding. The freaking apocalypse could be going on but she'll still be balled up on the couch reading the next Nora Roberts series. It's a little scary.
My sister also rocked the punk dreads look when she was my age. Just sayin'.
My sister can rival any man in anything. Case in point: My mother called my sister instead of my 4 other brothers to come kill a mouse in our house. If that doesn't prove it, I don't what does. This fact also includes burping contests. Please don't ask me how I know.
I'm still trying to forget the many dinners spent having my sisters large belch blown in my face. Thanks, sis.
My sister likes wine. And chocolate. And cheese. She has a tongue ring which really grosses me out. Her laugh can fill up a room. She has a beautiful singing voice and used to be in choir. And she somehow attracts every over-possessive bi-polar weirdo freak out there (I think it's due to the tongue ring, personally...). She also wanted to go to Culinary School to be a Pastry Chef, like myself. Except she wanted to decorate cakes, and open up her own shop dedicated to it. If I had a million dollars, I'd send her to Culinary School so she could do it.
Even though sister can be a stubborn hard-ass, it's cause she has been through hell and back. She is one of the most strongest people I've ever known, hands down. She single-handedly raised two awesome kids. Worked her butt off for everything she has, and yet still offers to help others with a genuine smile on her face. Her faith is inspiring to me. Lets me know that if she can still keep her head up after all that's happened to her, that I can definitely do the same.
And if I could be anywhere right now, I'd be at her house making her these Reeses Peanut Butter Bar Blondies. Because she's worth it. Because she likes Reeses. And because it would make me feel better to share these instead of eating them all myself. That, and I kind of owe her after all the years of her putting up with me going into her room and reading her diary, which was in cursive, so I couldn't read it anyway.
Yeahhh... Sorry about that, sis.
But really, my sister is just as awesome as these blondies. And, also like my sister, they should come with a warning label. So just in case you couldn't already tell, you probably shouldn't eat these blondies if:
1. You don't like peanut butter. In which case, what the heck is wrong with you?
2. You are dieting.
3. You have no one to share with.
4. You don't have milk in the house.
If none of the above apply to you, then please.. for the love of all that is holy: Make. These. Share. These. Eat. These. They are so good it's ridiculous. And if you're a fan of peanut butter, you'll go nuts. If you can't find Reeses Peanut Butter Bars (not to be confused with PB cups), you can substitute reeses pb & choco chips, or reeses pb cups chopped up.
Either way, don't miss out on these. They are too good.
Reeses Peanut Butter Bar Blondies
Ingredients:
2 cups all-purpose flour
1 teaspoon baking powder
1/4 teaspoon baking soda
1/4 teaspoon salt
1 stick butter, softened
1 1/2 cups brown sugar, packed
1/2 cup chunky peanut butter
1 teaspoon vanilla extract
2 eggs
2 king-sized reeses peanut butter bars, chopped
1/2 cup peanut butter & chocolate chips (found with the bags of semi-sweet chocolate chips)
1/2 cup finely chopped honey-roasted peanuts (optional)
Directions:
1. Preheat oven to 350F and grease a 9x13 pan with non-stick spray.
2. Mix butter and brown sugar together until light and creamy. Mix in eggs, peanut butter, and vanilla until smooth.
3. Combine the dry ingredients (flour through salt) together in a seperate bowl. Mix into peanut butter batter until no trace of flour remains.
4. Fold in Reeses bars. peanut butter & chocolate chips, and peanuts.
5. Pour into prepared pan and bake for about 20-25 minutes or until a knife/toothpick in the center comes out clean.
6. Let cool before cutting into 24 squares.
Monday, October 4, 2010
Chocolate Crunch Chunk Cookies
Yeah... Awkward.
Seriously, though. Autumn is well on its way to arriving full blast here, and instead of eating warm bowls of oatmeal for breakfast, sipping hot tea and enjoying warm comfort meals like lasagna and soup, all I crave is summer foods.
Cold yogurt and fruit. Frappucinos. Ice-cream sandwiches. Cool salads. And milk. Lots and lots of nice, out of the fridge milk.
It's becoming a bit of a problem.
And with all of the cool milk and scoops of ice-cream that have been consumed lately, I figure the time is right for some cookies. Cookies, unlike pumpkin pie and blueberry cobbler, is a thing that can be enjoyed at any season. There is no confusion with cookies. It's kind of like God created three things: Man, Woman, and Cookies. It's just meant to be there.
Yeah, I totally just put cookies on the same level as human creation. Sorry.
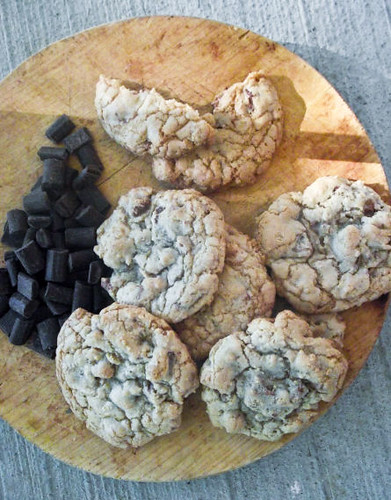
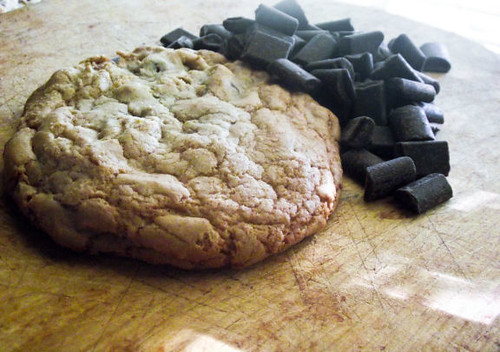
These are probably one of the best chocolate chip cookies I've ever made. I don't say that lightly because Lord knows I've made way too many (mostly failed) chocolate chip cookies. While they aren't my absolute favorite chocolate chip cookies ever, they do scale right up there in the top 10. These aren't just filled with chocolate chunks, either. They have bits of Ghirardeli's milk deluxe crisp chocolate bars in them as well, making them particularly yummy. If you don't want to shell out the cash for a Ghirardeli bar, you can just settle for a normal crunch bar. It won't be as rich, but it gets the job done. If you can get the Ghirardeli though, I'd definitely pull towards that one. It balances out nicely with the semi-sweet chocolate chunks. Oh, and for extra good measure, I threw some cornflakes in there for added texture. You can always use rice krispy cereal, too. Or just omit it all together if you're a cookie purist.
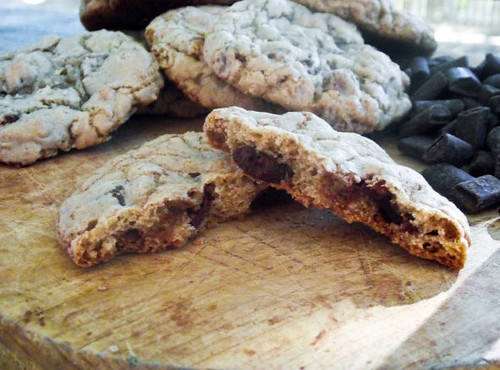
Either way, they are deliciously chewy. Make sure to cool them on the sheets while they are still underbaked if you like 'em chewy like me. If you like them on the softer side, just remove them immediately once they are light brown around the edges. And if you like them crisp, leave them in till they are nice and brown all over. Proceed to eat with cold milk. Or hot coffee, if your body is not seasonally confused.
Chocolate Crunch Chunk Cookies
Ingredients:
12 tablespoons butter, melted
1 cup light brown sugar, packed
1/2 cup granulated sugar
2 large eggs
1 teaspoon vanilla extract
1/2 teaspoon baking soda
1/4 teaspoon salt (omit if butter is already salted)
2 cups all-purpose flour (I used 1 1/2 cups all purpose and 1/2 cup whole wheat)
1/2 cup semi-sweet chocolate chunks
2 Ghirardeli Milk Deluxe Crisp Bars (8 squares in each bar) or 2 king-sized crunch bars (8 squares in each bar), roughly chopped
1 cup cornflakes
Directions:
1. Melt butter in a sauce pan, then mix with brown sugar and white sugar. Let mixture cool before mixing in the eggs and vanilla until thoroughly combined.
2. Mix in the baking soda and salt.
3. With a wooden spoon, fold in two cups of flour into the batter until no traces are left.
4. Fold in chocolate chunks and chocolate crunch bars. Then fold in the cornflakes right after.
5. Chill for 1 hour or until firm.
6. Preheat oven to 350 degrees, and bake cookies for 8-12 minutes. For chewy cookies, take out of the oven when the sides are brownish but middles are still underbaked and leave to cool on the hot pan for 3 minutes. For soft cookies, take out of the oven when sides are light brown and remove from pan onto cooling rack. For crispier cookies, leave in oven for about 10 minutes or until brown all over. Remove from oven and pan and place on cooling rack.
Sunday, September 5, 2010
Flourless PB&CC Cookies
Sometimes, a girl just needs to be able to enjoy the specifics of something. You know what I mean, right?
No?
Okay, examples. You come home from work and your sweetie lover honey muffin offers to give you a foot massage after a long day. He says, "come here my darling oogly-moogly, come take a nap after a long days work, you deserve it!" and you think to yourself: gee, that sure does sound awesome. But then you realize that even though that may sound appeasing, it's totally not what you're craving as a stress reliever. Something bright to end the day.
I know all you woman are like "yeah right, like I'd pass up a foot massage". But you know what I mean!
Sometimes, a woman needs specifics.
Sometimes, a woman needs... cookies.
And peanut butter. And milk chocolate. And she needs them to be gluten-free. Not because she has a gluten intolerance but because she has no flour and after working 10 hours the last thing she wants to do is haul her butt to Wal-mart (don't even pretend that you don't shop there, bakers) and pick up some flour for cookies.
So what does she do? She exclaims, "I need cookies!" and she makes them. Plain. Simple. Easy. It's no foot massage. It's no walk on the beach. But sometimes, it doesn't have to be any of that. Sometimes it just has to be something simple.
That, and I believe that a cookie a day keeps insanity away.
I think that even if we aren't all entitled to the best things on earth, we should still enjoy the little things we can. Something as simple as a cookie or maybe just a glass of wine before bed is things that we hold dear and near to our hearts. It's our special cool-down time. The part of our day where we can just breathe. Sometimes we share those moments with others. Sometimes we share them with strangers. Sometimes, we share them with God. Whoever it is you're sharing your special moments with, don't forget to take them when the opportunity strikes. You only live once. So even if some kid at your job decides it would be a fun idea to throw all the bouncy balls onto a display of stacked books, or some british guy gives you a hard time at the register because you have to see his ID for something, don't sweat it. Don't let it bring you down. Go home. Make cookies. Snuggle your sweetie-pie. Heck, do both at the same time (but please be careful not to burn yourself ;) ). Or just go for a walk, enjoy a glass of wine... whatever strikes your fancy
And if you don't have any flour on hand, make these cookies.
1/2 cup extra crunchy peanut butter
1/2 cup honey roasted creamy peanut butter
3/4 cup brown sugar
2 tablespoons white sugar
1 teaspoon baking soda
2 egg whites
1/2 cup milk chocolate chips
1/2 cup quick cooking or rolled oats
1/4 tsp salt
fleur de sal for sprinkling (or other coarse salt like sea salt)
DIRECTIONS
1. If baking immediately, preheat oven to 350F degrees.
2. Using a hand mixer, blend the peanut butters, sugars, salt and baking soda together in a bowl until smooth and sugar is completely incorporated.
3. Blend in egg whites until fully combined.
4. Stir in choco chips and oats with a wooden spoon or spatula.
5. Refrigerate for freeze dough if desired for 1-2 hours or overnight.
6. When ready to bake, preheat oven to 350F degrees. Or unless you didn't wait, go ahead and scoop your cookie batter out by tablespoonfuls and drop them on a greased cookie sheet. Sprinkle them on top with fleur de sal or sea salt.
7. Bake 8-15 minutes or until cookies are slightly brown around edges.
8. Stuff into face and enjoy with a big glass o' milk.
Sunday, August 22, 2010
"Ooey Gooey Cake" aka Millionaire Bars
Hey Blog,
How are you? I know, I know... I haven't touched you in, what.... over a month? 4 months, maybe? Give or take? Either way, I know you can't be too thrilled with me. Packing my bags in the middle of the night and leaving you all alone, patiently waiting... and I didn't even leave cake in the fridge. What the heck. I'm awful. I'm not getting any presents for Christmas this year.
It wasn't my fault though! You gotta believe me! Between the whole... you know... broken camera thing... Yeah, I have bad luck with cameras, I know. And I should probably admit that I've kindasortahavehadacameraforafewmonthsnow... I know. I really don't have any excuses other than sheer laziness and... well... I'm pretty picky about my picture quality, here. A 3 megapixel camera won't get you very far these days, you know. I mean, I think the iphone might take better pictures than this one.
That really doesn't make you feel any better though does it? Sorry.
But I came back for you, just like I said I would! I missed you! I missed us! I missed what we had! I baked, took pictures, and you displayed them! And I wrote about life and grandpas and cakes with identity crisis'! It was fantastic. It was awesome.
Could we work it out, you think? Get it back together? I think we can, blog. You and me.... we aren't finished yet. We can do this. I know it in my heart to be true (Sorry to anyone who gets this reference).
Here's my peace offering: Millionaire Bars. A simple dessert with a shortbread crust, caramel on top and some sweet chocolate ganache to tickle your fancy. How can you say no to that, blog? How can you say no?
I say we try again... and this time, I promise I won't leave you home alone without cake for 4+ months. Ever ever. Promise.
Forever yours,
Alexandra
(adapted from joy of baking)
1 1/2 cup flour
1/4 cup white sugar
1 1/2 stick butter, softened
1/2 teaspoon vanilla extract
1/2 teaspoon salt
Caramel Layer
1 14-oz can sweetened condensed milk or 1 14-oz can of dulce de leche
Chocolate Topping
6 oz coarsely chopped semi-sweet chocolate
1 teaspoon butter
DIRECTIONS:
Preheat oven to 350 degrees and place rack in center of oven. Grease a 9x9in. pan with butter or non-stick spray.
For shortbread, in the bowl of your electric mixer, or with a hand mixer, beat the butter and sugar until light and fluffy. Beat in the vanilla extract. Add the flour and salt and beat until the dough just comes together. Press onto the bottom of your greased pan and bake for about 20 minutes, or until pale golden in color. Remove from oven and place on a wire rack to cool while you make the filling.
For caramel filling, if using Dulce de Leche then simply warm the caramel in the microwave or in a heatproof bowl set over a saucepan of simmering water. If using sweetened condensed milk, pour the milk into a heatproof bowl and place the bowl over a saucepan of simmering water. Cover and cook, over low heat, stirring occasionally, for 60 to 90 minutes or until the milk has thickened and has turned a caramel color. Remove from heat and beat until smooth. Pour the caramel over the baked shortbread and leave to set.
Note: You can also do this step in a microwave oven. Place the sweetened condensed milk in a large microwaveable bowl and cook on medium power for about 4 minutes, stirring halfway through baking time. Reduce the powder to medium-low and continue to cook for another 8 to 12 minutes, or until the milk has thicken and has turned a light caramel color. Remove from microwave and beat until smooth.
For the topping, melt the chocolate and butter either in the microwave oven or in a heatproof bowl set over a saucepan of simmering water. Pour the melted chocolate evenly over the caramel and leave to set. Cut the shortbread into pieces using a sharp knife.
Store the shortbread in the refrigerator to keep the chocolate nice and firm.
Yield: 16 2in. squares.
Saturday, February 13, 2010
White Chocolate Rice Krispy Hearts
Love, love, love, love.
It's everywhere this weekend. You can't escape it. The chocolate. The pink. The red. The hearts. The Barry Manilow songs playing in the background of every department store...
At least chocolate is on the list.
V-day is one of those holidays that I think is ridiculous. Of course, that doesn't mean I don't celebrate it. I do. Any excuse to eat a box of chocolates, or make some cute heart shaped treats for people I love is good enough for me. But, I really think that Valentine's Day should be every day! You know what i'm sayin'? Although I won't deny that i'd enjoy a night out at some fancy schmancy restaurant that serves REALLY good, warm, handmade bread (oh lord, would I love that) and way too much food for my tiny self to eat; I would rather spend each day showing the people I love that I love them rather then pick a day out in particular. I wouldn't say i'm a fuddy duddy or anything... Regardless, I am totally going to smother my special someone on Sunday. But I'll also do it on Monday. And tuesday. And wednesday.
Though we won't be going to any fancy schmancy restaurant, we will still have a wonderful day just spending time together. And that's all that matters to me.
Anywho, enough about my Valentine's Day philosophy's. These yumyums are amongst the many things that I love. Besides chocolate, anyways. Not only that, but their simple, easy, and budget friendly. And seriously... who doesn't like butter, marshmallows, rice krispies and white chocolate?
Tie it all up with a pretty ribbon or cut it out into heart shapes and you've got yourself a sweet treat that will melt your babies heart in a minute.
So go on! If you don't think you'll have time to make something big for your loved one, this is definitely a killer way to still do it without too much hassle. And who knows, maybe these little delights will sweep your crush off their feet.
As for me, I don't think that any amount of heart shaped goodies will get Johnny Depp to fall in love with me. But hey, it's worth a shot.
White Chocolate Rice Krispy Hearts
(bear not included)
INGREDIENTS:
1/4 cup butter, plus more for greasing the pan
5 cups rice krispy cereal
3 cups miniature marshmallows
1/2 cup white chocolate chips
1 cup (or 8oz) white chocolate, finely chopped
1/4 cup heavy cream
1 drop of neon pink food coloring (optional)
DIRECTIONS:
1. Butter a 9x13 inch baking pan with butter liberally.
2. In a large saucepan (make sure it's big!), melt 1/4 cup of butter over low-medium heat.
3. When butter is melted, add marshmallows and pink food coloring, if using
4. When marshmallows are mostly melted and mixture starts to boil slightly, remove from heat and stir in the rice krispy cereal and white chocolate chips. Make sure to stir it very good so the mixture is well combined.
5. Pour mixture into prepared pan, using the back of a spatula or buttered parchment paper to spread the mixture evenly throughout the pan. Smooth the top with an offset spatula if it's very bumpy.
6. In a microwave safe bowl, place the chopped white chocolate and 1/4 cup of heavy cream together. Mix slightly. Place into microwave and microwave on high, stirring every 10 seconds until chocolate is smooth. BE CAREFUL NOT TO OVERCOOK. Mine usually takes about 20-25 seconds total before I can stir it enough that the chocolate melts completely.
7. Pour white chocolate mixture ontop of rice krispy treats, spreading with a spatula to cover the top.
8. Let mixture sit for about 2 hours. If refrigerating, let treats come to room temperature before cutting.
9. Cut into squares or heart shapes (if cutting into shapes, I recommend pressing the cookie cutter into the treats, and then using a very sharp knife to cut around the outlines. You will get smoother cuts this way).
Saturday, February 6, 2010
Classic American Yellow Cake with Chocolate Ganache
Dear 9,000 year old Bundt Pan,
Look. I know how it is. You sit, unused, at the bottom of my cabinet, alone and abandoned. I understand how scary it must be in there... forced to sleep in the shadows every night. And with the broken old bent springform pans, no less. Feeling so neglected, collecting dust, and being nothing more than a home for the ocassional bug or fly. Getting your hopes up every time you see a speck of light dawn on you from the bright kitchen that you see so little of, only to have those hopes crushed when you realize that someone was just looking for the frying pan that got carelessly shoved all up in your personal space in someones careless rush to clean the kitchen. I know. It sucks to be forgotten. It sucks to be unused, especially when you have so much potential. So much to offer.
But Bundt Pan, you shouldn't be so bitter. You see, when you do get used, you really shouldn't do horrible things that make people never want to use you again.
For example...
1) Hanging onto half of my cake even though I rubbed shortening all over you 10x.
2) BURNING the top half of my cake regardless of the extra procedures I went through to ensure that didn't happen.
3) Did I mention the hanging onto half of my cake part? Yeah. That wasn't cool, Bundt Pan.
I really do want to use you more. I do. But when you do stuff like this... no matter what I do to avoid it, you always end up throwin' off my groove, Bundt Pan. And it makes me want to never use you. Ever. Ever ever ever ever.
I don't know if I can use you again, Bundt Pan. You really screwed up this time, man. You're lucky I had lots of ganache in the fridgerator. Real lucky. Or else, I might have thrown you out this morning. You're even luckier that this recipe is so kick butt that it's good enough for me to post regardless of your little tactics to try and ruin my cake making desires. Seriously... perfectly, all-american golden cake, tender and moist underneath two thick layers of ganache? Not even you can ruin that, Bundt Pan. Though you try.
I really am serious, man. Maybe if you got your act together, I'd use you more, and then you'd be happier, and so would I. Just sayin'. A little cooperation is all i'm askin' for.
Hopefully, this isn't an omen for the Saints to lose on Sunday. 'Cause if they do... I'm blaming you, Bundt Pan.
With Love,
Your Frusterated Owner Alexandra
Classic American Yellow Cake with Chocolate Ganache
(Adapted from a Passion for Baking by Marcy Goldman)
Note: I highly recommend not using a bundt pan for this recipe like I did, and instead making a layer cake or cupcakes.
INGREDIENTS:
CAKE
1 cup (2 sticks)unsalted butter, softened
1 cup sugar, pulverized in food processor
3 large eggs, room temperature
2 1/2 teaspoons vanilla extract
3 cups all-purpose flour
1/4 teaspoon salt
4 teaspoons baking powder
1 1/2 cups warm milk
GANACHE
1 cup semi-sweet chocolate chips
1 cup heavy cream
1/4 cup butter
DIRECTIONS:
1. Preheat oven to 350F. Generously spray two 9-inch round cakepans with nonstick cooking spray and place pans on large parchment paper-lined baking sheet (or spray 24 cupcake liners).
2. In a mixer bowl or large food processor, blend butter and sugar until fluffy and thoroughly combined. Then add eggs and vanilla and blend well. Add flour, baking powder, and salt, drizzling in milk as mixture blends to make a smooth batter. Spoon batter into prepared cakepans.
3. Bake until cake springs back when gently pressed with fingertips, 35-40 minutes. Cool slightly. Unmold cakes from pans, cool on wire wracks, and then gently wrap in wax paper or plastic wrap. Chill in freezer 30 minutes or wrap and refrigerate until you are ready to frost.
4. To make chocolate ganache, melt in a double boiler or in the microwave the heavy cream, chocolate chips and butter until smooth and velvetty. Cover and place in refrigerator for 30 minutes.
5. To assemble cake, take cake and ganache out. Give the ganache a quick stir to make it velvetty smooth again. Spread 1/4 of the ganache between the cake layers. Spread half of the remaining ganache mixture ontop of the cake, letting it drip down the sides. Return ganache and cake to the refrigerator for 5-10 minutes. Take back out, and give the top of the cake another helping of ganache. Let ganache set on the cake before serving.
Monday, January 4, 2010
Black and White Chocolate Chip Cookies
I always get funny looks when I talk about chocolate with other people. Everyone, obviously, has their favorite brand of chocolate. Ranging from the well known Godiva, Lindt, and if you're REALLY a chocolate connoisseur, Vosges is probably up your lane of choices as well. Not to say that any of these chocolates are bad. I like all of them, to be honest. Some more than others (I personally dislike anything from Lindt unless its their truffles). Either way, every foodie who enjoys the wonderful taste of chocolatey goodness usually has a favorite brand.
So when I tell people what my favorite chocolate ever is, they usually look at me and go, "Really?" as if they expected me to come up with some exotic chocolate from belgium that costs more than all my baking utensils put together.
But i'll be honest with you. My favorite chocolate is neither Godiva, nor Ghirardeli, nor any other special kind of chocolate from any country outside the US...
My favorite chocolate ever in the world is Hershey's Hugs Kisses.
Yes, that's right. Hershey's. Of all the chocolate I could pick from, I pick one that comes from Hershey's.
Call me crazy. Call me insane. It's okay, I won't mind. But I will do backflips for a bag of Hugs. It might be because everytime I've had them it's always been a special thing. Like sharing a bag with my sister while watching her play Zelda when I was a little kid, or the fact that my mom would always put a bag of them in my stocking for Christmas and in my Easter basket, or the fact that they are somehow ten times more stupendous when you eat them with someone you love. I don't know what it is about them. But biting into a hershey hug right out of the freezer, breaking open the white chocolate and milk chocolate swirly shell around it and then letting the pure milk chocolate center melt in your mouth -- Good Lord. I'm about ready to go to the store right now to get some. They are seriously that good, and I am not ashamed to say that I could munch on a bag mindlessly all day if given a chance (the boyfriend as my witness!).
So you can only imagine my reaction when I saw a bag of mini chocolate and white chocolate swirled morsels on the baking shelf of my local grocery store. Yeah. You bet I grabbed one. And ever since, it has been waiitng patiently in my freezer, waiting to be used.
While the mini chocolate morsels in themselves don't taste much like Hugs (unfortunately), they still get the job done. I've been waiting to come across the perfect recipe to incorporate them in and I honestly think that this might be it. Unlike your typical chocolate chip cookie, these are made with cake flour, a dash of Kahlua (a coffee liquor), and egg substitute. Lending for a much more healthier cookie in general that doesn't sacrifice or skimp on taste. The toasted pecans definitely lend a wonderful contrast, though I didn't use many of them because I like to have more chocolate in my cookies than I do nuts ;).
I won't lie, these are addictive. Though I didn't have Kahlua on hand, I replaced it with some brewed Espresso and I think that they came out just as good as they would if I had used Kahlua. These cookies are absolutely awesome and though they are originally meant for a blend of white chocolate chips and semi-sweet chocolate chips, I'm pretty sure that using the swirled kind lends its own flavor that lets you enjoy both at once instead of separately -- and I like it better that way.
If you don't happen to find the swirled morsels in your grocery, feel free to use a mix of white chocolate chips and semi-sweet ones. But if you do find them, I gotta say: use them! Do it. You won't regret it. I absolutely pinky promise you.
Black and White Chocolate Chip Cookies
(adapted from Cooking Light)
INGREDIENTS:
2 cups cake flour (about 8 ounces)
3/4 teaspoon baking powder
1/4 teaspoon salt
3/4 cup packed brown sugar
1/2 cup granulated sugar
6 tablespoons butter, softened
1/4 cup water
2 tablespoons egg substitute (OR 2 tablespoon egg whites)
1 1/2 tablespoons Kahlúa (coffee-flavored liqueur) OR 1 1/2 tablespoons brewed espresso
1 teaspoon vanilla extract
1/2 cup white chocolate/semi sweet chocolate swirled morsels OR
6 tablespoons semisweet chocolate minichips
1/3 cup premium white chocolate chips
2 1/2 tablespoons finely chopped pecans, toasted (optional)
DIRECTIONS:
1. Preheat oven to 350°.
2. Lightly spoon flour into dry measuring cups; level with a knife. Combine flour, baking powder, and 1/4 teaspoon salt; stir with a whisk.
3. Combine sugars, butter, and shortening in a large bowl; beat with a mixer at medium speed until light and fluffy, about 3 minutes.
4. Combine 1/4 cup water, egg substitute, Kahlúa, and vanilla in a small bowl. Add Kahlúa mixture to sugar mixture; beat 2 minutes or until well blended.
5. Gradually add flour mixture; beat at low speed just until combined.
6. Fold in all your chocolate chips (whether you used the swirled or individual kind) and pecans. Drop by level tablespoonfuls 2 inches apart onto ungreased baking sheets.
7. Bake, 1 sheet at a time, at 350° for 14 minutes or just until set and beginning to brown around edges and on bottoms.
8. Remove from oven; cool on pan 1 minute. Remove from pan; cool completely on wire racks.
Makes about 40 cookies.
Sunday, October 18, 2009
Pumpkin Blondies


Sunday, September 27, 2009
White Chocolate Orange Cookies


Monday, September 7, 2009
Accidental Oatmeal Cookie Brownie Bars.

I have this thing. This problem, you see. No matter what i'm baking, or how many times i've foolproofed a recipe, I always, ALWAYS, mess something up. Whether it be in missing the vanilla... putting too much flour... oh, or that time where I forgot to melt chocolate (FOR BROWNIES) because I was too busy thinking about what shoes to wear. Yeah. Something ALWAYS happens.
This time was no different. I went out on a mission to make Eating Well's brownies. Their suppose to be 86cal a pop and I really haven't made brownies for awhile, so I thought hey -- why not! They'll be brownies but a little more healthier. And chocolate is a must in my life. Must must must.
Well turns out that something, somewhere in that recipe went horrrrrrribly wrong and somehow my batter came out so entirely thin that instead of giving me brownies when I poured them into the pan, they gave me more of a brownie BASE than anything else. It was soooo thin. I refused to believe that I was gonna get brownies out of batter that thin. I almost thought I had a poured it into too big of a pan but nope -- 8x8 is what it called for. So 8x8 is what I used.
I'm not really sure how I got the result that I did, but thankfully, I had a back-up plan.
The quaker-oatmeal-cookie to the resue plan.
I just happened to have half a batch of oatmeal cookies in the freezer in case of emergencies... like cookie cravings. But! I got an idea and decided to try it. Anything to save these brownies. I really didn't want to waste all that chocolate, and ingredients. And chocolate.
So I took out my oatmeal cookie dough that USED to have chocolate chips in the batter (<_< Wonder who ate those...), went ahead and crumbled (yes, crumbled) the dough to form little clusters, or balls, and sprinkled them over the brownies until they were entirely covered. Then I popped them into the oven and prayed for the best.

Result?
Really good freakin' oatmeal cookie brownies.
The base was perfect for the cookie dough and everything baked evenly. Total "YES *FISTPUMP* moment for me the second they came out of the oven and cooled. The top got a littttttttle overbaked, but overall it was a very yummy, chewy brownie cookie bar...thing.
So if you happen to have cookie dough sitting in your fridge, but you wanna make something a little bit different -- go for the brownie base. Or, you can just TRY and make the original recipe work... But what fun is baking when something doesn't go right? ;)
(P.S.: These are best dunked in milk. With a bigger glass full than that one.)

Oatmeal Cookie Brownie Bars
Combination of Eating Well and Quakers recipes
Brownie Base Ingredients:
2/3 cup confectioners' sugar
3 tablespoons unsweetened cocoa powder, American-style or Dutch-process
3 ounces semisweet or bittersweet chocolate (50-72% cacao), coarsely chopped
2 1/2 ounces semisweet or bittersweet chopped into mini chip-size pieces, divided
1 1/2 tablespoons canola oil
1/4 cup granulated sugar
1 1/2 tablespoons light corn syrup, blended with 3 tablespoons lukewarm water
2 teaspoons vanilla extract
1/8 teaspoon salt
1 large egg
1/3 cup chopped toasted walnuts, optional
Oatmeal Cookie Ingredients:
(Note: you will only need to use half of the cookie dough batter for this)
3/4 cup firmly packed brown sugar
1/2 cup granulated sugar
2 eggs
1 teaspoon vanilla
1-1/2 cups all-purpose flour
1 teaspoon baking soda
1 teaspoon ground cinnamon
1/2 teaspoon salt (optional)
3 cups Quaker Oats (quick or old fashioned, uncooked)
1 cup raisins, chocolate chips, walnuts (optional)
1. Make your oatmeal cookie dough first! since we have to let the dough sit in the freezer for a bit.
2. To make oatmeal cookie layer, In a small bowl, whisk together flour, baking soda, cinnamon and salt.
3. In large bowl, beat butter and sugars on medium speed of electric mixer until creamy.
4. Add eggs and vanilla; beat well. Add combined flour, baking soda, cinnamon and salt; mix well. Add oats and raisins (if using); mix well.
5. Divide dough into two large balls. Wrap in non-stick foil or food wrap, and stick in freezer. Let sit while you make the brownie layer.
6. To make the brownie layer, first, position your oven wrack in the middle and preheat your oven to 350. Line a 8x8 baking pan with foil, letting the foil hang off the edges (this way you can just lift them out of the pan without cutting them out and ruining them) remember to spray your foil with non-stick cooking spray like PAM so it doesn't stick.
7. Sift (or whisk) flour, confectioners’ sugar and cocoa together into a small bowl.
8. Combine the 3 ounces coarsely chopped chocolate and oil in a large, microwave safe bowl. Melt chocolate in microwave, stirring every 20 seconds or so, until chocolate is smooth and velvetty. DO NOT MICROWAVE FOR TOO LONG. Just until melted.
8. Remove from the microwave and stir in granulated sugar, corn syrup mixture, vanilla and salt until the sugar dissolves.
9. Vigorously stir in egg until smoothly incorporated.
10. Gently stir in the dry ingredients. Fold in the walnuts (if using) and the remaining 2 1/2 ounces chopped chocolate just until well blended.
11. Turn out the batter into the pan, spreading evenly.
12. Get out one frozen portion of your cookie dough, unwrap, and start using your fingers to form small portions of the cookie dough into teaspoon/tablespoon sized little balls. Sprinkle evenly over brownie layer until you can only see a few bits of brownie through the dough.
13. Bake at 350 for 20-25 minutes. Remove from pan and let cool for an hour or so. To remove from pan, take both side of foil and lift up out of the pan, and rest on a cooling wrack until completely cooled and ready to cut.
14. Cut brownies into small bars. Should yield about 20 bars from the pan.