Thursday, December 31, 2009

Brown Butter Snickerdoodle Muffins

snickerdoodlemuffins


When it comes to New Years... I'm not too big on whole "I'm gonna be a better person" or "i'm gonna eat healthy" or "I'm gonna do something great this year" switch that seems to get hit everytime our calenders restart and January rears its head back into our lives. Not that I'm against anyone who does do that. In fact, if it really does help you to set goals for yourself every year -- be my guest and do it man. I'll be right here rooting you on (yeah! eat those veggies!)

But as for me... setting goals at the start of the year makes me feel like, if I should need an exact date to change something important about myself, to better myself as a person, then why even bother at all? I should be wanting to do that every day. I should be wanting to treat my family nice all the time. I should be wanting to show the people I love that I love them every day. I should be eating healthy because It's good for me, not because I have to shed off all the pounds I may have gained by eating a cookie or two (or five). I shouldn't need one day out of the year to be the starting point of becoming the person I want to be. And really, I just feel like I'm setting myself up for failure more than anything else. Because when I make resolutions, I tend to go the "welp, there goes that" approach and just give up altogether. Well, not this year!

snickerdoodlemuffins


Instead of sitting here thinking of ways to better myself this year... I'll just keep doing what I've been doing. Trying to follow God as best that I can, being the person He wants me to be, and in the process treating everyone I love with the respect and care that they have given me. I'll count my blessings and instead about worrying of what will come three or two months from now, focus on today.

And most of all, I will keep baking whatever I friggin' want -- healthy resolutions or not!

And I am totally not saying that just because these muffins are probably one of the most delicious things to have ever graced my kitchen. Not even joking with you.

snickerdoodlemuffins


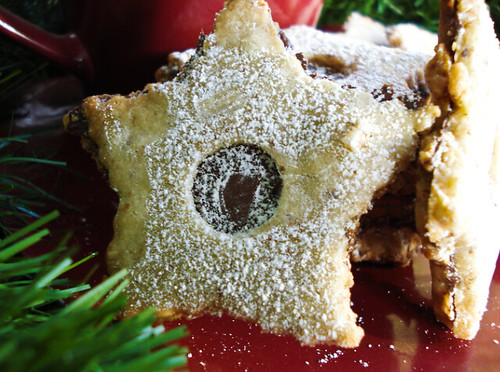
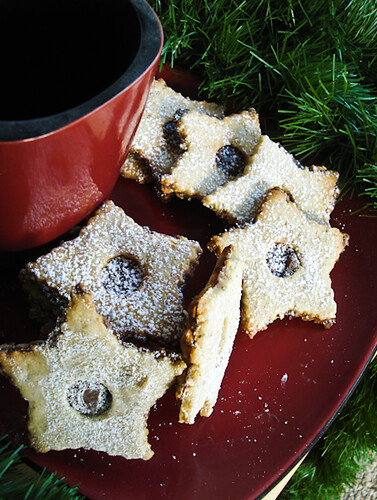
All new years talk aside... these muffins are amazing. I can't even begin to explain to you how good these are. They have even converted a muffin hater like myself to be tempted for another bite.

These are definitely no ordinary cinnamony/sugar muffins. They have a beautiful depth of buttery flavor that comes from browning the butter in a saucepan until the butter is a nice bronze, emitting a wonderful nutty aroma that will make you want to shove your face in the saucepan (disclaimer: I am by no way responsible for any known injuries if you actually do this) and forget the muffins altogether. But please, please refrain from doing so. Because these muffins are just too good to pass up. And don't you even think of using plain, normal butter. Brown butter is definitely the way to go with these babies.

Not only that, but they have a gorgeous cinnamon sugar crust on top. While you could do a crumble crust, or just simply sift some powdered sugar over the muffins instead once they've cooled -- the crust really does make for a simple and elegant presentations and a wonderful crunch right before you hit the soft, slightly dense snickerdoodley crumbs that lay underneath; truly living up to its name as a "Snickerdoodle Muffin".

So if you're not totally sick of the holiday sweets, and you've got a soft spot for snickerdoodles (we're all big snickerdoodle lovers in my family), make these! And if you really don't trust yourself around them but still want to make them, do what I did and give them to your awesome neighbors as a New Years gift. Ten bucks says as soon as they smell the warm, cinnamon fragrance coming from these babies, they aren't gonna dare turn them down.

snickerdoodlemuffins


Or you could just hog them all to yourself and love them and call them George. Your call.

Snickerdoodle Muffins
(Adapted from Culinary Concoctions by Peabody)


Makes about 12 normal muffins and 20ish mini muffins.

INGREDIENTS:
1 stick unsalted butter, browned (see directions for instructions on browning butter)
3/4 teaspoon baking soda
3/4 teaspoon cream of tarter
1/2 teaspoon cinnamon
2 cups all-purpose flour
1 cup sugar
2 teaspoons vanilla extract
2 eggs
1/2 cup milk
1/2 cup sour cream

1/2 cup sugar and 1 tablespoon cinnamon mixed together for topping (optional)

DIRECTIONS:

1. First, to brown your butter, get out a non-stick saucepan and set the heat on medium-low. Stick your stick (hah) of butter inside the pan and let melt completely. Butter should start foaming up on top, which will make it hard to see if it is "browning" or not. Don't worry, if this happens, determine if it's done or not by smell. As soon as the butter begins to starts to emit a nutty smell, give it a stir or two with your fork. It may start bubbling (thats ok). Keep the butter over medium-low heat for about 2 minutes after it starts to smell nutty. Stir again and let it bubble for a little longer, about 1 minute or so. You should see a bit of caramelization on the sides of the saucepan building up, and the smell should be getting stronger and more "caramel"-y. When this happens, take the saucepan off the heater and let cool. The foam will die down and you should be left with a glorious bronze color. If your butter does not foam (some dont) then just wait for the butter to get a bronze color before pulling it off the saucepan.

2. After browning your butter, LET IT COOL COMPLETELY. This is important because we do NOT want hot butter to go with the eggs as they will start cooking.

3. Preheat your oven to 375F degrees, spraying a paper-lined 12 cup muffin or 2 mini muffin tins with nonstick spray.

4. In separate bowl, mix together flour, baking soda, cream of tartar and cinnamon.

5. In your mixing bowl (the one that will hold your muffin batter), take a whisk and whisk together the sugar, eggs, COOLED brown butter, vanilla, milk, and sour cream. Do not over whisk. It's okay if there are a few lumps from the sour cream.

6. Add flour mixture and whisk in JUST UNTIL there are no signs of flour left. Once again, DO NOT OVERMIX. It's okay if the batter is lumpy -- it's suppose to be.

7. If using the sugar and cinnamon topping mix, GENEROUSLY cover the top of each muffin with the mix (about a heaping tablespoon for each).

8. Bake muffins at 375F for 15-20 minutes, sticking a toothpick in the middle of one of the muffins to check for doneness (in other words, the toothpick should come out with only a few moist crumbs). Take out and cool muffins on wire wrack.

9. Muffins can be frozen and then warmed in the oven or microwave if desired. These are best served warm and out of the oven with a strong cup of coffee.

Monday, December 28, 2009

Gingersnaps

gingersnaps


I think I can honestly say that my oven will be getting its holiday vacation for the next couple of days or so.

It seems like everyone builds up for Christmas each year and yet the day comes, and goes, and next thing you know, Christmas, the day we spend weeks getting ready for, is over in what feels like minutes. Sometimes, I wonder if Christmas should just be considered a month-long holiday. 'Cause it certainly felt like it this month. I'm still finding random balls and disks of forgotten cookie dough in my fridge and freezer... and underneath my fingernails... but that's irrelevant...

I hope you all had a great, wonderful Christmas full of good food and, of course, cookies. I know I sure did (cookies included!). I hope you all got pretty chef knives and lots of cookbooks under your tree... I know I'll be enjoying my new set of ramekins, my new cookbook, and my espresso maker. Oh yes. The espresso make has been put to good use already, I assure you -- it will not go unused ;). Now I just need to whip up some biscotti to go with it, and I'll really have no reason to get out of bed. Ever again.

Besides the being sick, Christmas allergies and the drastic amount of laundry covered in powdered sugar and flour touring over next to me, I'd say that this Christmas was a successful one... with leftovers to enjoy.

In all seriousness, I'll probably be back in the cookie making business in a few days. ;) Have to put those new tools to good use afterall :).

gingersnaps


One of the most praised cookies that made it to my cookie tray this year had to be these gingersnaps... I gotta admit, they are the best i've ever had. I usually like my gingersnaps very crunchy, but these are wonderful when chewy and much, much better than the store-bought ones that taste like molasses bricks, in my honest opinion. And thankfully, they go either way you want them to... crunchy or chewy. But make sure you don't store the crunchy ones with the chewy ones... the moisture will rape whatever crunchiness your other batch of cookies will hold. No crunchy cookie is safe from it. Truth.

Now, if you don't want to go run off and bake these beauties right away... I completely understand... but definitely keep them in your recipe box to make. And just so you know, they taste just as fabulous after Christmas as they do on Christmas. In other words... you have no excuse not to make these. ;) They really are splendid with a particularly frothy cappucino or just a nice glass of cold milk. You might even find yourself actually getting out of bed to go for seconds.

gingersnaps

Perfect Gingersnaps
(Thanks to 17andbaking for the killer recipe)


INGREDIENTS:
2 cups all purpose flour
2 tsp baking soda
2 tsp ground cinnamon
2 tsp ground ginger
1 tsp ground cloves
Pinch of salt
1 cup packed light brown sugar
1/4 cup molasses
3/4 cup canola oil
1 large egg
Sugar for rolling (I like evaporated cane juice or raw sugar)

DIRECTIONS:

1. Whisk together the flour, baking soda, spices, and salt in a medium bowl. In another bowl, combine together the brown sugar, molasses, canola oil, and egg until smooth.

2. Mix the flour mixture into the brown mixture, stirring until dough comes together. Cover with plastic wrap and chill for 20 minutes.

3. Preheat the oven to 375 degrees and line baking sheets with parchment paper.

4. Scoop up bits of dough by the heaping teaspoonful and roll into balls between your palms, about the size of a quarter. Roll the balls in sugar and place on the baking sheets 2 inches apart. Bake 8 minutes – if you like crispy gingersnaps, try 9-10 minutes. Cookies will be very soft but will firm up. Leave on the baking sheet several minutes, then transfer to a wire rack to cool completely.

5. Store crunchy cookies at room temperature, uncovered. Store chewy/soft cookies in air-tight container. Cookies will stay good for quite some time.

Wednesday, December 23, 2009

My favorite sugar cookies


You know. Being sick around Christmas time really blows. Seems whatevers been going around has finally caught up to me (2 days before Christmas... joy), and is enjoying beating the living crap out of my immune system as I lay helplessly in bed, yearning to get inside my kitchen and finish the numerous amounts of baking I still have yet to do.

You know what doesn't suck about being sick?

Fuzzy green neon socks.

Yes, you heard me right. Fuzzy. Green. Neon. Socks. They rock. They are my "sick-time" socks. They keep my feet nice and warm and cozy and I love them. And the best part is, because I'm sick, I have a totally justified reason for wearing them with PJ pants and a "free hugs!" shirt that I made two years ago with spray paint. Awesome.

So despite my attempts at staying in bed all day, I'm cheating and posting a recipe for my favorite sugar cookies ever... Their incredibly easy to make. They puff up and get all soft and yummy and so perfect. The dough is perfectly handled in a way that the cookie comes out delicate yet sturdy and oh so buttery. Pair that up with some awesome icing skills (of which I do not have the patience for) and you got yourself a crowd pleaser.

The best part about making the dough is that it's actually quite a messy process... The recipe calls for you to mix it in BY HAND. And by hand, I mean literally using your hands. That's right. You incorporate the flour WITH YOUR HANDS. And once the flour is almost gone, you switch to a spatula just to make sure it's all entirely mixed. I didn't realize how much of a difference this method made in these cookies until I simply used my mixer to mix the flour in... the cookies had a duller texture and just weren't the same, light-hearted sugar cookies that seem to come out when you do it exactly as the directions say: by hand. So if you don't mind getting your hands a bit messy (i'm sure they already are), definitely make these cookies. Right now.

And make me a batch too. I'm gonna need the sugar.


Michelle's Soft Sugar Cookies


INGREDIENTS:
1 cup butter, softened
1 1/2 cups white sugar
3 eggs
1 teaspoon vanilla extract
3 1/2 cups all-purpose flour (may need 1/4 cup more for dough to come together)
2 teaspoons cream of tartar
1 teaspoon baking soda
1/2 teaspoon salt

DIRECTIONS:
1. Cream the butter and add the sugar gradually. Beat until light and fluffy. Add eggs one at time, mixing well after each addition.

2. Stir in the vanilla.

3. Add the flour, cream of tartar, baking soda and salt gradually to the creamed mixture, stirring in with floured hands. Dough should be slightly sticky and not too wet. If too wet, incorporate 1/4 cup more of flour. Cover and chill dough overnight.

4. Preheat oven to 375 degrees F (190 degrees C). Line baking sheets with parchment paper.

5. Roll dough out on a floured surface to 1/8 to 1/4 inch thick and cut into your favorite shapes. Place cookies onto the prepared baking sheets.

6. Bake at 375 degrees F (190 degrees C) for exactly 8 minutes. Cookies will be pale and only slightly brown at the edges.

Monday, December 21, 2009

Red Velvet Cheesecake


Hi.

How's life? Got all your Christmas shopping done yet? Still doing 1:00 AM visits to Walmart? Tired of the sound of cash registers? Not done planning your Holiday menu? Stocking up on Pillsbury ready-to-bake cookies and cakes just in case? Realizing it's only 4 days left until Christmas? 10 seconds away from saying 'screw it!' and just letting the kids unwrap their Christmas gifts by just taking them out of the bags they originally come in? In debt up to your eyeballs? Trying to figure out why your pants dont fit anymore? Trying to figure out why nothing fits anymore?

Don't worry. That's okay. Me, too.

Thankfully, there are things in life that are very forgiving when it comes to the stress of holiday seasons...

Like Red Velvet Cheesecake.


I'm not gonna lie.
It calls to me.

It's like the Marilyn Monroe of cheesecakes.
It doesn't give a flying fudge nugget what you think of it. It's sexy, and it knows it's sexy, and it'll seduce you with just one look.

Assuming, of course, that your cheesecake has eyes... Mine doesn't... I pretty much prefer it that way; but to each their own.

I really do love this cheesecake... Even though I messed up on the crust (1/2 cup melted butter instead of 1/4 cup... Woops!), AND my cheesecake cracked at the top... Everything was good in the world as soon as I threw a dollop of cream cheese frosting on top. And hey... no one's gonna mind the extra chocolate crust... ;)

If you're looking for a sure-fire way to make everyone ooh and aaah at the Christmas table, this is a great go-to recipe to have on hand. Everything comes together nicely and the cheesecake itself is perfectly tasty. Much like red velvet cake, except with a creamier texture and a chocolate crust. Still, very, very good.


Just make sure you don't do what I did and find out you don't have enough red food coloring at the last minute. Because then you'll find yourself in an array of hysterics throwing spices out of your cabinet looking for an extra bottle of food coloring while shouting "MY CHEESECAKE IS PIIIIIIIIIIIIIIIIIIIIIIIINK. PIIIIIIIIIIIIIIIIIIINK." at the top of your lungs.

It isn't pretty.


Red Velvet Cheesecake
(Adapted from Culinary Concoctions from Peabody)


INGREDIENTS:

CRUST
1 ½ cups oreo cookie crumbs
¼ cup butter, melted
1 TBSP granulated sugar

FILLING
3 (8 ounce) packages cream cheese, at room temperature
1 ½ cups granulated sugar
4 large eggs, lightly beaten
3 TBSP unsweetened cocoa
1 cup sour cream
½ cup whole buttermilk
2 tsp vanilla extract
1 tsp distilled white vinegar
2 (1 oz) bottles red food coloring

TOPPING
1 4oz package cream cheese, at room temperature
2 tbsp butter, at room temperature
1 cup powdered sugar
1/2 tsp vanilla extract

DIRECTIONS:

1. Stir together oreo crumbs, melted butter and 1 TBSP sugar; press mixture onto bottom of a 9-inch springform pan.

2. Beat together cream cheese and sugar at medium low speed with an electric mixer 1 minute. Add eggs, unsweetened cocoa, sour cream, buttermilk, vanilla extract, vinegar and food coloring. Mix on low speed just until fully combined.

3. Pour batter into prepared pan.

4. Bake at 325F for 10 minutes, reduce heat to 300F, and bake for 1 hour and 15 minutes or until center is firm.

5. Run knife along outer edge of cheese. Turn oven off and let cheesecake stand in oven 30 minutes.

6. Remove cheesecake from oven; cool in pan on a wire rack for 30 m minutes.
Cover and chill for 8 hours.

7. To make the topping, beat cream cheese and butter at medium speed with an electric mixer until smooth; gradually add powdered sugar and vanilla, beating until smooth.
Remove cheesecake from refrigerator and spread topping evenly over top of cheesecake.
Remove sides of springform. Garnish if desired.

Thursday, December 17, 2009

Cranberry White Choco Chip Oatmeal Bites


First, please forgive me for the offset color coordination of these photos. My camera... it defeats me sometimes, and adds weird reflections of other colored objects to my cookies when picture taking time comes around. It's not a very cooperative camera. But that's okay. It knows if it ticks me off too much it'll sit in its little dark corner in my drawer until it learns its lesson. Or until I have to use it again.

I'll admit it's usually the later. But whatever. It doesn't need to know that.

I've got this recent obsession with small little bite-sized cookies... which is awfully weird because I've been craving the opposite. But I just can't help but love how easy they come together and can be packaged and sent off as gifts or other. These little oatmeal bites are exactly what I'm talking about. They get their softness from the 1/4 cup of yogurt that replaces 1/4 cup of butter in the original recipe, a lightness from whisking an egg white in replace of a whole egg, a chewyness from the oatmeal bits and craisins and a slight crunch from the white chocolate chips that heavily stud every piece like little yummy jewels.


I just love it. I really do. And look how festive they are. Come on. The only dangerous thing about these cookies is the fact that anything easily popped inside the mouth will be gone in about... 10 seconds? Okay. I'll give you the benefit of the doubt... 15 seconds.

If you're looking for an easy way to whip up some easy package cookies that will stay moist and satisfy the sweet tooth in your life, then make these. Not only are they incredibly seasonal, but come on... Cuteness factor is out the door here. Don't deny it.


Cranberry and White Choco Chip Oatmeal Bites

INGREDIENTS:
1/4 cup butter, softened
scant 1/4 cup plain, non-fat yogurt
2/3 cup brown sugar
1/4 cup granulated sugar (*See footnote)
1 large egg
1 large egg white, briefly whisked
1 1/2 cup all-purpose flour
1 1/2 cup oatmeal, quick-cooking or rolled (I used quick cooking since its what I had on hand)
1/2 teaspoon ground nutmeg
1 teaspoon baking soda
1/2 teaspoon salt
1 6oz package sweetened dried cranberries
2/3 cup white chocolate chunks or chips (or 4oz, chopped)

DIRECTIONS:

1. Beat butter, yogurt and sugars* together. Mixture should not look light and fluffy but will be a little more on the liquidy looking side. That's okay. Add eggs one at a time, mixing well.

2. Combine oats, flour, nutmeg, baking soda and salt together in a separate bowl. Add to butter mixture in several additions, mixing well after each addition (don't skip this step!)

3. Stir in dried cranberries and white chocolate. Dough should be sticky. If dough seems too wet, mix in another 1/4 cup of flour.

4. Divide dough into 2 separate balls and cover them in plastic wrap or foil. Refrigerate for at least 2-3 hours.

5. Preheat your oven to 375

6. Drop by rounded teaspoonfulls onto ungreased cookie sheets. Bake for 10-12 minutes or until golden brown on the bottom and slightly set on top. Remove from sheets and cool on wire wrack. Makes about 2 1/2 dozen.

*Footnote: These are a little on the sweet side, so if you want you can probably only use 1 tablespoon of granulated sugar in replace of the 1/4 cup, or just forget the sugar entirely. The only reason why I added 1/4 cup of sugar was to cut the tartness of the plain nonfat yogurt which has a slight tang to it that I was scared wouldn't balance out with the brown sugar. So if you want, just cut the 1/4 cup out or just use a tablespoon if you're paranoid.

Tuesday, December 15, 2009

Linzer Sablés with Nutella


Well. It's official. Florida has made it quite clear that it wants nothing to do with Christmas this year, as is evident by our 78 degree weather. I could blame it all on that global warming yap, but I honestly think that Florida just isn't in the mood to celebrate. That, and this state has some serious PMSing issues. But don't tell her I said that (or him... I am, afterall, entirely convinced that men endure a monthly PMS as well).

Seriously. It's hard to get into the yuletide cheer when you can practically bake your holiday cookies ontop of your car because of the weather outside. Whatta bummer.

Regardless, though, you'll still see snowflakes hanging from tree's in peoples front yard and lots of interesting decorations (I personally love one of the houses in my neighborhood whom has a little squad of penguins huddled together in front of a fire on their lawn). We may not be gettin' chilly weather our way anytime soon, and the air conditioner may just be on high for Christmas Day... but people are still determined to keep the spirit alive, and I think that that's awesome.

Despite the wavering heat that's been washing over our little town, I still find it hard to stay away from the oven and baking cookies even if I go through five ice cold water bottles while I do it. It may not look like Christmas outside... but it'll smell like Christmas inside. And honestly, how can you not think about cute little chubby santa clauses munching down on a plateful of goodies when you have gingerbread bars and these Linzer cookies goin' down in your kitchen?


That's what I thought.

You can keep thinking about those chubby little santa clauses too.

I won't judge you.

Linzer cookies are incredibly easy to make, and while they are typically filled with jam (raspberry does wonders with the almond taste), I decided to slasher on some Nutella for mine, and the taste of chocolate/hazelnut combo with the almondy butter cookie was just what Santa ordered... though he may need to spend some more time on the treadmill for it ;). I rolled mine a bit thinner than required but it gave the cookies a nice snap to them so I didn't mind. Make sure you watch these, as they can burn very easily in the oven if left in just a moment too long. It's well worth the extra time spent. As always, Dorie Greenspan knocks my socks off with another cookie recipe. Here's to hoping I get my own copy of her book for Christmas!


Linzer Sablés with Nutella
(Adapted from Dorie Greenspan From My Home To Yours)


INGREDIENTS:
1 1/2 cups finely ground almonds, hazelnuts or walnuts
1 1/2 cups all-purpose flour
1 1/2 teaspoons ground cinnamon
1/4 teaspoon salt
Scant 1/4 teaspoon ground cloves
1 large egg
2 teaspoons water
1 stick (8 tablespoons) unsalted butter, at room temperature
1/2 cup sugar
1/2 cup nutella or other filling (such as raspberry jam or other)
Confectioners' sugar, for dusting

DIRECTIONS:
1. Whisk together the ground nuts, flour, cinnamon, salt and cloves. Using a fork, stir the egg and water together in a small bowl.

2.Working with a stand mixer, preferably fitted with a paddle attachment, or with a hand mixer in a large bowl, beat the butter and sugar together at medium speed until smooth, about 3 minutes, scraping down the bowl as needed. Add the egg mixture and beat for 1 minute more. Reduce the speed to low and add the dry ingredients, mixing only until they disappear into the dough. Don't work the dough much once the flour is incorporated. If the dough comes together but some dry crumbs remain in the bottom of the bowl, stop the mixer and finish blending the ingredients with a rubber spatula or your hands.

3. Divide the dough in half. Working with one half at a time, put the dough between two large sheets of wax paper or plastic wrap. Using your hands, flatten the dough into a disk, then grab a rolling pin and roll out the dough, turning it over frequently so that the paper doesn't cut into it, until it is about 1/4 inch thick.

4. Leave the dough in the paper and repeat with the second piece of dough. Transfer the wrapped dough to a baking sheet or cutting board (to keep it flat) and refrigerate or freeze it until it is very firm, about 2 hours in the refrigerator or about 45 minutes in the freezer. The rolled-out dough can be wrapped airtight and stored in the refrigerator for up to 3 days or in the freezer for up to 2 months. Just thaw the dough enough to cut out the cookies and go on from there.

5. enter a rack in the oven and preheat the oven to 375 degrees F. Line two baking sheets with parchment or silicone mats.

6. Peel off the top sheet of wax paper from one piece of dough and, using a 2-inch round cookie cutter-a scalloped cutter is nice for these-cut out as many cookies as you can. If you want to have a peekaboo cutout, use the end of a piping tip to cut out a very small circle from the centers of half the cookies. Transfer the rounds to the baking sheets, leaving a little space between the cookies. Set the scraps aside-you can combine them with the scraps from the second disk and roll and cut more cookies.

7. Bake the cookies one sheet at a time for 11 to 13 minutes, or until the cookies are lightly golden, dry and just firm to the touch. Transfer the cookies to a rack to cool to room temperature.

8. Repeat with the second disk of dough, making sure to cool the baking sheets between batches. Gather the scraps of dough together, press them into a disk, roll them between sheets of wax paper or plastic wrap and refrigerate until firm, then cut and bake.

9. When cookies are cooled, drop a heaping teaspoon of nutella onto one side (preferably the side without the hole in it) and spread with an offset spatula or the back of the spoon until cookie has a thin spread covering it. Sandwich with another cookie (the one with the hole, if you made them with holes) and dust with Confectioner's sugar if desired. Enjoy!

Sunday, December 13, 2009

Gingerbread bars with white chocolate icing


Sometimes, some thing just tastes so good, that you can't even compare what it tastes like with an actual taste. For example, say you're at a restaurant and you order the jerk seasoned shrimp with mango salsa and mashed sweet potato with fried plantains on the side... you taste it, and you get such an explosion of hot, spicy & sweet that sometimes all you can
say is: "Oh man. That tastes like the freakin' bahamas right there."

And somehow, everyone will nod their head and totally know exactly what you mean even though in reality it makes no sense whatsoever.

These bars... are kinda like that.

I want to say they taste like gingerbread bars that have been tinted with a nice white chocolate (and cream cheese) icing laced on top. I want to say they taste subtly spicy with a sweet tone. I want to say they taste like a thousand gingerbread men, only in cake form... but none of these seem to fit the description as well as my sister-in-laws words:

"It's like I just bit into Christmas."


Y'took the words right outta my mouth. Except not literally because that would be awkward.

Just look at these. They are so delicately weighed. Not too light or heavy. A perfect little snack cake that would do well with or without the icing (but because we like to take things to the next level and once is never enough, we'll just go ahead and ACCIDENTALLY cross over another healthy helping of lacy icing on these babies. Remember. Accidentally.) It's not rich at all and it
really does taste like you are biting into Christmas Day itself. It's like a total nostalgia rush to the fifth degree. Even if you've never had gingerbread before, you'll be swept away into Christmas.


Or just another piece.
Extra icing, please.

I was actually going to opt for Martha's AMAZINGLY DELICIOUS looking white chocolate gingerbread blondies BUT... 2 sticks of butter martha?! 2 whole sticks!?

...WELL, MARTHA, I DON'T HAVE TWO STICKS OF BUTTER TO USE. So you and your fancy pants recipe will just have to wait another week before they get their grips on my waistline.

So there.
(I'm sorry, I had to get that out. Forgive me.)

'Till then, I'm going to savor what has to be the best version of gingerbread I have possibly ever had. And I encourage you to do the same.


Gingerbread Bars with White Chocolate Icing
Stolen from Culinary in the Desert who adapted it from Bon Appetit

INGREDIENTS:

For gingerbread bars:
2 cups all-purpose flour, divided
2 teaspoons ground ginger
1 teaspoon cinnamon
1/4 teaspoon nutmeg
1/4 teaspoon ground cloves
1/2 teaspoon baking soda
1/2 teaspoon salt
10 tablespoons unsalted butter, softened
3/4 cup packed dark brown sugar
1/2 cup granulated sugar, divided
2 large eggs
1 teaspoon vanilla extract
1/4 cup molasses
1 cup white chocolate chips (optional)

For white chocolate icing:
1 oz white chocolate, melted and cooled
4 oz cream cheese, softened
3-4 cups powdered sugar
1/2 teaspoon vanilla extract
1 tbsp milk (optional)

DIRECTIONS:

1. Preheat oven to 350 degrees. Line a 13x9 inch pan with foil, with the foil going over the length-wise edges of the pan, sprayed with nonstick cooking spray. Set aside.

2. In a medium bowl, add flour. SCOOP OUT 2 TABLESPOONS OF FLOUR and place in separate bowl to reserve for topping.

3. Into the flour (not reserved flour), whisk in ginger, cinnamon, nutmeg, cloves, baking soda and salt. Set aside.

4. In large mixing bowl, cream together butter and 6 tablespoons of granulated sugar. Add eggs one at a time, beating just to combine after each addition. Mix in vanilla and molasses. Add dry ingredients and mix until just combined. Stir in white chocolate chips if using.

5. Scoop batter into prepared pan and, with an offset spatula, smooth out top. Sprinkle the top with reserved flour, then sprinkle the remaining 2 tablespoons granulated sugar over that.

6. Place into oven and bake until bars are golden brown and a toothpick comes out mostly clean with a few crumbs attached, about 20-24 minutes. Remove and place pan on wire wrack to cool completely before cutting.

7. While gingerbread is cooking, make the icing. take a clean medium-small bowl and blend together the cream cheese and powdered sugar. Blend in the melted white chocolate. Then blend in the vanilla. IF your icing is too thick, thin it out with a tablespoon of milk. If it's too think, add more powdered sugar.

7. When bars are cooled, lift the bars out of the pan with the foil that you lined over the edges of the pan. Cut into desired bars and, using a pastry bag (Or take a ziplock bag, put the icing in it and then cut off a little hole with scissors at the pointy tip), drizzle white chocolate icing over bars. Save leftover icing in fridge if desired.

Friday, December 11, 2009

Cakey Chocolate Chip Cookies


Reader, I know.
This is difficult.
This is hard.
This is not easy to do, and I understand.

That penguin cookie jar is seriously too cute for your mind to control. I know. I feel your pain.

Oh. And cookies. Those don't help either.


I'm not too big of a fan of chocolate chip cookies. This could be because mine always burn or turn out flat. Yeah, that whole nestle tollhouse recipe everyone raves about? Seems that no matter what I do, I get burned chocolate chip pancakes instead of sturdy cookies. It sucks. It really does.

I have yet to come across a chocolate chip cookie recipe that has successfully given me my kinda chocolate chip cookie -- crisp, slightly crumbly, not too chocolate and melt-in-your-mouth when dipped in cold milk. Those are my kinda chocolate chip cookies. I guess you could say even after all the chocolate chip cookies I've tried, I'm still a chips ahoy! girl at heart ;).

Still, it's hard to really care when you don't get a chocolate chip cookie recipe right. There are so many others out there, the possibilities are endless, and even if you get it wrong there are still some desperate relatives (or very hungry mice, apparently; but that's a story for another day) who will eat it despite it's flaws and enjoy it thoroughly. That's kind of what happen
ed with these cookies.

Their perfectly soft -- cakey and delicious with just the right amount of chocolate chips in each little ball. I could've make them tinier, to be honest. And it would have probably helped to put them in the fridge for a little while after dropping them on the cookie sheets so they wouldn't have spread and burned on the bottom. But that's alright. They still came out good and, surprisingly, keep very moist and still cakey after a week of being in an airtight container. Good deal.

So if you're the cakey chocolate chip cookie type, definitely whip some of these up. Or if you know someone who likes cakey chocolate chip cookies, give it as a gift! After all, it is the season of giving. And I promise they won't mind if you have slightly burned bottoms. Promise.

(And no, I am not the least bit disturbed by the fact that you have to remove the penguins head to get the cookies. I just see it as if he's got cookies on his mind -- haha, get it? yeahh. I'm good.)

Cakey Chocolate Chip Cookies
(recipe by Martha Stewart)
INGREDIENTS:
2 1/4 cups all-purpose flour
1/2 teaspoon baking soda
14 tablespoons (1 3/4 sticks) unsalted butter, room temperature
3/4 cup granulated sugar
1/4 cup packed light-brown sugar
1 teaspoon salt
2 teaspoons pure vanilla extract
2 large eggs
2 cups (about 12oz) semi-sweet and/or milk chocolate chips

DIRECTIONS:
1. Preheat oven to 350 degrees.

2. In a small bowl, whisk together flour and baking soda; set aside.

3. In the bowl of an electric mixer fitted with the paddle attachment, combine the butter with both sugars; beat on medium speed until light and fluffy. Reduce speed to low. Add salt, vanilla, and eggs. Beat until well mixed, about 1 minute.

4. Add flour mixture; mix until just combined. Stir in chocolate chips. Turn out dough into plastic wrap and refrigerate for 1 hour if desired.

5. When ready to bake cookies, drop heaping tablespoon-size balls of dough about 2 inches apart on baking sheets lined with parchment paper.

6. Bake until cookies are golden around the edges and slightly set in the center, 10 to 12 minutes. Remove from oven and let cool on baking sheet 1 to 2 minutes. Transfer to wire wrack, and let cool completely. Store cookies in airtight container at room temperature up to 1 week.

Sunday, December 6, 2009

Punitions with Rum Cream Cheese Icing


The chilly morning weather is rolling in and I am seriously finding it harder and harder to get out of bed in the morning. Seriously. You could be whippin' up a batch of cinnamony french toast and bacon and I'll still hesitate to get out from under the covers. It's just been one of those weekends where all you wanna do is snuggle inside your blanket, watch some awesome T.V. shows (*cough*THEFRINGE*cough*) and eat a lot of nice, warm, comforting, homey food.
Even though Christmas is coming, I really hardly feel like it is. It seems like the hype is so died down this year for everyone... But I'm still glad people are spreading the Christmas cheer anyway. That, and there is DEFINITELY no shortage of cookie making and consumption. No,
not at all.

Though I admit I was a total laze ball this weekend, I did manage to drag my butt out of bed and get some things done... And of course, those things came mostly in cookie form. Because it's Decemeber. And they can come in no other way but in cookie form.


I love these cookies because they are basic, simple, and still the bomb. Throw some snazzy cream cheesy icing on there that's been spiked with rum extract and you got yourself a class full of happy, hungry, cheery little kids all wanting to gobble these cute little snowmen up. And I don't blame them one bit!

Punitions, also known as "Punishment" cookies, are incredibly easy. You just mix flour, sugar, and butter together in the food processor, stick it in the fridge for a few hours, roll it out and cut it into traditional wedged circles or get all fancy-shmancy and use a snowman cut out. Your choice.

They're great on their own with a crumbly and snappy texture. But the icing really makes it even better. You really don't want to eat too many of these... they are truly for sweet tooths only. You know. The kind of people who can enjoy a few Hawaii'an sweet rolls with a good pat of butter on 'em.

Mmm. Hawaii'an sweet rolls...

Punitions (Punishment cookies)
(courtesy of smitten kitchen, adapted from Boulangerie Poilane, via Paris Sweets by Dorie Greenspan)
INGREDIENTS:

For cookies:

1 1/4 sticks salted butter, at room temperature
Slightly rounded 1/2 cup sugar
1 large egg, at room temperature
2 cups all-purpose flour

For rum cream cheese icing:
1/4 cup cream cheese, softened
2 cups powdered sugar
1/4 teaspoon rum extract
1 teaspoon light corn syrup
1 teaspoon water (optional, for thinning)

DIRECTIONS:
1. Put the butter in the work bowl of a food processor* fitted with the metal blade and process, scraping down the sides of the bowl as needed, until the butter is smooth. Add the sugar and process and scrape until thoroughly blended into the butter. Add the egg and continue to process, scraping the bowl as needed, until the mixture is smooth and satiny. Add the flour all at once, then pulse 10 to 15 times, until the dough forms clumps and curds and looks like streusel.

2. Turn the dough out onto a work surface and gather it into a ball. Divide the ball in half, shape each half into a disk, and wrap the disks in plastic. If you have the time, chill the disks until they are firm, about 4 hours. If you’re in a hurry, you can roll the dough out immediately; it will be a little stickier, but fine. (The dough can be wrapped airtight and refrigerated for up to 4 days or frozen for up to 1 month.)

3. Position the racks to divide the oven into thirds and preheat the oven to 350°F (180°C). Line two baking sheets with parchment paper.

4. Working with one disk at a time, roll the dough out on a lightly floured surface until it is between 1/8 and 1/4 inch (4 and 7 mm) thick. Using a 1 1/2-inch (4-cm) round cookie cutter, cut out as many cookies as you can and place them on the lined sheets, leaving about 1 inch (2.5 cm) space between them. (You can gather the scraps into a disk and chill them, then roll, cut, and bake them later.)

5. Bake the cookies for 8 to 10 minutes, or until they are set but pale. (If some of the cookies are thinner than the others, the thin ones may brown around the edges. M. Poilâne would approve. He’d tell you the spots of color here and there show they are made by hand.) Transfer the cookies to cooling racks to cool to room temperature.

6. For icing, beat cream cheese and powdered sugar together. Add extract and corn syrup. Beat until combined. If icing is too thick (it should have a drizzly consistency) add teaspoon of water or milk as desired. Ice cookies and leave for icing to harden.

Do ahead: The cookies can be kept in a tin at room temperature for about 5 days or wrapped airtight and frozen for up to 1 month.
 

Dunk Twice Copyright © 2009 Cookiez is Designed by Ipietoon for Free Blogger Template