Thursday, May 5, 2011

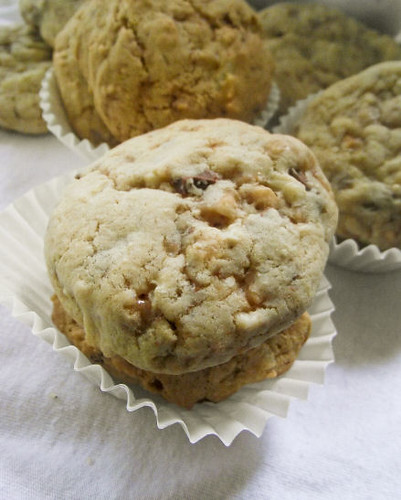
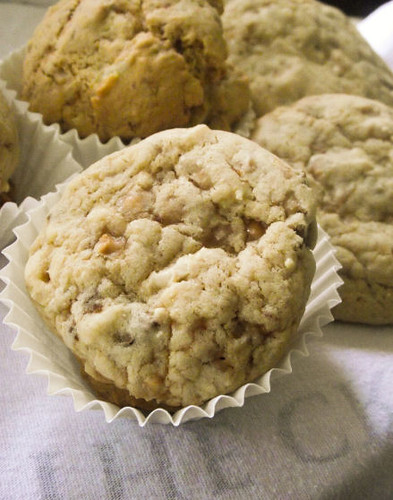
Allspice Oatmeal Cookies


Friends.... I am feeling a wee bit inflicted this past week.

There seems to be so much going on.

Tsunamis. Tornados in Alabama. Osama bin Laden dying. Friends betraying friends. New job offers. Crossroads in life...

And me getting a car.

Which isn't exactly inflicting to ME...moreso to the people who will be driving with me on the road.

I can just hear it now...

"Hey GRANDMA. GET OFF THE FREAKIN' ROAD. I have to be at work in 5 MINUTES. You're doing 20 IN A FAST LANE."

Yes... that's right. I'm a grandma driver. I do the speed limit. I check three times before I cross the street. You might as well throw a walker at me and call it a day, I'd probably get to work faster that way than driving.

But at least I have transportation!

Now I just need money.


In fact, having no money is kind of what brought me to this recipe to begin with. These cookies are very easy to make and you probably have all the ingredients sitting in the back of your cabinet somewhere collecting dust because that one reason you bought them you forgot to use them for and now it's too late because you already used the other ingredients and you're too lazy to go to the store and get them.

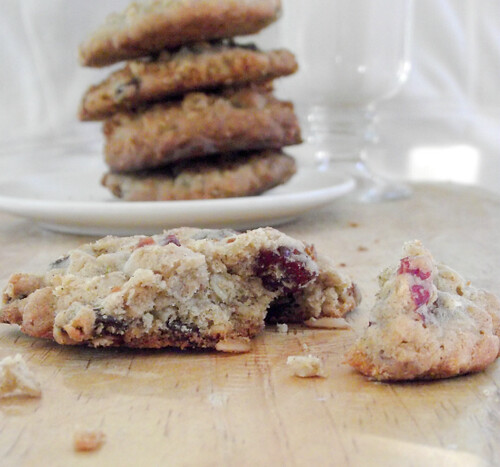
Yeah, that's right. I know your dirty kitchen secrets. Its okay. Mine are probably the same. If you must know, I bought the raisins and dried cherries in this for a chicken salad ( that I never made ) and the oats for breakfast (which I also never made due to my incompetence in making oatmeal).

So when I got the urge to make cookies, I immediately thought Oatmeal. Then I thought to use both the raisins and dried cherries and use them up (I didn't have enough in each packet to just use one flavor). And while I began to make the sweet doughy concoction, it occurred to me that while looking through my spice cabinet that I had no cinnamon whatsoever.

Then, I dropped dead of shock. Because this NEVER. HAPPENS.
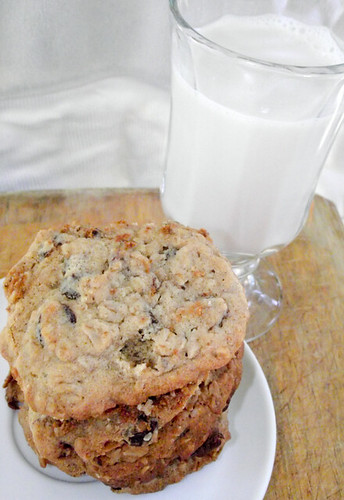
I always have cinnamon around. Cinnamon is my mistress. My other lover. The boy next door. It's my favorite spice of all time. When I didn't see any in the cabinet I just about freaked out. Then I stuck my finger in the cookie dough and ate off a spoonfuls worth. Then I felt better.

I tried looking for the closest possible spice. Nutmeg? Oh god, no. Ever since that one time I tried to make Alfredo sauce by scratch and threw like 2 tablespoons of nutmeg in the sauce, nutmeg and I have never seen eye to eye. Cloves? WAY too strong and dark. Ginger? I just had a feeling that wouldn't bear well with the raisins and dried cherries. So, almost at the end of my rope, I kept looking until at the very back of the cabinet I saw my savior:

Allspice.

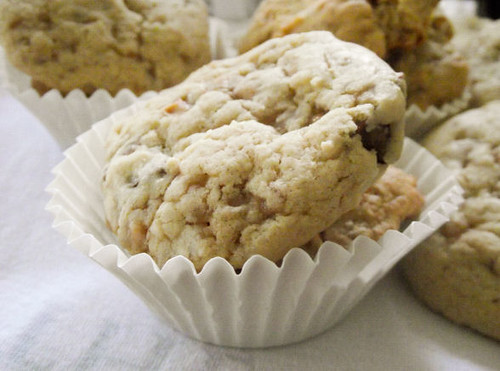
Allspice doesn't get much attention, but it should. It's a great substitute for cinnamon, since it basically carries all the spices in (cinnamon, nutmeg, cloves, etc) without being too overpowering. In fact, when I made this cookies I thought it tasted BETTER than cinnamon did. It just gave them this different, spicy edge to it that complimented the dried fruit PERFECTLY. I'm actually really excited about it, too, because who knows what else it's good with? dried apricots, maybe? allspice chocolate chip cookies? we shall see.

In the meantime though, if you're in a cookie crunch and you don't have all the ingredients you wish you did... make these. I'm sure if you don't have allspice you can sub out cinnamon, but it won't taste the same. This recipe is a good base recipe for any additions, really, so just use your imagination.

You may come up with one of your favorite cookies ever.

Allspice Oatmeal Cookies with Raisins and Dried Cherries

Ingredients:
1/2 cup butter, softened
3/4 cup brown sugar, packed
1 egg
1 teaspoon vanilla extract
1/2 cup all-purpose flour
3/4 cup whole wheat flour
1 1/4 teaspoon allspice
1 teaspoon baking soda
1/2 cup each raisins and dried cherries or other dried fruit of choice
1 3/4 cup rolled or quick cooking oats (not instant!)

Instructions:

1. Preheat oven to 350F. Prepare a cookie sheet pan.

2. Cream together the butter, brown sugar, egg and vanilla on low setting until smooth.

3. In a separate bowl, combine the flour, allspice, and baking soda. Add into butter mixture and mix until there are no traces of flour left.

4. Fold in dried fruit and oats by hand with a spatula.

5. Drop the cookies by tablespoonfuls (I made mine a bit bigger) about 2 inches away from eachother on the pan in case they spread (mine didn't). Bake for about 8-10 minutes, or until the cookies are done around the edges but still a little raw in the middle. Cool on pan for 2 minutes then move onto wire wrack to cool completely. Devour immediately.

Makes 1 1/2 dozen cookies depending on how big you make them.

Wednesday, April 20, 2011

Vanilla Cupcakes with Vanilla Bean Lemon Buttercream

Sometimes, I forget why I love baking.

I get so caught up in all the hustle and bustle of the day that I just...forget. I forget what butter and sugar look like mixed together. I forget what it's like to feel dough kneaded between my fingers. I forget what it's like to spread homemade icing on a cake, or pressing down buttery delicious graham cracker crumbs into a springform pan. I forget the heat of the oven, the smell of freshly baked cinnamon apple muffins, the first bite into a homemade cookie...

I forget all of the things that are so important to me. That keep me calm, balanced, and happy.

Baking has always been my get-away vacation from the norm. It's time I spend alone in a kitchen with nothing but frantic ideas. It's relaxing, for the most part. And even when it's not -- even when you take a task on so great that you end up curled into a ball on the kitchen floor with icing in your hair and a mess on the counters... you still feel like you conquered the world once that awesome dessert you spent 5 hours to perfect is on your table ready to be served, its demanding presence drawing everyone in.

They ooh, and ahh, and smile, and become happy with each bite. Therefore, making you happy in the process. Because not only did you totally kick that recipes BUTT, but you made people smile and forget their problems.

Baking is a gift. And I need to find more time in my life to do it.

That's why I forced myself in the kitchen yesterday. Though I dreaded the pile of dishes that would follow, I proceeded with confidence. I thought up a recipe. I mixed it all together. I baked them at 350F. And then I frosted them.

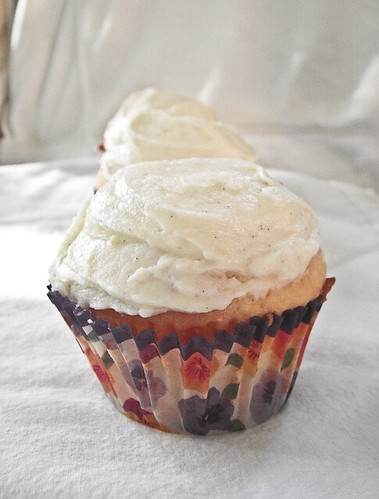
Thus, the birth of Vanilla Cupcakes with Vanilla Bean Lemon Buttercream.

And despite the natural light outside not doing well for my little starter DSLR, I went ahead and posted anyway.

'Cause honestly? These cupcakes could make anyones day ten times better.

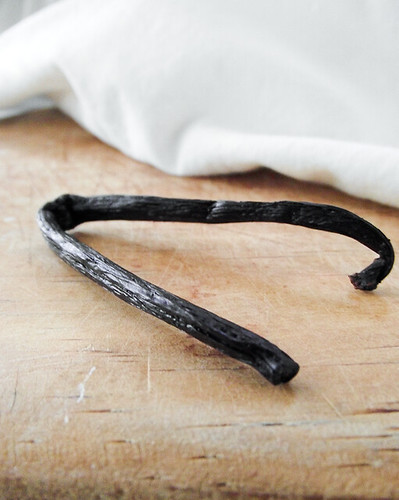
I've never actually used real vanilla bean in a recipe before, so I was excited when I did for this one. I practically jumped around the room, showing everyone my vanilla bean.

I must've sounded like some kind of Ina Garten obsessed freakshow.

"Look! LOOK! It's a VANILLA BEAN. A REAL VANILLA BEAN! Oh my God. It's the pod and everything! Holy crap! I've only seen this on the teevee!"

Sadly, no one seemed as enthralled by it as I was.

Whatever. Don't judge me.

Anyway, I'm glad I mixed this into the buttercream. It added a fantastic vanilla flavor that I just loved. I used just a little bit of lemon, not enough to overpower it. I didn't want to get rid of that vanilla bean flavor. But you can definitely taste undertones of it. And when your teeth hit the perfect, fluffy vanilla cupcake underneath, you will be in spring HEAVEN.

It's really great to make for any spring-time get together, for church or just for friends coming over for a bit. I highly recommend eating it outside with a pitcher of lemonade while it's nice and sunny...preferably by a pool :) (If you don't have a pool, that's ok -- i'm sure those weird neighbors across the street wont mind you using theirs.)


Vanilla Cupcakes with Vanilla Bean Lemon Buttercream

INGREDIENTS:

Vanilla Cupcakes
1 1/2 cups all-purpose flour
1 cup sugar
1 1/2 teaspoon baking powder
1 stick butter (8tbsp), room temperature (VERY important!)
1 egg
2 egg yolks
1/2 cup sour cream or full-fat yogurt
1 1/2 tsp vanilla extract

Vanilla Bean Lemon Buttercream
1 vanilla bean
1 large lemon (or 2 small)
1 tbsp vanilla extract
2 sticks butter (16tbsp), room temperature
3-4 cups powdered sugar

INSTRUCTIONS:

1. Preheat oven to 350F. Place cupcake liners in a 12pc cupcake pan or spray with nonstick spray or bakers spray.

2. In an electric mixer with a paddle attachment (or hand mixer), combine the flour, sugar and baking powder together. Add in the butter, eggs, vanilla, and sour cream/yogurt, and mix for 30 seconds (or 1 minute for hand mixer) until the dough is smooth with no clumps, making sure to scrape down the sides.

3. Disperse batter evenly into cupcake pan. Place in the oven and bake for 20-25 minutes or until tops are pale golden and a toothpick through the middle cupcake comes out clean. Once done, leave to cool on a wire wrack.

4. Meanwhile, make the frosting. To a bowl, add the butter, vanilla extract, the zest of 1 large lemon, and the juice of the same lemon. Mix together briefly to combine. Using a sharp knife, cut down the middle of the vanilla bean and scrape the beans inside out and into the mixing bowl. Mix again until the beans are incorporated into the butter. Add 3-4 cups gradually to the bowl until your frosting has the consistency you like, checking for taste after each addition (make sure it's not TOO sweet!)

5. Once cupcakes are cooled COMPLETELY, frost cupcakes as you desire (I just swirled them on with a knife... I'm simple.)

Monday, April 4, 2011

Cinnamon Rolls


Before I talk about these beautiful, delicious rolls of love... let me tell you 5 reasons why these should not invoke any guilty conscious in you when you make them (and eat all of them).

1. Cinnamon. Cinnamon is good for you. It's high in antioxidants, helps digestion, and also lowers stress!

2. Has enough carbohydrates to make you want to wrestle a bear. And really, hasn't everyone always wanted to wrestle a bear before?

3. You actually can tell people what ingredients go in them! Bet you can't do that with your regular old supermarket cinnamon rolls.

4. They give you a work-out! Rollin' the dough out for these babies is like running a marathon. You'll have so much arm muscle after this you'll be able to lift up a car! (disclaimer: please do not actually attempt said statement after eating cinnamon rolls as it may cause hip displacement or other injuries to vital areas)

5. It makes 7 pans. 7. Pans. What are you going to do with 7 pans of cinnamon rolls?! You practically have to give them away! This recipe actually ENCOURAGES will-power, selflessness, and kindness to your neighbors! (even if you're still pissed at them for stealing your mail for a year)

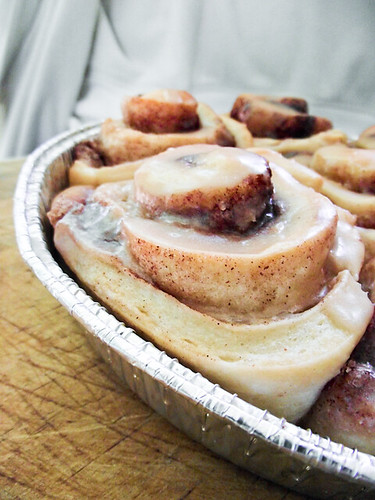
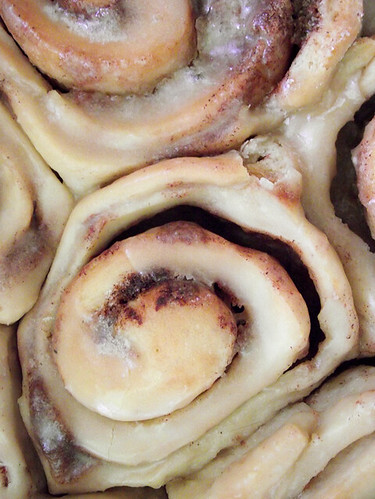
Now that we've gotten that over with, we can continue with how amazing these cinnamon rolls are. They will make men propose to you. Make your manager give you a raise. They'll make you the most popular chick (or guy) around. Soon enough, people will be begging you to make more. In fact, they'll demand it. They are that good.

Just don't tell anyone it has four and a half sticks of butter in it. Especially not Jillian Michaels. She might come to my house and make me do burpies.

I hate burpies.

Really, though, if you want to make a special treat... This is it. This recipe makes A LOT of cinnamon rolls... so if you make the full recipe, be prepared to give some away. I gave two batches to my neighbor, three to my work (they were gone two days), and froze the last two. They are better than any cinnamon rolls you'll buy from a bakey. And people will be super impressed when you tell them you made them yourself. I highly recommend starting the night before and finishing it in the morning. You can easily freeze these like I did after their done baking or before you put them in the oven. Either way, people will be singing your praises.

Just make sure you save one for yourself.
Remember: Cinnamon rolls make your digestion better.

And who doesn't like being regular?

Right?
...Right?

...

*cricket*


Better Than Supermarket Cinnamon Rolls with Maple Frosting

INGREDIENTS


Rolls:
1 quart whole milk
1 cup vegetable oil
1 cup sugar
2 packages active dry yeast (o.25 oz packets)
8 cups (plus 1 cup flour, separated) all-purpose flour
1 teaspoon (heaping) baking powder
1 teaspoon (scant) baking soda
2 cups butter (4 sticks butter), melted
2 cups sugar
Generous amount of ground cinnamon


Maple Frosting

2lbs powdered sugar (1 large bag)
1/4 cup real maple syrup
1/2 cup milk
1/4 cup melted butter
1/4 cup brewed coffee
1/8tsp salt

INSTRUCTIONS

1. Mix the milk, vegetable oil and sugar in a pan. Scald the mixture (heat until just before the boiling point). Turn off heat and leave to cool 45 minutes to 1 hour. When the mixture is lukewarm to warm, but NOT hot, sprinkle in both packages of Active Dry Yeast. Let this sit for a minute. Then add 8 cups of all-purpose flour. Stir mixture together. Cover and let rise for at least an hour.

2. After rising for at least an hour, add 1 more cup of flour, the baking powder, baking soda and salt. Stir mixture together. (At this point, you could cover the dough and put it in the fridge until you need it – overnight or even a day or two, if necessary. Just keep your eye on it and if it starts to overflow out of the pan, just punch it down).

3. When ready to prepare rolls: Sprinkle rolling surface generously with flour. Take half the dough and form a rough rectangle. Then roll the dough thin, maintaining a general rectangular shape. Drizzle 1/2 to 1 cup melted butter over the dough. Now sprinkle 1 cup of sugar over the butter followed by a generous sprinkling of cinnamon.

4. Now, starting at the opposite end, begin rolling the dough in a neat line toward you. Keep the roll relatively tight as you go. Next, pinch the seam of the roll to seal it.

5. Spread 1 tablespoon of melted butter in a seven inch round foil cake or pie pan. Then begin cutting the rolls approximately ¾ to 1 inch thick and laying them in the buttered pans.

6. Repeat this process with the other half of the dough. Let the rolls rise for 20 to 30 minutes, then bake at 400 degrees (see note below) until light golden brown, about 15 to 18 minutes.

For the frosting, mix together all ingredients listed and stir well until smooth. It should be thick but pourable. Taste and adjust as needed. Generously drizzle over the warm rolls. Go crazy and don’t skimp on the frosting.

Saturday, March 26, 2011

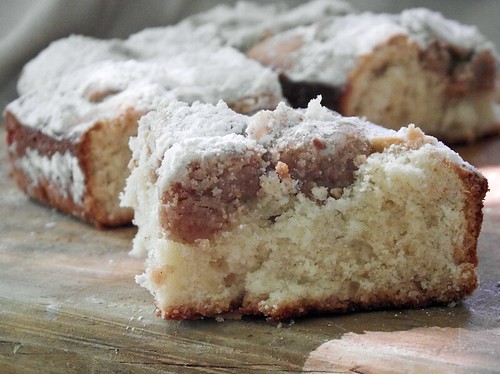
New York Style Crumbcake


Every once in awhile, when my father wanted to treat us, he would drive us after church to a bakery called "Entenmans" off the side of the highway. I remember walking in and just looked at the boxes and boxes of pound cakes, chocolate donuts, cream cheese danishes and chocolate chip cookies. I would look through them excitedly, not straying far from my father. He would smile at me and say, "pick one thing you want", while picking out some things for himself and the rest of the family. My eyes would get wide with excitement, and I would stand there, stuck with a choice that as a child seemed so absolutely life-threatening. If I got the chocolate chip cookies, I wouldn't have any orange pound cake. But if I got the pound cake, then I wouldn't get any chocolate chip cookies. I remember always standing there anxiously, thinking hard.


But there was one item that they sold there that I was honestly addicted to. One of the best things I had ever eaten: New York Style Crumbcake. It had a brilliant small crumb on top, moist cake underneath and powdered sugar all around. If I ever came to a fork in the road about what I wanted, my hands immediately went for the crumb cake. I would constantly sneak into the kitchen, grabbing another slice, until my father would ask who was eating all of the crumb cake and I'd keep my mouth closed and grin to myself sheepishly.

Unfortunately the bakery near me closed down, and now we can only buy some in packages at the super market, which never tasted exactly like the ones that came from the place we went to. And no matter how hard I've tried, I've never been able to completely mimic the taste in a recipe. But I've come damn close with this cake. Infact, I am perfectly fine with settling for this if I cannot get the best, because aside from a bit of dryness at the cake part underneath, this crumb cake was 100% DELICIOUS. And if you are a fan of the crumb cake, then you will like this. I do recommend using something to keep the cake moister or richer... Maybe more butter, or perhaps sour cream in place of buttermilk. Either way, it's an awesome way to treat yourself or just eat something new. Just makes sure you poor some powdered sugar all over these... It's just not right without it.

New York-Style Crumb Cake
Adapted from America's Test Kitchen

INGREDIENTS:
For the crumb topping:
1/3 cup granulated sugar
1/3 cup dark brown sugar
1/8 teaspoon salt
3/4 teaspoon ground cinnamon
1/2 cup (1 stick) unsalted butter, melted, still warm
1 3/4 cups cake flour

For the cake:
1 1/4 cups cake flour
1/2 cup granulated sugar
1/4 teaspoon baking soda
1/4 teaspoon salt
6 tablespoons unsalted butter, at room temperature
1 large egg
1 large egg yolk
1 teaspoon pure vanilla extract
1/3 cup buttermilk, at room temperature

DIRECTION
Set an oven rack to the upper-middle position and preheat the oven to 325 degrees. Spray an 8-inch square baking dish with nonstick cooking spray and line it with a strip of parchment paper or aluminum foil that is just shy of the width of the dish and long enough to overhang the sides of the dish. Spray the parchment paper with nonstick spray as well.

In a medium bowl, stir together all the ingredients for the crumb topping until they form a smooth dough. Let the dough rest for 10 minutes while you prepare the cake.

In the bowl of an electric mixer, stir together the cake flour, sugar, baking soda and salt at low speed. With the mixer running on low, add the butter chunks one at a time, letting each one incorporate into the dry ingredients before adding another. When the mixture resembles even, moist crumbs, add the egg, egg yolk, vanilla and buttermilk, and increase the speed to medium. Beat until the batter is light and fluffy, about 2 minutes. Scrape the batter into the prepared pan.

Break apart the crumb topping into large pea-sized pieces, rolling them slightly in between your fingertips to get them to hold their shape. Spread the crumbs in even layer over the batter. Bake until the crumbs are golden and a cake tester inserted into the center of the cake comes out clean, 35 to 40 minutes. Cool on wire rack at least 30 minutes. Lift the cake out of the pan using the parchment handles. Dust with confectioners' sugar just before serving.

Friday, March 4, 2011

Dulce De Leches Cheesecake


For some reason, gossip never seems to go out of style no matter how old you are. You could be 40 years old and still stuck in a inferno of twisted stories. Sure, they may start off innocent. One person telling another person that they saw some hot golfer guy that lives down the street from them helping Crazy Old Lady Tooters with her groceries. Then the person you told says something about it to someone else, then that someone else says it to someone, and suddenly it turns into:

"Did you hear about what's going on with Crazy Old Lady Tooters that lives down the street?! I heard she's having an affair with the hot golfer guy that's married to that one chick that works at Kmart... I even heard that he got her pregnant! I know she's like 5038 years old but oh, my, GOD!"

Then someone decides it would be a good idea to actually ask the people in question what's going on instead of assuming something. Nine out of ten times they hear something completely different than what their peers said. What was thought to be an affair actually turns into Crazy Old Lady Tooters needing help putting away her groceries because she was too weak to put them up in her cabinets, and hot golfer guy was just being a good ol' gentlemen. No affair. No pregnancy. No bomb conspiracies. No wife who works at kmart being cheated on.

Rumors. They can get sticky pretty fast.


Unfortunately, no matter where you go in life, rumors will eventually find their way to you. I'm currently stuck in one that has been blown so much out of logic that at this point all I can do is laugh that anyone could even come up with stuff. It really is ridiculous. I like a good story now and then, but life isn't a Jerry Springer Show. When it comes to gossiping, I try to keep my mouth shut. I've always lived by the philosophy that whatever people tell me, I won't go blabbing to someone else unless I want to know the truth. And in that case, why not just ask that person straight up? This is one of my favorite bible verses concerning this:

“A gossip betrays a confidence, but a trustworthy man keeps a secret.” Proverbs 11:13

I try to live by this verse when it concerns gossip. Afterall, no one needs to know eachothers private lives.

Now, if you're going to spread rumors about me... At least have it to do something with my baking. Good rumors. Like, "hey, I heard Alex bakes a mean dulce de leches cheesecake"... that, I can live with. Totally. Absolutely. Go right ahead and say stuff about me if you're gonna be saying that.

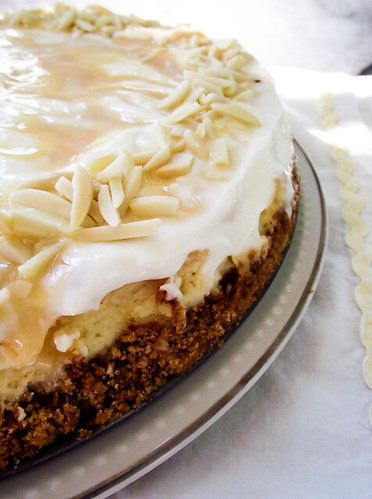
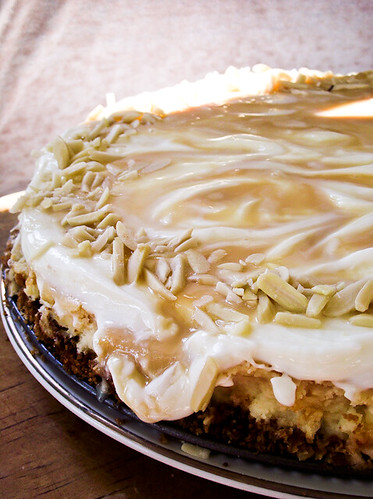
While you're at it, mention that my dulce de leches has a spiced graham cracker and almond crust. And that it's got a sour-cream dulce de leches swirl on top. Tell them it's absolutely splendid, not too sweet not too bitter... A beautiful medium.

And tell them that I will totally make one for them, too.


Dulce De Leches Cheesecake

INGREDIENTS

Crust:
1 1/2 cup graham cracker crumbs (about 12 crackers)
3 tablespoons granulated sugar
6 tablespoons butter, melted and still warm (not scorching hot) to the touch
1 teaspoon cinnamon
1/2 teaspoon nutmeg
3/4 cups almonds


Cheesecake:
3 8oz packages of cream cheese, room temperature
1 cup granulated sugar
2 tablespoons flour
1 teaspoon vanilla extract
1 teaspoon almond extract (can replace with vanilla extract)
3 eggs, room temperature
1/2 cup homemade or store bought dulce de leches (from a 14 oz. can)

Topping:
2 cups full-fat sour cream
3 tablespoons granulated sugar (I added more sugar to this cause I like the topping more sweet, but add more to your own preference)
1/2 cup or whatever remains of the dulce de leches
1/4 cup slivered almonds (to decorate)


DIRECTIONS:


1. Preheat your oven to 320 degrees. Spray a 9in springform pan with non-stick baking spray.

2. To make the crust, take all of the crust ingredients and pulse together in a food processor or blender until fully combined. Press into the springform pan, moving up the sides about an inch or two. Put the crust into the oven for about 10 minutes or until slightly brownish. Take out and let cool while you make the cheesecake filling.

3. Using an electric mixer or handmixer, on a low speed combine the cream cheese with the sugar, extracts, and flour until smooth. Add in eggs one at a time, making sure to mix each egg in completely before adding another. Be careful not to overmix. Reserve 1/2 cup of the cheesecake and set to the side.

4. Pour the filling into the cooled crust. Pour the 1/2 cup of dulce de leches into the reserved 1/2 cup of the cheesecake filling. Whisk together, then drop spoonfuls of the cheesecake dulce de leches filling into the regular cheesecake filling. Swirl together with a butter knife.

5. Bake cheesecake for about an hour or until the cheesecake wiggles only slightly in the middle and the outside of the cheesecake is set.

6. Run a knife around the side of the cheesecake to loosen. Let cool at room temperature for another hour, then pop into the fridge for 5 hours or overnight.

Friday, February 25, 2011

Donut Muffins


Lately, I've been finding myself missing out on my morning "me" time. You know, that point in the day where you're actually by yourself and stalking checking out other peoples facebooks...

If you have kids, this part of your life is probably missing. Don't fret, it isn't gone forever. Unless you're my mom, who hasn't had a kid in years and still has them in her house at all times.

Apparently it's because she makes killer hot wings. But I think they just are fascinated by the fact that she wears a weave.

Actually, I probably wasn't suppose to mention that on the internet...


Anyway, "me" time... It's something I literally go out of my way to obtain. If I don't have a moment in the day where I'm literally by myself for an hour or two, I usually am in a horrible mood for the whole day. I just can't stand going a day without being able to sit down and just chill out. I like to get up early, early in the morning and do this. Everyone's sleeping and I can check my e-mail/facebook/etc in peace without having to worry about talking to anyone or doing anything. It's also my prime time to write, do devotionals, and pray.

But mostly, it's a time to enjoy my first meal of the day. Which for me is a big deal, because I absolutely love breakfast. If I had it my way, I'd probably eat breakfast for lunch and dinner as well. Whether it be waffles, pancakes, eggs/bacon sandwich, grilled cheese, yogurt and granola or apples with milk... I don't care. All I know is that I seriously dig breakfast.

Plus there's that whole bacon deal... Did I ever mention I used to eat plates of bacon for breakfast?

I also had really bad acne...

Yeah... Something to think about.

I also used to love to eat those powdered donut balls from Dunkin' Donuts. My Dad would occasionally buy them on Sunday mornings before church. Whenever he did, they were guaranteed to be gone by that night. I would sneak away with about five of them, washing them down with a cold glass of milk. Since I've moved to Louisiana, I scarcely have seen any Dunkin' Donuts... so those powdered donut holes haven't been in my life.

But thankfully, I found a substitute.

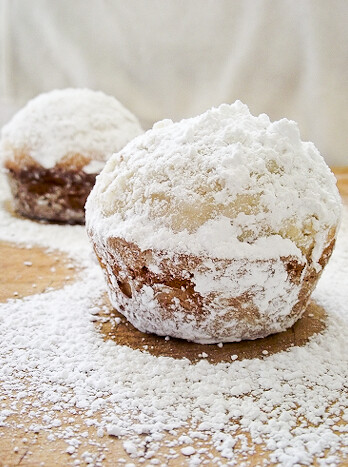
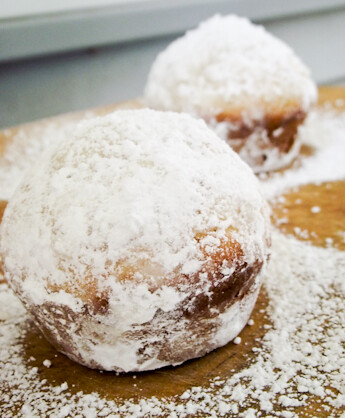
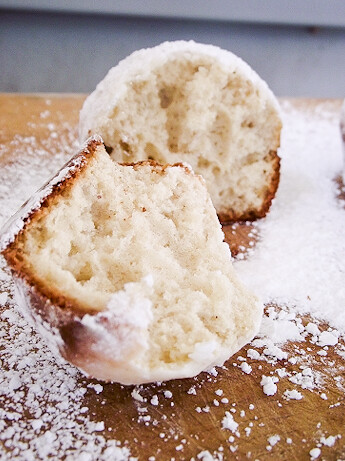
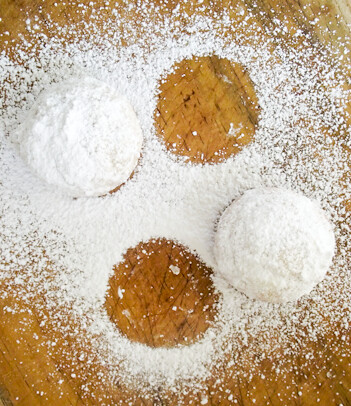
These babies are called Donut Muffins. While they can be rolled in coarse sugar or cinnamon sugar, I went with the powdered variety. Why? Because it's literally like biting into the love child of a beignet and a powdered donut. These babies are made with a good amount of butter, then brushed with MORE butter when they get out of the oven. Sweetened mostly by the powdered sugar, these beauties come out clean and neatly domed without the need of smoothing out the dough. They are soft, perfect, pillowy, and absolutely need to be drunk with milk or coffee. No doubt about it. And don't invite tea to the party. Save the biscotti for that.

Now, with a whole arsenal of these wrapped up and ready to be warmed and eaten, I'm definitel going to try a little bit harder to get that "me" time. I am literally counting down the hours until I can wake up and eat this delicious morsel. Maybe it's not the healthiest breakfast... but it's good for a treat every now and then. Hey, I won't tell if you won't.


Donut Muffins

INGREDIENTS:
3 cups unbleached all-purpose flour
2 ½ tsp baking powder
¼ tsp baking soda
Scant 1 tsp salt
½ tsp freshly ground nutmeg
¾ cup plus 1 Tbs whole milk
2 Tbs buttermilk
1 ½ sticks (6 ounces) unsalted butter, at room temperature
¾ cup plus 2 Tbs granulated sugar
2 large eggs

TOPPING
4 - 6 Tbs unsalted butter
1 ½ - 2 cups powdered sugar OR 1/2 cups cinnamon sugar OR 1/2 cup coarse sugar

DIRECTIONS:

1.Preheat the oven to 350. and set a rack to the middle position. Spray a standard-size muffin tin with cooking spray.

2. In a medium bowl, combine the flour, baking powder, baking soda, salt, and nutmeg, and whisk to mix them thoroughly. Set aside.

3. Combine the milk and the buttermilk in a measuring cup, and set aside.

4. Place the butter in the bowl of a stand mixer fitted with the paddle attachment (or, alternatively, in a large mixing bowl with electric beaters nearby), and beat on medium speed for a few seconds, until the butter is soft and creamy. With the motor running, add the sugar in a steady stream. Continue beating, scraping down the sides of the bowl once or twice, until the mixture increases in volume and lightens to pale yellow. It should look light, fluffy, and wonderfully creamy, like frosting. This could take a couple of minutes.

5. Add the eggs one at a time, beating until they are just combined.

6. With a wooden spoon, mix ¼ of the flour mixture into the butter mixture. Add 1/3 of the milk mixture. Continue to add the dry and wet ingredients alternately, ending with the dries. Mix until the dough is smooth and well combined, but do not overmix.

7. Divide the batter between the cups of the muffin tin. Bake until the muffins are firm to the touch and a toothpick inserted in the center comes out clean, about 25-32 minutes.

8. When the muffins are still slightly warm prepare the topping: melt the butter in the microwave or on the stovetop, and pour the powdered sugar/cinnamon sugar/sugar into a deep bowl.

9. Using a pastry brush and working one muffin at a time, lightly brush the entire outside of the muffin with butter, and then roll it in the powdered sugar/sugar/cinnamon sugar. Shake off any excess, and place the finished muffins on a rack or serving platter. Serve.

Wednesday, February 16, 2011

Tres Leches Cake (Three Milk Cake)

So I decided to go pink on Valentine's Day.

Real pink.

As in... Pink eye pink. Or should I say blood red.

Yeah. A box of chocolates has never been more needed.

It wouldn't have been so bad if I didn't have to go to the ER two days before Valentine's Day and have my eye forced open by a doctor because it was swollen shut. I was literally blind for the entirety of Saturday. I have never felt so helpless in my life before. You don't realize how much you need your eyes to do everything until you have nothing anymore.

So unfortunately, I spent my Valentine's Day inside, making this delicious Three Milk Cake.

In other words, it wasn't that bad. Plus, eye pain is the perfect excuse for second helpings of anything.

"But sweetie, my eye likes calories... it needs the energy to feel better!"

My boyfriend totally fell for it.
My doctor... ehh, not so much.

But what do they know anyway.

Tres Leches Cake, or Three Milk Cake, is a dessert quite popular in Latin America. Not only is it ridiculously easy but it's ridiculously delicious and most of the ingredients are pantry staples. I made it for my boyfriends mother, whose birthday falls on Valentine's Day. When I asked her what she wanted, it seemed to be a tie between a cheesecake and Tres Leches Cake.

Obviously, if she picked this over cheesecake, that says something.

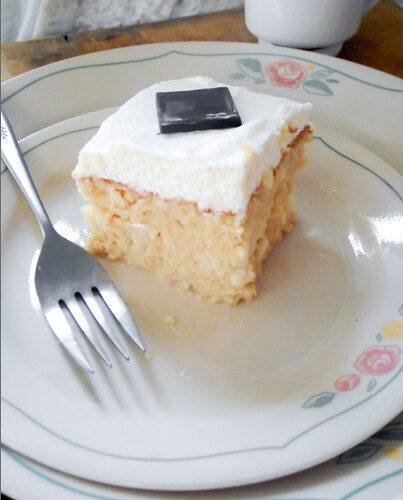
My favorite part about this cake is the fact that it's a sponge and it literally does not dry out. Even if you leave it at room temperature or leave a piece uncovered in the fridge on accident, you wont have a dried out piece of cake. It stays moist and delicious, usually with a small pool of milk underneath. And the whipped cream on top stays soft and fluffy. Just the way it's suppose to be.

If you ever make a dessert for any Puerto Rican, Mexican, Honduran, etc, in your life, I guarantee you they will love it if you bring this to their house as a dessert. Just make sure you bring more than one.

Us hispanics like our food in bulk.

Don't judge.

(P.S. Do not, and I repeat, DO NOT buy premade whipped topping for this cake. It will not taste the same. If you're gonna make the cake, you gotta go with homemade topping.)


Tres Leches Cake
(adapted from the Pioneer Woman Cooks)
INGREDIENTS:

1 cup All-purpose Flour
1-½ teaspoon Baking Powder
¼ teaspoons Salt
5 whole Eggs
1 cup Sugar, Divided
1 teaspoon Vanilla
⅓ cups Milk
1 can Evaporated Milk
1 can Sweetened, Condensed Milk
¼ cups Heavy Cream

WHIPPED TOPPING
1 pint Heavy Cream, For Whipping
5 Tablespoons Sugar

INSTRUCTIONS:

1. Preheat oven to 350 degrees. Spray a 9 x 13 inch pan liberally until coated.

2. Combine flour, baking powder, and salt in a large bowl. Separate eggs.

3. Beat egg yolks with 3/4 cup sugar on high speed until yolks are pale yellow. Stir in milk and vanilla. Pour egg yolk mixture over the flour mixture and stir very gently until combined.

4. Beat egg whites on high speed until soft peaks form. With the mixer on, pour in remaining 1/4 cup sugar and beat until egg whites are stiff but not dry.

5. Fold egg white mixture into the batter very gently until just combined. Pour into prepared pan and spread to even out the surface.

6. Bake for 35 to 45 minutes or until a toothpick comes out clean. Turn cake out onto a rimmed platter and allow to cool. While cake is cooling, stick your mixing bowl and your spinners (whether its from a kitchenaid or handmixer) into the freezer along with the heavy cream for the whipped topping.

7. Combine condensed milk, evaporated milk, and heavy cream in a small pitcher. When cake is cool, pierce the surface with a fork several times. Slowly drizzle all but about 1 cup of the milk mixture—try to get as much around the edges of the cake as you can.

8. Allow the cake to absorb the milk mixture for 30 minutes.

9. To ice the cake, take out your thoroughly chilled mixing bowl and spinners and whip 1 pint heavy cream with 5 tablespoons of sugar until thick and spreadable.

10. Spread over the surface of the cake. Decorate cake with whole or chopped maraschino cherries. Cut into squares and serve.

Saturday, February 5, 2011

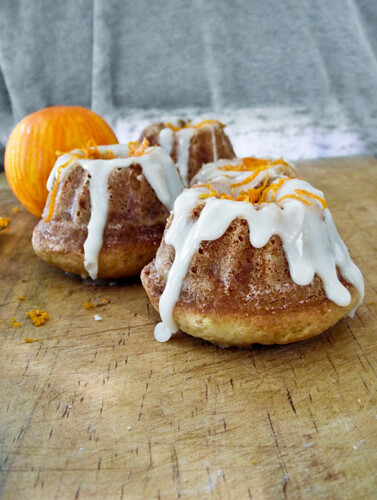
Orange Mini Bundt Cakes with Orange Glaze

Holidays seemed to have kicked me straight in the butt this year. Usually, I'd be baking up a storm all the way 'till Valentine's Day but I seem to have taken a long hiatus from the kitchen despite my beautiful new KitchenAid that I got for Christmas.

It definitely made things a heck of a lot easier... Though I'm pretty sure I pulled some kind of weird shoulder muscle getting that hunk of a machine out of the box and onto the counter.

Homegirl needs to go on a diet ASAP.

Maybe Christmas and New Years burned me out. Shafted along with Chris's 22nd birthday and our anniversary, blogging kind of had to take a backseat for a bit.

But now I'm back. And the Florida sunshine has not followed me into Louisiana territory.

I'm pretty sure it was so cold one night I could see my breath inside the car.

With the heater on.

Totally not awesome.


Among my KitchenAid I did get a lot of more cool gadgets...AKA, this awesome mini bundt pan. Along with one of those brownie pans, a gorgeous glass cake platter (that turns into a punch bowl), and some other little baking goodies in my stocking. Yeah... I got out good this year. And yes, I do still get a stocking. My mother and I made an agreement that I get to have a stocking until I'm married. And I'm not married yet. So there.


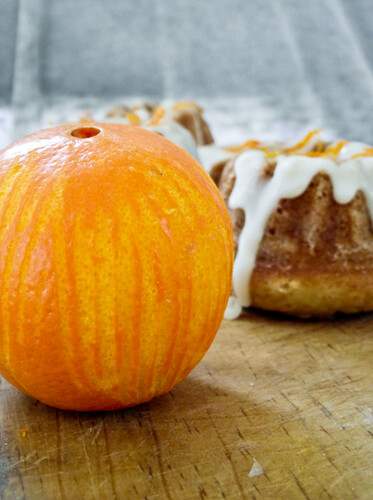
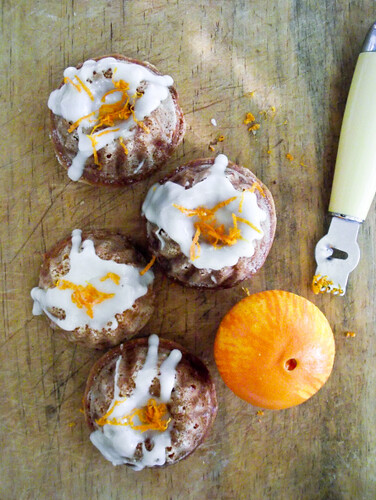
While I've made a couple of things already with this pan, It's really fun to make bite-sized versions of little cakes that just look so beautiful glazed or even dusted with powdered sugar. This cake in particular was delicious. Soaked up with an orange syrup and then finished with a zesty citrus glaze...if you're a fan of oranges, this is right up your alley.

I'll be posting more often soon, so be on the lookout for new posts. BTW, you can totally make these in a cupcake pan as well or double the recipe for a full-size bundt cake Just sayin'.


Orange Mini Bundts with Orange Glaze
(makes 12 mini bundt cakes or cupcakes)

Bundt Cake Ingredients:

1 3/4 cups unbleached, all-purpose flour
1 1/2 teaspoons baking powder
1/2 teaspoon baking soda
1/2 teaspoon kosher salt
8 tablespoons (1 stick) unsalted butter
1 cup granulated sugar
3 eggs
1 teaspoon pure vanilla extract
zest of 2 oranges
1 cup sour cream

Orange Syrup Ingredients:
1/3 cup freshly squeezed orange juice
1/3 cup sugar
1/2 teaspoon vanilla

Glaze Ingredients:
1 1/2 cup confectioner’s sugar
1 tablespoon cream
2 tablespoons freshly squeezed orange juice

INSTRUCTIONS:

1. Preheat the oven to 325 degrees. Spray a mini bundt pan with nonstick cooking spray (or line a standard muffin tin with 12 cupcake papers). In a medium size bowl, combine flour, baking powder, baking soda, and salt.

2. In the bowl of an electric mixer fitted with the paddle attachment, cream together butter and sugar and mix until light and fluffy, about 2 minutes. Add in eggs, one at a time, incorporating well after each addition. Add in vanilla and zest. Incorporate sour cream.

3. With the mixer on low, slowly add in dry ingredients and mix until well-incorporated, scraping down the bowl as necessary. Fill each bundt mold halfway with batter (if there is any extra, pour into cupcake liners in a muffin tin). Bake for 15-20, or until a toothpick entered into the center bundt comes out clean.

5. For the glaze: While the cakes are baking, in a small saucepan set over medium heat, combine sugar and orange juice. Boil for 1 minute. When the cakes come out of the oven, allow to cool for 5 minutes, then invert on a wire cooling rack. Pour warm syrup over each of the cakes.

6. Combine all ingredients for the glaze in a small bowl and drizzle over warm or cool cakes.

Monday, December 20, 2010

Carrot Cake with Brown Sugar Cream Cheese Frosting


You know how whenever you're having a really bad day, and you say to yourself, "it can't get any worse" and then ten minutes later it gets worse?

Yeahhhh... That was Sunday.

This weekend was my mother and I's birthday weekend. I get told a lot that my birthday kind of gets shafted, you know, with my mom's birthday the day before mine and Christmas 6 days away. You'd think it'd be like, "oh cool! I get double the presents!" but that's totally not the case.

It's more like... "oh, cool! my birthday present is my Christmas present too!"

*Awkward silence*

"....waaaaaaaaitaminute."

Yeah.

Totally not bitter or anything like that. Nope.

Kidding, in all honesty, I don't really mind. After I turned 15 I got really weird about birthdays. I just never liked them after that. Call me crazy, but a whole day devoted to me is not something I'm too into. And no, it's not because I'm Ms. Humble ;) It's because that every time my birthday rolls around, something happens that ends up ruining my whole day. Don't believe me? I can pretty much list every single birthday since I was 14 where somethings gone wrong. It's crazy.

My birthday is like an excuse for the universe to play russian roulette or rather, "let's-press-all-of-alex's-buttons" day. So I prefer to skip the whole birthday thing. It just makes it easier.


However, this year, I decided to bite the bullet and do something.

Instead of being a "party-pooper" on my own birthday, I went ahead and planned to do something I actually wanted to do. What better excuse? It's my birthday. You gotta do it, or else you'll end up on Santa's naughty list and get no presents.

At least that's what I tell my nieces and nephews.

What? It's the only perk of having a birthday close to Christmas. ;)

Anyway, I decided I wanted to bake my own cake (aka the only cake I'll eat besides rum cake), have all my family members over to play a board game, and just really spend time with my family. Something that I have been lacking horribly the past 5 months.

The day didn't start off bad... In fact, it was great. Filled with new york crumb cake and lots of (caffeinated) tea. It was wonderful. Church was awesome, and everyone sang me happy birthday, which caused me to sink into my chair, turn into a tomato and run to North Korea.

Then, all it took was a text message. Our vacuum had broken in the middle of my mother cleaning the house back at home. "Ok, figures," I think to myself, "at least that's all it was".

That should've been the first sign.

Next thing you know, I realize I have no ingredients for the cake I want to make. Ok, another bump in the road, not too bad... Go to the store, get the ingredients, and then see that I forgot the most crucial part of carrot cake.

Carrots.


So, there goes another trip to the store. I start to get jittery at this point, watching the clock all the while. I get home and try to get going as quickly as possible. I get all my ingredients ready, set everything up, butter my cake pans, preheat the oven....

And then the oven catches on fire.

Yeah.

Fire.
Flames.
Fiery flamey flames.

Next thing I know the whole house is filled with smoke and my neighbors are asking if I'm letting Bob Marley stay at my house. The smoke is so dense I can barely see the other side of the kitchen, and as the oven stays on it's not getting any better.

It's at this point that the universe wins and Alex goes into breakdown mode.

"I knew this was going to happen," I cried, shaking an invisible fist to the universe. "This always happens!"

Thankfully, my mom was there. And since she can magically make everything better, the day didn't end in disaster and fiery flames. She helped me calm down, clean up the oven, keep baking, and get everything done in time.

And you know what? Everything came out perfectly. The cake. The frosting. The party. The everything.

Overall, I did have a good birthday. And I had a freakin' delicious carrot cake to go with it. I honestly adore carrot cake. Probably the only cake I'll ever eat. And the brown sugar cream cheese frosting was such a complement to the cake... I loved it. The best part about this cake is that it has virtually no fat in it. I had even used 0 calorie granulated sugar and it was still amazing. I kept it moist with 0% greek yogurt and REAL brown sugar. The taste was tremendous and just lightly spiced. Over all the cake came out great. Although there is no coconut in this cake. I'm seriously against coconut in carrot cake... Sue me.

Carrot Cake with Brown Sugar Cream Cheese Frosting

INGREDIENTS:
2 cups flour
2 teaspoons ground cinnamon
2 teaspoons baking soda
1 teaspoon ground ginger
1/2 teaspoon ground cloves
1 cup greek yogurt (fat-free works fine)
1 cup brown sugar
1 cup granulated sugar (zero calorie sugar substitutes work fine for this cake)
4 eggs (I used 1 cup egg substitute)
1/2 cup crushed pineapple, drained of most its juice
2 teaspoons vanilla extract
1 cup chopped walnuts (I used more than this cause I love walnuts in carrot cake)
1 cup golden raisins
3 cups grated carrots (I finely grate mine to a pulp)

BROWN SUGAR CREAM CHEESE FROSTING INGREDIENTS:
8oz cream cheese, room temperature ( I used fat-free)
1/2 cup butter, room temperature (I used light)
1/2 cup brown sugar
1/2 teaspoon vanilla extract
1/2 teaspoon ground cinnamon (or pumpkin pie spice)
3 cups powdered sugar (add more as needed)

DIRECTIONS:

1. Whisk together flour, baking soda, spices and salt in a medium bowl. Set aside.

2. Preheat your oven to 350F degrees. Grease 1 9x13 inch pan or 2 8x8 cake pans with butter and flour.

3. Mix together greek yogurt and sugars until fully combined. Mix in egg substitute until incorporated (if using real eggs, beat in one at a time), and then proceed to mix in the crushed pineapple and vanilla extract.

4. Gently fold in walnuts, raisins and carrots, being careful not to overmix.

5. Pour into prepared cake pans and bake at 350F for about 40-50 minutes or until a toothpick comes out of the center clean and the cake is a slightly dark golden brown.

6. While cake is cooling, make the frosting. Blend together the cream cheese, butter, brown sugar, vanilla extract and cinnamon until smooth. Add in powdered sugar 1 cup at a time until you've reached a stiff, smooth frosting. In other words, if you use a spatula to pick up the frosting from the bowl and the frosting is dripping off your spatula, you need more powdered sugar. Set the frosting aside or put in covered container in the fridge until cake is cooled and ready.

7. Cool in pan for 10 minutes before transferring to a plate. Cover with plastic wrap and refrigerate until you are ready to frost (this is also helpful for cooling the cake down quicker so the frosting does not melt). Once cake is cooled, frost with brown sugar cream cheese frosting any way you'd like.

Tuesday, December 14, 2010

Hot Chocolate Bars


So I've decided that Mother Nature is having a temper tantrum this week.

I'm not sure what happened. Maybe she got up on the wrong side of the bed. Maybe the sun burned her favorite pair of shoes (I mean, what women wouldn't get pissed over that?). Maybe she just likes picking on poor traveling families just trying to have a nice vacation at Disney World.

Or maybe God didn't want the north to have all the fun this winter.

I don't know. All I know is that I woke up Sunday morning and it was bright and sunny out and now it's 20 degrees outside.

In Florida.

Excuse me, but... WHAT IS GOING ON HERE?

You know it's cold in Florida when shops close down early because no one is leaving their house. Seriously. Us Floridians aren't like other people. We don't go, "oh, it's cold out, better take out my warm clothes!". Uhm, no. Us Floridians don't have warm clothes. We have 500 tank tops and maybe one hoodie thats stuck in the back of our closet underneath our shorts.

If you have lived in Florida for over 6 years (or all of your life), you don't go outside during winter. You stay inside, eat a lot of comfort food, and don't get out of bed until the sun comes out and makes it all better.

In other words, native Floridians go into hibernation during the winter, leaving the poor traveling families who thought they were going somewhere warm for winter in the freezing cold.

At least there are no lines at Disney. Ha ha...ha...


I don't really like the winter. I used to be in love with it, but now it bugs me. I don't like being cold and numb. I do, however, like being snug. The best part about the winter is being able to cuddle under your blankets, and drink hot chocolate, with the heat blasting and fuzzy neon green socks on your feet...

Okay, maybe the fuzzy neon green socks are just me.

I do love drinking good hot chocolate during the winter though. And not the things that come out of the packet. I mean real melted chocolate in a cup with the fluffiest marshmallows you can imagine, and maybe some whipped cream on top. There is nothing better than curling up on the sofa and drinking real hot chocolate with marshmallows.

Except...maybe, baking hot chocolate BARS with marshmallows.

Yeah, now you're talking.


These bars awesome because of four reasons:

(1) They took less than 10 minutes of prep work.
(2) They have marshmallows on top.
(3) Chocolate.
(4) ONLY ONE DIRTY DISH. Emphasis on ONE ONE ONE ONE.

I'm all about using one bowl. It calms my soul and helps me sleep at night.

While the bars have more of a brownie texture, you can definitely taste the hot chocolatey taste in them. If I could, I probably would've either added maybe some espresso to the mix or more powdered hot chocolate to give it an extra POW, but I think it did just fine as is. And the marshmallows? Awesome touch. These definitely need to be cooled completely before cutting, or else you'll have a marvelous gooey mess on your hands. Trust me, I know from experience.

But hey, if you like melted marshmallows and half-baked chocolate goo all over your fingers and counter-top, more power to you!

Just don't expect me to come over and clean your kitchen.

It's too cold for that sort of thing.

Hot Chocolate bars with Marshmallow Topping


INGREDIENTS:
1/2 cup butter
1/3 cup dark chocolate (I used semi-sweet)
1/2 cup hot chocolate powder (I would up this to maybe 3/4 cup next time)
1 egg
2 tablespoons milk or heavy cream
1/2 cup sugar
1 1/2 cup flour
2 teaspoons baking powder
2 cups marshmallows

DIRECTIONS:

1. Preheat your oven to 350F. Line a 8x8 pan with foil or parchment paper and spray with nonstick cooking spray or butter it.

2. Melt the 1/2 cup butter with the chocolate. Stir until smooth and glossy. Pour into a large mixing bowl. (I just melted the butter/chocolate together in the microwave in my mixing bowl)

3. Add in chocolate powder, egg, milk/cream, and sugar. Whisk until thoroughly combined.

4. Add flour and baking powder (you don't have to whisk together beforehand), mix until there are no signs of flour left.

5. Press into your prepared 8x8 pan.

6. Bake for 15 minutes. Top with marshmallows and then bake for an extra 2 minutes or until the top of the marshmallows are just slightly brown. For better presentation, use the back of a spoon to gently push the marshmallows down into the bars without smashing them completely.

Thursday, December 9, 2010

Banana Nut Bread


I'm still not quite sure what part of me thought it was a good idea to get on an airplane during the Holidays and think that somehow nothing would go wrong.
I hate airplanes.

Wait, no, let me correct myself... I hate airports.

They are a pain. A big pain. Like... stepping on a bunch of lego's kind of pain. For one, all the food there is too expensive... even if it's just one little piece of fruit! I was in layover in Tennessee and you know how much it cost for one tiny palm sized apple!? $1.30! I could buy like... a whole POUND of apples for less than that. It was riiiiiiidiculous.

Not only that, but God forbid your flight delays. You know what there is to do at an airport if you're stuck there for an extra hour? nothing. You could walk around the whole airport... but then you start to feel really weird because you keep passing by the same stores and the people that work there start to give you funny looks like they've never seen someone stuck at an airport before.

Not to mention the fact that going through security takes five hours. Five hours of which you feel like you have to throw all your clothes off in lightspeed because somehow you ALWAYS end up in front of the one person who only takes like....a laptop and flip-flops.

All the while, you have to worry about being one of those selected people who get the majorly violating pat-down that will give you nightmares of security people touching you in weird places while you sleep. Keep your hands to yourself, please.

The worst part about it wasn't the security though. Or the one hour delay. Or the fact that we couldn't even leave the plane because for some reason the plane door wouldn't unlock, so we had to wait 15 minutes. It was the fact that before the flight I had meant to bring a slice of banana nut bread with me and I totally forgot.

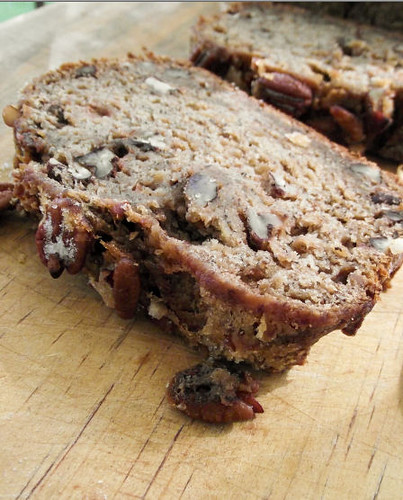
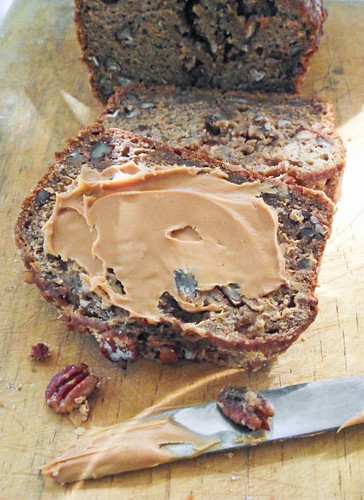
I made banana nut bread before I left for what seems like the first time in ages. For years I've been searching for the banana nut bread that tastes most like the one my grandmother made, but I haven't been able to yet. I'm certain she made hers with walnuts, but for lack of time, I subbed out pecans. While the bread is still absolutely delicious, and probably one of the better recipes I've used, it still isn't my grandmothers bread. One day, I'll make it. But for now, this one will definitely do.

It uses up at least 5 BLACK bananas. Yes, BLACK bananas. Don't use them if their spotted. Wait until they are completely dark as night black. That's when the banana flavor is most prominent and sweet. And though you can use less than 5, I really recommend 5. It gives the bread a nice banana flavor that melds beautifully with the nuts, brown sugar, and dash of cinnamon. I also added a nice sugar crust to the top, which gives it a slight crunch when you eat it. It's perfect with peanut butter or nutella, or toasted with butter. And the slices are thick and well kept together enough that it can totally be made into french toast. So really, this banana bread is just all kinds of awesome.

Maybe if all the people work at the airport had this kind of bread for breakfast, they'd be less cranky. Including me.

Banana Nut Bread

INGREDIENTS:

2 cups all-purpose flour
1 teaspoon baking soda
1/4 teaspoon salt
1/2 cup butter, melted
3/4 (packed) brown sugar
2 large eggs, beaten
2 1/3 cups mashed black bananas (5 bananas)
1 teaspoon ground cinnamon
1/2 teaspoon vanilla extract

DIRECTIONS:

1. Preheat oven to 350F. Lightly grease 9x5-inch loaf pan.
2. In large bowl, combined the mashed bananas with the melted butter and brown sugar until smooth. Stir in eggs, vanilla extract and cinnamon.
3. Sprinkle the baking soda and salt over the mixture. Stir together.
4. Sift in the 2 cups of flour, and then mix until there is no signs of flour left. Do not overmix. It's dangerous for your banana breads soul.
5. Pour batter into prepared loaf pan. Bake for 50-60 minutes, or until a toothpick comes out the middle mostly clean. Allow bread to cool in pan for 10 minutes, then turn out onto a wire rack to cool completely.

Thursday, December 2, 2010

Upside-Down Pear Gingerbread Cake

I am not good at Christmas shopping.

Actually, that's a lie. I'm not bad at Christmas shopping at all.

I just have some issues when it comes to it.

For example, when I'm Christmas shopping, economic value goes straight out the window. It then becomes what I would like to call the "Aunt" value. In layman terms, what can I buy all my nieces and nephews that can trump the other 20 other uncles and aunts?

Suddenly, it's like I do not see price-tags on anything. Instead, I see a "lame" to "awesome" value of everything I contemplate buying my nieces and nephews. $2 dollar stuffed polar bear at walmart with a funky smell? Lame. Freakin' incredibly huge stuffed polar bear/pillow that smells like victory? Totally awesome.

Christmas. It's a time for giving, loving, family, being thankful... and competition.


Of course, this has put in motion some minor setbacks. Like...buying one niece #1 two things and niece #2 just one thing because I saw something niece #1 might like and therefore grabbed it and rang it up without thinking twice.

And then returning it once I realized I had already bought her a present. And then having a huge argument with myself on whether or not I should just buy everyone two things or just stick with one thing for all. Thus bringing me into a spinning mental state of what I should do ending in me being in the fetal position in the parking lot of Toys'R'Us.

Which isn't really an odd thing to witness this time of year.


Either way, Christmas shopping is both a blessing and a curse. Which is why after I come home from a nights worth of fighting with my brain about the whole Christmas present deal, I go into my kitchen and I bake something that fills the house with a very simple reminder. It's not about who gets the best gift, but about the fact that someone cared enough to get one for you.

I baked this the morning of one of those crazy Christmas shopping days, and honestly, just how beautiful it came out and how wonderful the apartment smelled afterward was enough to get me ready for the day.

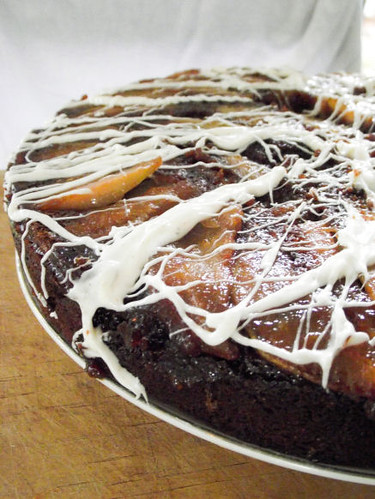
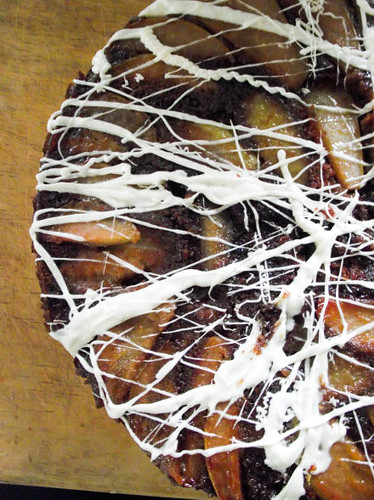
It's a Upside-Down Pear Gingerbread Cake. You may think that sounds odd, but pears are often quite complimentary for gingerbread. Right next to apple, it has a fruity sweetness that works in harmony with the spices inside the cake. It is an incredibly fragrant cake that has a glossy brown sugar shine on the top. The white chocolate drizzle is spiced with pumpkin spice, but if you don't have that on hand, a dash each of ground cinnamon/ginger/nutmeg/cloves will do the trick just fine. It really does complete the cake, I think. This is incredibly moist. I'm sure if this cake was an aunt, it'd probably win the "awesome" award right off the bat (unless, of course, its competition was a cheesecake). With just the right amount of spices, and caramlized pear slices on top... it makes a perfect brunch, breakfast, or light dessert. Plus, it makes your house smell like heaven. Who wouldn't want that?


Upside-Down Pear Gingerbread Cake
(adapted from Gourmet)
INGREDIENTS:
2 ripe pears
1/4 cup of salted butter, melted
1/2 cup of packed light brown sugar
2 1/2 cups of flour
1 1/2 teaspoons of baking soda
1 teaspoon of ground cinnamon
1 teaspoon of ground ginger
1/2 teaspoon of ground cloves
1/2 teaspoon of salt
1 cup of molasses
1 cup of boiling water
1/2 cup of salted butter, softened
1/2 cup of packed light brown sugar
1 large egg, lightly beaten

DIRECTIONS:

1. Preheat oven to 350F. Peel and core pears and cut each into thin slices. Arrange pears in the bottom of an 8 inch springform pan. Drizzle with melted butter and sprinkle with brown sugar.

2. Whisk together flour, baking soda, cinnamon, ginger, cloves, and salt in a bowl. Whisk together molasses and boiling water in a small bowl. Beat together butter, brown sugar, and egg in a mixer at medium speed until creamy, about 2 minutes, then alternately mix in one third of the flour mixture and half of the molasses mixture at low speed until smooth, starting and ending with the flour mixture. Pour batter over topping, being careful not to disturb pears, and bake in middle of oven until a tester comes out clean, 40 to 50 minutes.

3. Cool cake in pan on a rack for 5 minutes. Run a thin knife around the edge, then remove sides and invert a large plate with a lip over the bottom of the cake and, using pot holders to hold the pan and plate tightly together, invert cake onto plate. Replace any pears that stick to skillet. Serve warm or at room temperature.

Sunday, November 21, 2010

Pumpkin Pie Butterscotch Bars

So I was wondering if I was the only person currently with 5 cans of pumpkin puree in their pantry? No? Good.

I wouldn't want to feel like the only one who has been trying to figure out a way to make the most of an abundance of pumpkin. Apparently, thanksgiving in all it's turkey glory cannot come fast enough for me to use up all of this pumpkin that I bought a month ago thinking to myself it would be a smart investment to get it now before it disappears thanksgiving week and I'm having panic attacks in the kitchen ripping my hair out because the pumpkin shortage of '09 has come back to haunt me.

By the look of my local supermarkets, I think I acted a little too quickly.


I can't really be upset about it though. Because if I had never bought those numerous cans of pumpkin puree, I would've never stumbled upon these addicting Pumpkin Pie Butterscotch Bars.

That's right.

Pumpkin. Pie. Butterscotch. Bars.

Now, I don't usually go off the map for thanksgiving and make anything outside of pie or cheesecake.... but honestly, I would have no shame in bringing these crustless square beauties. Delicious does not even begin to describe. It is far better than any pumpkin pie or cheesecake I have ever had or made. And I do not take my pumpkin desserts very lightly.

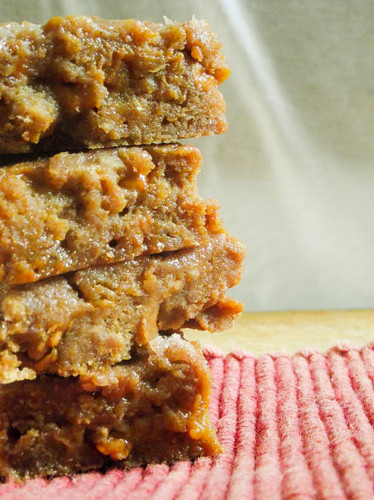
As you can probably tell from the pictures, my bars are very custard-y. That's because I took 'em out of the oven a little bit earlier than I was suppose to. Do I regret it? NO. In fact, I think they taste better this way. Sure, you'll have to eat it with a napkin next to you but that is a sacrifice I'm willing to make. I'm sure any trees that had to die in order for me to use said napkin would do the same thing in my place. I'm positive of it. Yup.


While the pumpkin pie bars themselves are ahhhmazing on their own (due to the fact that this baby is packed with brown sugar and butter up the wa-hoo), the butterscotch chips are a must and I would not recommend leaving them out less you may cause me to cry at night for your loss. It's worth the extra $$$, I promise you that. The caramelized taste paired with the sweetness of the butterscotch chips just tie the flavors together so beautifully that it's hard to believe I have gone so long without realizing the potential of using the two together.

If you are looking for a thanksgiving pumpkin dessert that differs from the norm while still staying on the same track of a "pumpkin" theme... then I swear by this recipe. I cannot imagine any person being able to pass a second helping of these up. It's just not possible.

Please. Make these. If you are a pumpkin fan: MAKE THEM. Eat them. Eat them lots. Eat them lots, get a tummy ache, and send the rest to your neighbor. Or make them for thanksgiving and watch everyone else eat them and sing your praises until your ego is so big you decide you deserve a shot of rum in your egg nog. I won't tell. Just please, please, PLEASE.... Make these.


Pumpkin Pie Butterscotch Bars
(Recipe adapted from Brown Eyed Baker)
INGREDIENTS:
2 cups all-purpose flour
2½ teaspoons cinnamon
1 teaspoon ground ginger
¼ teaspoon ground nutmeg
½ teaspoon salt
1 cup (8 ounces) butter, melted
2 cups dark brown sugar
2 eggs
2 teaspoons vanilla extract
1 can (15 oz) pumpkin
1 2/3 cups butterscotch chips

TOPPING:
2 tablespoons granulated sugar
1 teaspoon ground cinnamon
2 tablespoons flour

DIRECTIONS:

1. Preheat oven to 350 degrees F. Butter a 9×13-inch baking pan and line with parchment paper, leaving an overhang on both sides.

2. In a medium bowl whisk together the flour, cinnamon, ginger, nutmeg and salt; set aside.

3. In a large bowl whisk together the sugar and butter. Add the eggs and vanilla extract and whisk until combined. Add the pumpkin and whisk until thoroughly combined. Add the flour mixture and, using a rubber spatula, gently stir or fold the flour into the pumpkin mixture until just combined.

4. Scraped the batter into the pan and smooth the top. In a small bowl, stir together the granulated sugar and cinnamon, and then sprinkle evenly over the top of the batter. Bake for about 30 minutes, or until a thin knife inserted into the center has just a few moist crumbs on it. Cool completely and then, using the parchment as handles, lift out of the pan and cut into 24 squares. Store at room temperature in an airtight container.

Thursday, November 18, 2010

Toffee Almond Cookies

Every time this year, there is an outburst of random acts of kindness. It's like, as soon as Halloween is over, everyones got the satan out of them (Okay, not everyone, but some people) and they all want to start sending out cookies and calling up relatives and oohh, santa's comin', you better be good! kind of deal to all the children. It's almost as if people suddenly realize, "oh CRAP, Christmas is coming... better get my sunday best on!" -- y'know, that kind of thing...

It's also the time of year where donators start popping up everywhere. Outside your shopping mall. Inside your grocery store, stalking you down dorito lane. After any transaction you make, you are usually asked to decide whether you would like to donate to so-and-so's foundation or not and that it goes to a great cause and it will only cost you $$ amount of money.

I know this, because I'm doing it at my store as well.


Never doing a donation run before during the holidays has shown me a lot about people. It has shown me: 1. how giving people can be; and: 2. how downright ridiculously unreasonable people can be. Sure, if a donation is like, over 7 dollars, I can imagine the pause in someones thought process when you ask them if they'd like to donate. But when someone is asking you if you'd like to donate $1.25 to a local childrens hospital charity, and you say "no, I can't right now" and then hand me a $100 dollar bill to pay for your $20 dollar purchase, there is something very, very, very wrong.

Sure, there are some of you out there who really can't donate. And I can understand that. But those of you who can... should. Not because Santa or God is watching over you but because it's the right thing to do. I don't always want to spend that extra 4-5 dollars as a donation, but you know what? I get paid. I have a job. Five bucks cut from my salary won't hurt me. And if it doesn't hurt you, then really, is there any reason not to do it? Nope.

I don't mean to get on anyones case about it. I know people have been ripped off by christmas charities before and we're all a little wary of where our money goes. But still. Helping is helping, and yes, even a $1.25 makes a difference.

Now that I've gotten that out of the way... these cookies are very good. Slivered almonds and 1 cupful of toffee make these a great little gift to anyone (who doesn't have a nut allergy). If you wanted to, you could also use milk-chocolate covered toffee. Either one tastes amazing. The cookies are a little on the soft side, making them perfect for dunking twice since they soap up the liquid fast and then it's just a brilliant symphony of toffee, cool milk or hot coffee and the subtle crunch of almonds in your mouth. Yeah, these babies are good for any time of the day.

If you wanted to, you could probably throw in 1/2 cup of oatmeal in there too if you want a chewier cookie. I was going to do that, but unfortunately I didn't have enough oatmeal. Thus, my dreams were ruined forever.

Make the cookies. Make donations when you can. Make cookie donations when you can. Helping in any way is better than doing nothing. Even if it's just $1.25, I promise you it's worth it. Just cause you can't see a sick child in front of you, doesn't mean they don't exist.


Toffee Almond Cookies

INGREDIENTS
1/2 cup softened butter
1/2 cup white sugar
1 cup brown sugar
1 1/2 tsp vanilla extract
2 eggs
2 1/4 cups AP flour
1/2 tsp salt
1 tsp baking soda
1 cup of toffee pieces, milk chocolate or otherwise
1 cup almond slivers

DIRECTIONS:
1. Preheat oven to 375 degrees.

2. Mix dry ingredients together in a separate bowl: all purpose flour, baking soda, & salt.

3. Cream together butter & both sugars. Add eggs & vanilla, mix well. Slowly incorporate the dry mixture into the sugar mixture.

4. Stir in the chocolate chips, toffee pieces, & almond slivers.

5. Drop by tablespoons onto baking sheet. Bake 8-10 minutes. Let cool completely on wire wrack.


Dunk Twice Copyright © 2009 Cookiez is Designed by Ipietoon for Free Blogger Template